

Farmhouse coffee bar ideas marry lived-in warmth with smart function, making a daily ritual feel like a design moment.
Whether you have a tiny alcove or room for a full station, these ideas focus on material choices, proportions, and easy execution so your coffee setup looks intentional and works beautifully.
I’ve pulled from pattern, proportion, and real-world wear to select ideas that age well and that are straightforward to install or source.
Expect specific guidance on wood species, shelf spacing, appliance placement, and common mistakes to avoid when fitting a farmhouse bar into compact homes.
Editor’s Pick: Rustic Floating Shelves Coffee Nook, I love this option because it creates depth in small spaces without bulky cabinetry, the staggered shelf heights let you display mugs and brew gear neatly, and it’s easy to customize with reclaimed wood or painted pine so it reads authentic in real homes.
- 1. Farmhouse Coffee Cabinet with Open Shelves
- 2. Rustic Floating Shelves Coffee Nook
- 3. Reclaimed Wood Coffee Bar Countertop
- 4. Butcher Block Coffee Station Layout
- 5. Shiplap Backdrop Coffee Cabinet
- 6. Vintage Mason Jar Accessory Display
- 7. Barn Door Cabinet Coffee Nook
- 8. Built-In Kitchen Coffee Alcove
- 9. Apron-Front Sink Coffee Prep Area
- 10. Soft Blue Farmhouse Coffee Nook
- 11. Industrial Pipe Mug Rack Feature
- 12. Glass-Front Cabinet Coffee Bar
- 13. Tiny Corner Floating Shelf Nook
- 14. Vintage Hutch Converted Bar
- FAQ
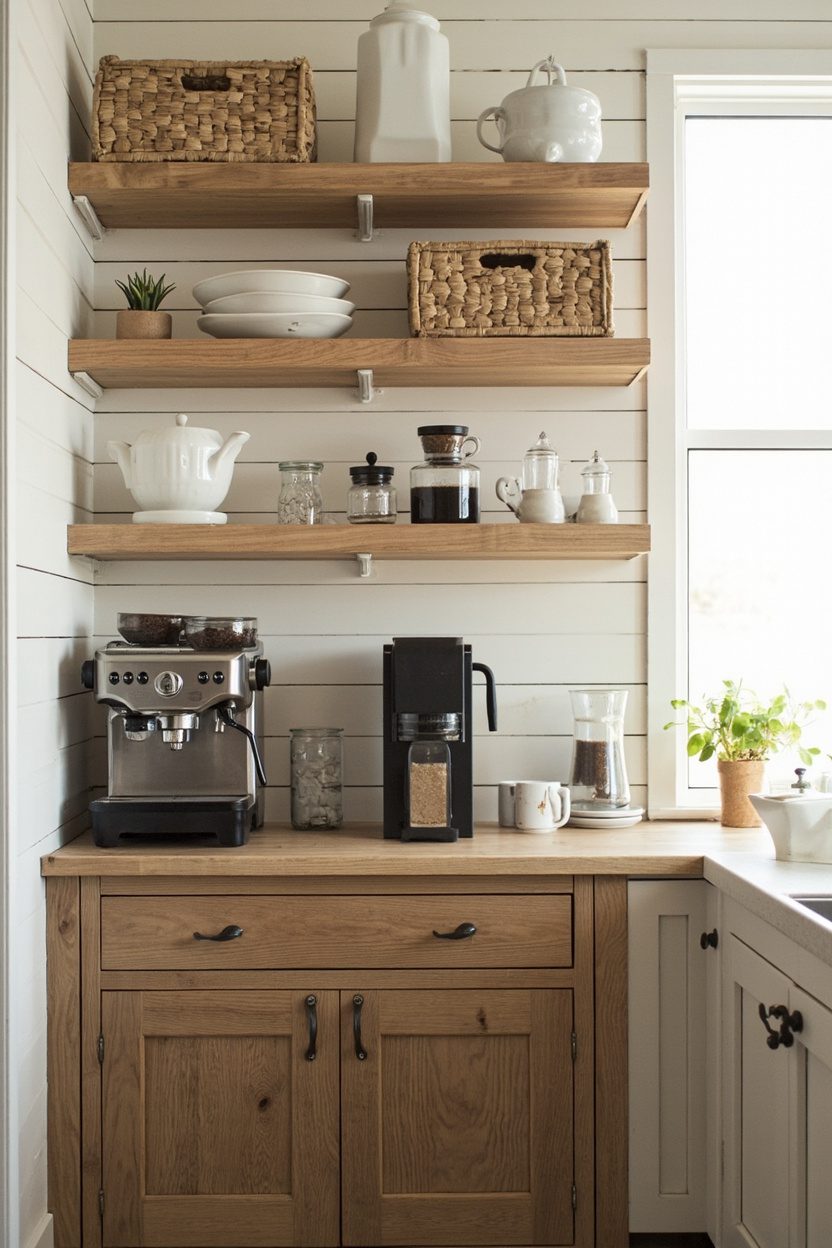
1. Farmhouse Coffee Cabinet with Open Shelves
- Effort Level: Hire a Pro.
- Estimated Budget: $500+.
- Maintenance Level: Low.
- Best For: Kitchens and Breakfast Nooks.
A cabinet with a closed base and open upper shelves gives the best of both worlds, concealment plus display.
Choose a painted maple case for durability, and space shelves 10 to 12 inches apart to accommodate mugs, French presses, and small jars without overcrowding.
Place the cabinet against a wall with a slim butcher block top for pouring and staging, and leave a 2 to 3 inch overhang so the espresso machine has clearance from the wall.
This prevents steam damage and simplifies cleaning.
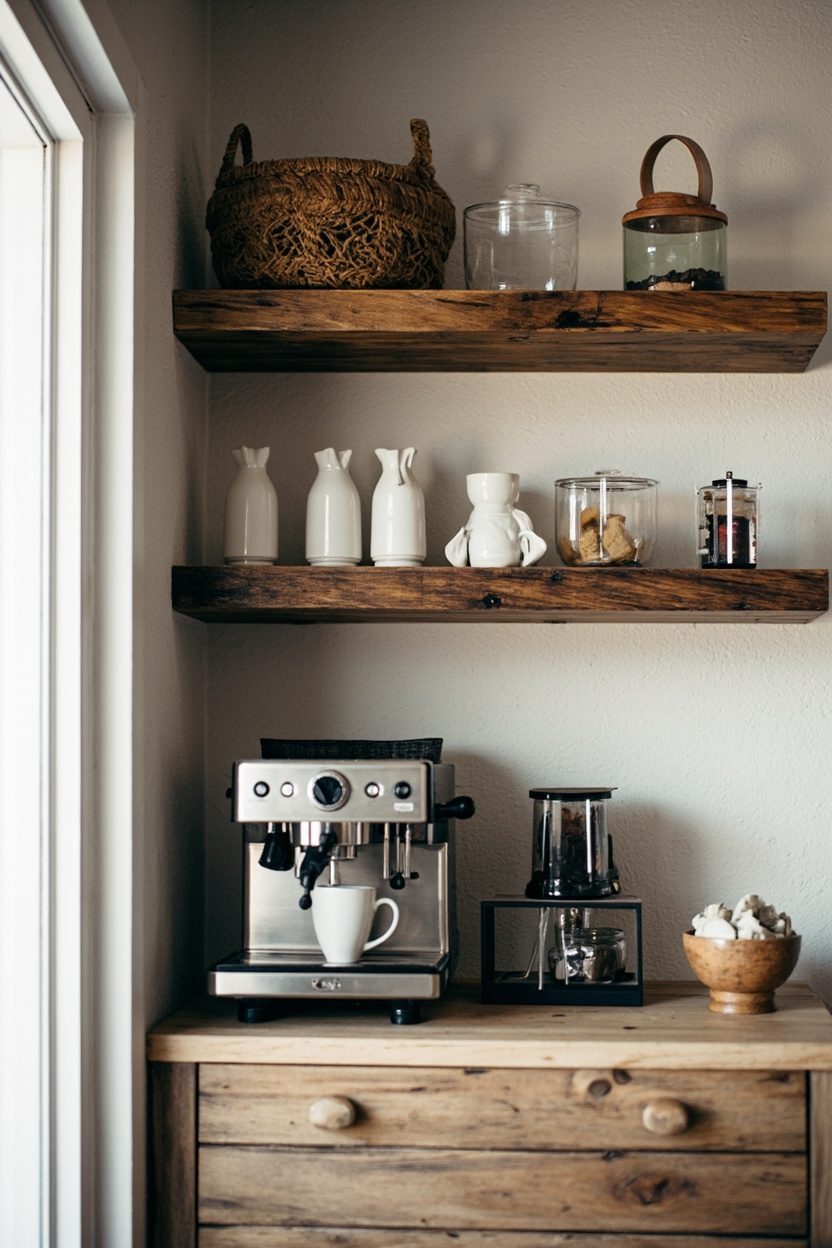
2. Rustic Floating Shelves Coffee Nook
- Effort Level: Weekend DIY.
- Estimated Budget: Under $100.
- Maintenance Level: High (requires dusting).
- Best For: Renters and Small Corners.
Floating shelves carve out a coffee nook without sacrificing floor space, and reclaimed pine or oak planks bring instant farmhouse character.
Mount heavy-duty concealed brackets every 16 inches into studs, and stagger shelf depths, for example, 8 inches on top for mugs and 12 inches below for a grinder.
Save by sourcing unfinished pine and sealing with a clear matte polyurethane; this keeps costs down while protecting against spills.
Splurge by commissioning a milled live-edge oak set, wired with integrated under-shelf lighting, which elevates the nook and makes early mornings feel curated.
Styling matters; place frequently used items on the lowest shelf at arm height, keep bulk supplies in simple apothecary jars, and avoid over-accessorizing, which is a common mistake that makes floating shelves look cluttered instead of calm.
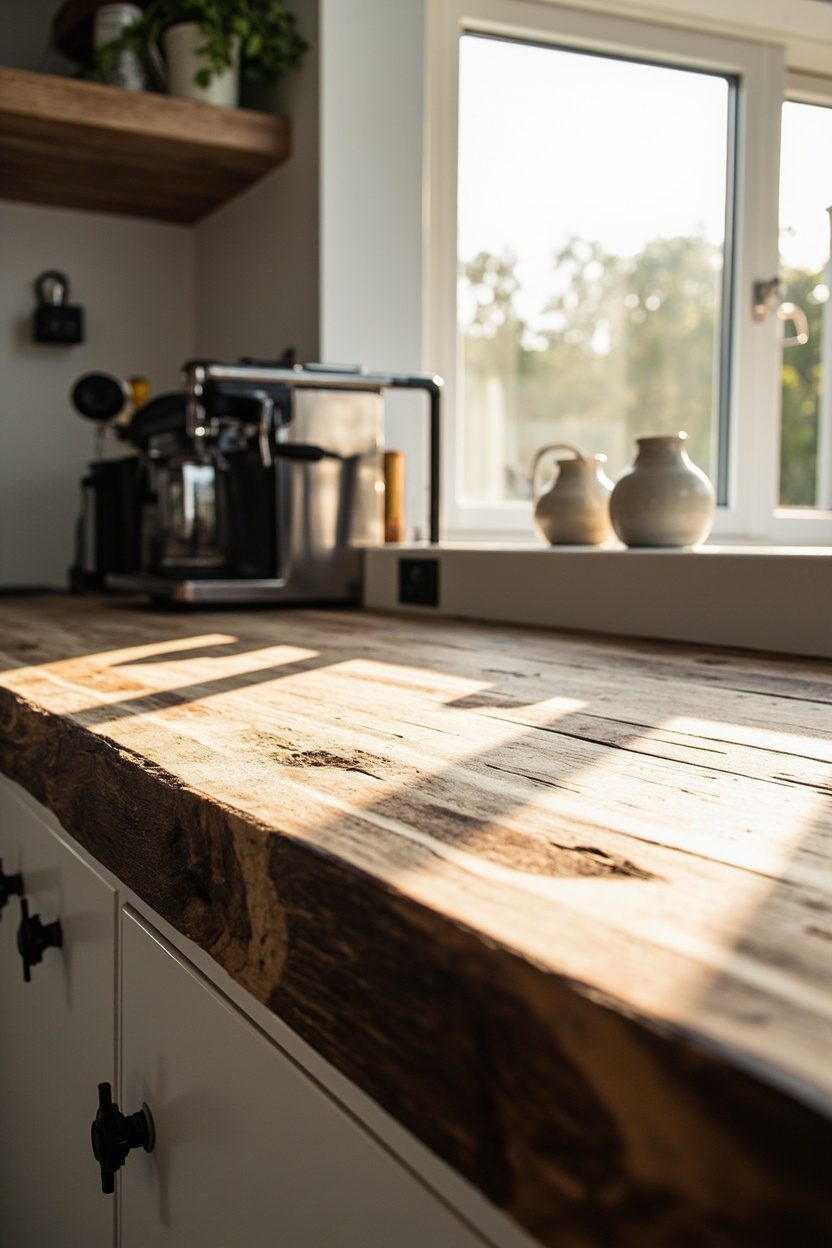
3. Reclaimed Wood Coffee Bar Countertop
- Effort Level: Hire a Pro.
- Estimated Budget: $100-$500.
- Maintenance Level: Medium (requires resealing).
- Best For: Cottage and Farmhouse Kitchens.
A reclaimed wood countertop instantly reads farmhouse. Choose quarter-sawn oak or aged barnwood planks for stability and a tighter grain that resists cupping.
Have a carpenter laminate the top to a stable substrate, and finish with a food-safe oil, then reseal annually to protect from stains and steam.
Keep the counter depth to 24 inches for a compact station, and allot an 18-inch clear zone in front of the machine for working space. This proportion prevents a crowded feel.
For visual cohesion, echo the wood tone in a nearby shelf or framed print, and reference styling ideas from cozy cottage interiors for balance with other pieces like those shown in a Small Cottage Decor guide.
4. Butcher Block Coffee Station Layout
- Effort Level: Weekend DIY.
- Estimated Budget: $100-$500.
- Maintenance Level: Medium (oil periodically).
- Best For: Small kitchens, renters who want a movable piece.
A narrow butcher block counter creates a warm, durable surface for your brewer and grinder, positioned against a wall or floating on casters for flexibility.
Keep the countertop depth between 14 and 18 inches so the station fits in a tight galley, and reserve a 6 to 8 inch clearance behind the machine for steam and cord routing.
Use a magnetic strip or peg rail mounted 6 inches above the surface to hang spoons and tamper, and place a narrow drawer or tray under the block for filters and pods, so every tool has its spot and clutter stays off the top.
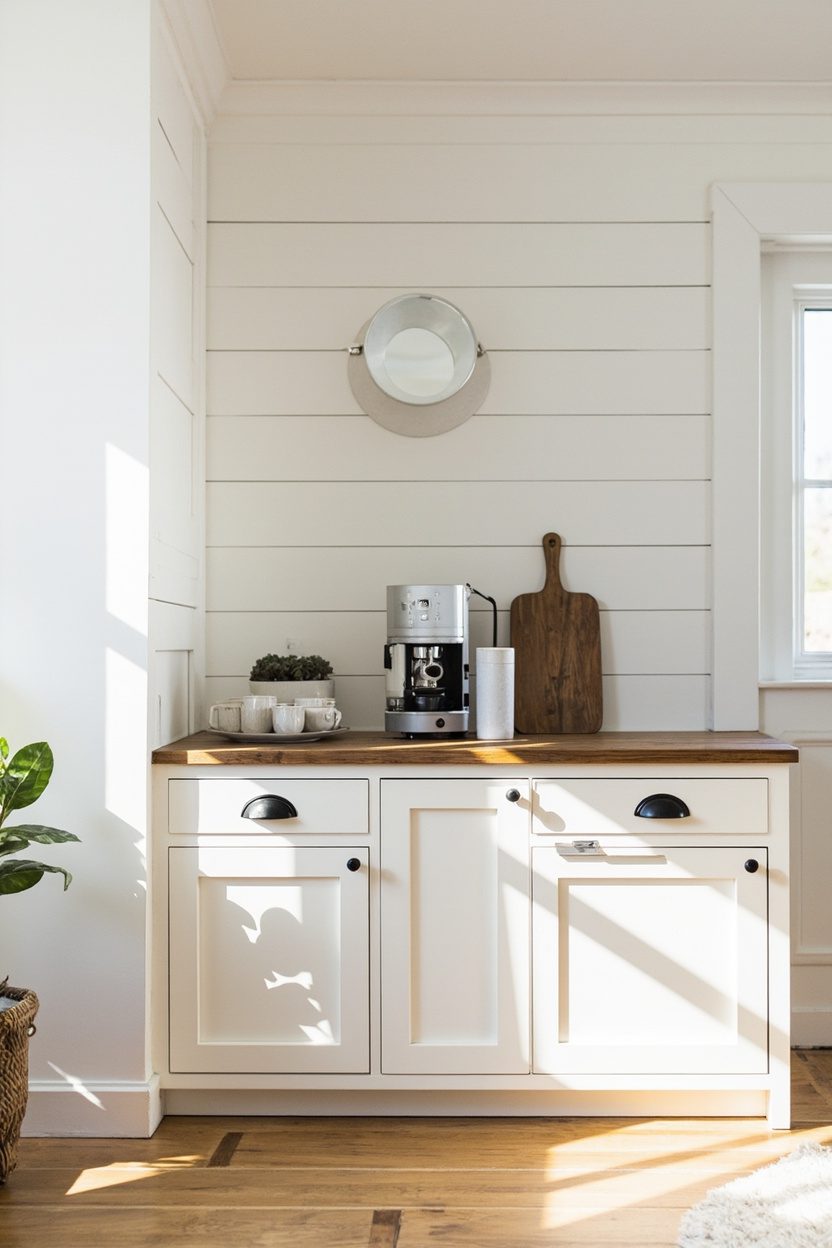
5. Shiplap Backdrop Coffee Cabinet
- Effort Level: Weekend DIY.
- Estimated Budget: Under $100.
- Maintenance Level: Low (occasional dusting).
- Best For: Cottage kitchens, renters who want a temporary upgrade.
A shiplap backdrop instantly nails the farmhouse vibe behind an open coffee cabinet, paint it in a soft off-white for contrast with dark appliances, and space boards at 1/8 inch gaps to keep the look authentic.
Mount a floating shelf three-quarters up the panel to display mugs, and add hooks beneath for hanging cups, keeping the cabinet footprint compact.
When I installed shiplap behind my own beverage nook, I learned to prime the edges first to prevent warping from kitchen humidity, and the seams can show over time.
Pair this with a slim cabinet or baker’s rack, and you have an affordable, high-impact focal point that masks imperfect walls while adding texture. See more cottage styling ideas in this Cottage House Interior guide.
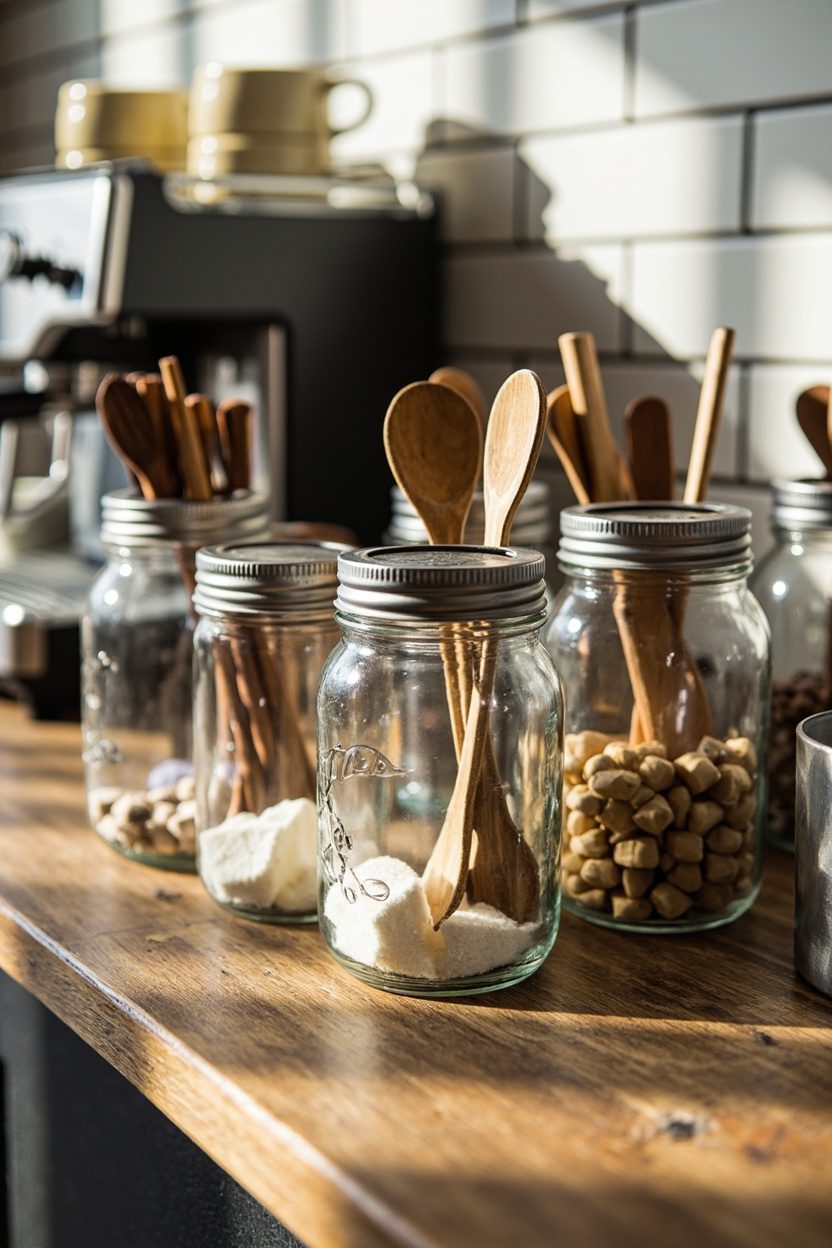
6. Vintage Mason Jar Accessory Display
- Effort Level: Weekend DIY.
- Estimated Budget: Under $100.
- Maintenance Level: Low (wipe jars).
- Best For: Small counters, farmhouse enthusiasts.
Use a reclaimed wood plank with evenly spaced screw-in mason jar rings to organize scoops, sugar, and stirrers, placing the board 8 to 10 inches above the coffee machine so jars are reachable but out of the splash zone.
Choose quart jars for bulk items and half-pint jars for single-serve condiments, and label each lid with kraft paper tags for an orderly vintage look.
For a tidy presentation, center the plank above a 24-inch-wide counter area and include a small tray below to catch spills. This prevents sticky buildup on the wood and makes cleaning quick.
Brighten the display with a single sprig of eucalyptus in one jar; the glass reflects light and keeps the vignette feeling fresh, while referencing classic farmhouse charm from pins and trend boards like those curated on Pinterest.
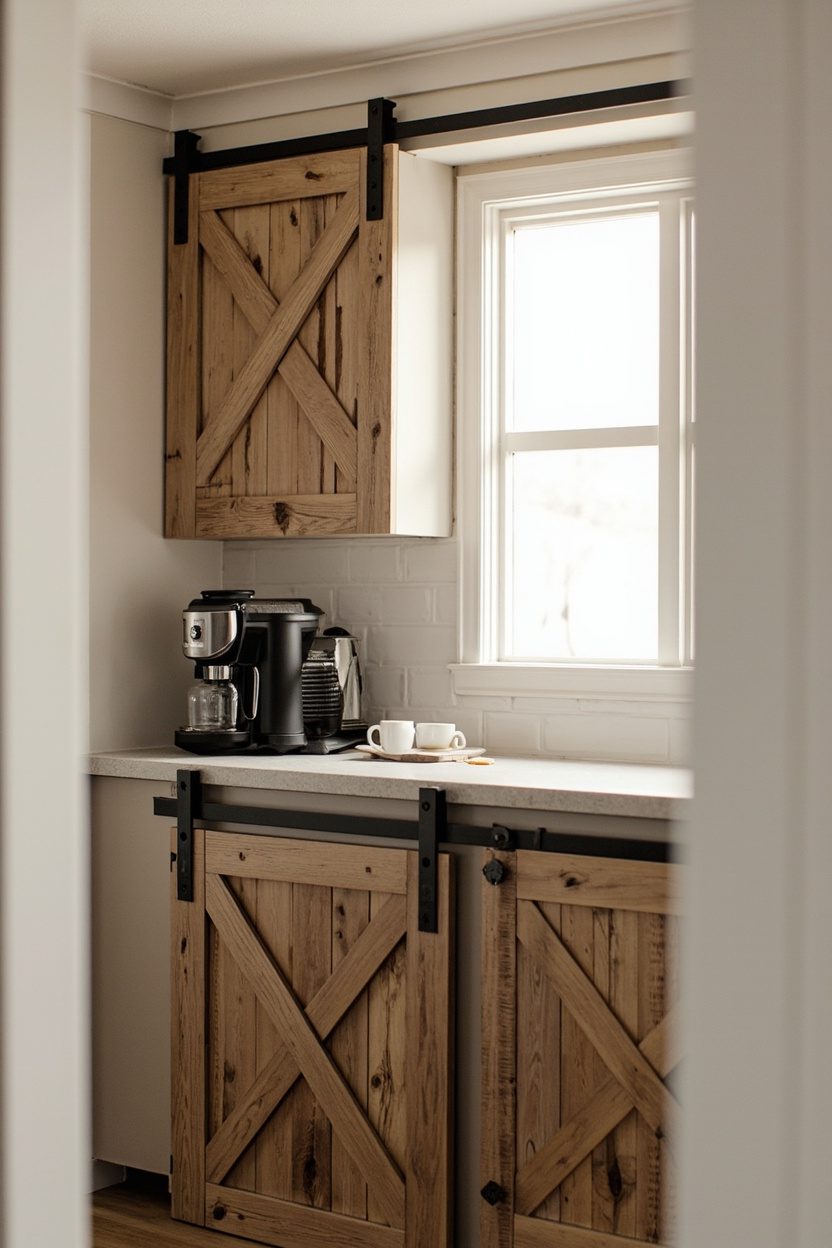
7. Barn Door Cabinet Coffee Nook
- Effort Level: Weekend DIY.
- Estimated Budget: $100-$500.
- Maintenance Level: Low.
- Best For: Small kitchens, renters.
A narrow cabinet with a sliding barn door makes a tidy coffee nook that hides clutter when guests arrive, position it at counter height so your espresso machine sits on a stable surface and the door clears the drip tray.
Use reclaimed pine for the door to add texture, and fit two shallow shelves inside, spaced about 6 to 8 inches apart, to hold mugs, pods, and small jars without crowding.
Keep one side of the interior dedicated to frequently used items, and install a small power strip with a switched outlet to avoid trailing cords, a common mistake is overstuffing the cabinet so machines overheat, so leave 2 inches of clearance around appliances for ventilation.
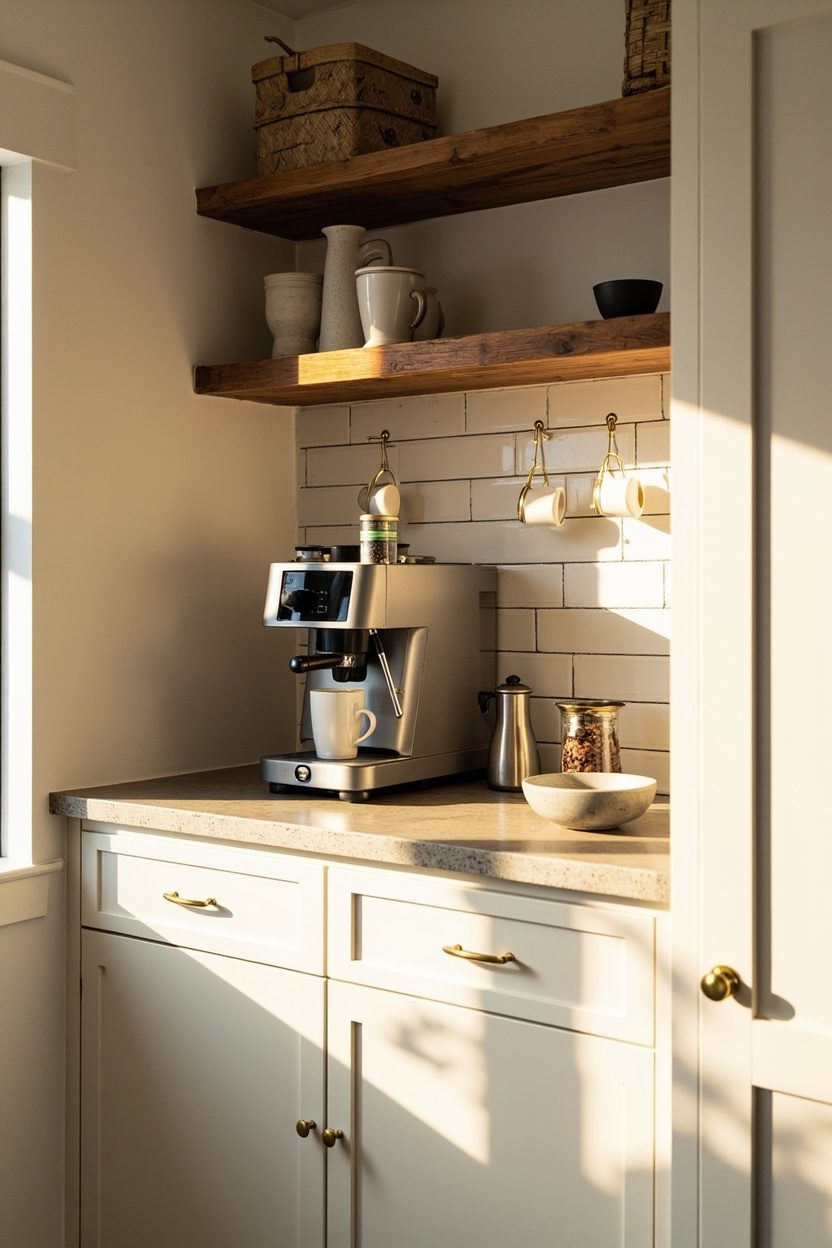
8. Built-In Kitchen Coffee Alcove
- Effort Level: Hire a Pro.
- Estimated Budget: $500+.
- Maintenance Level: Medium (requires spot cleaning).
- Best For: Full kitchens, homeowners.
A recessed alcove framed in beadboard creates a dedicated coffee station that reads integrated, aim for a 24 to 36 inch wide niche with under-cabinet lighting and a moisture-resistant laminate shelf to protect surfaces from spills.
Choose an outlet with USB ports and a GFCI protector, then anchor a floating shelf 12 inches above the counter for mugs, and add a small tray for filters and spoons to keep the countertop calm.
To save, use open shelving and paint the alcove in a contrasting color, install basic puck lights, and repurpose a cabinet door as a backboard, this keeps costs under control while still creating a purposeful zone.
To splurge, build custom inset cabinetry with soft-close drawers, integrated appliance garages, and brass hardware, invest in LED task lighting and stone backsplash for durability, this elevates the alcove into a polished, long-term feature.
When planning, keep the coffee machine footprint in mind, leave at least 18 inches of clear counter depth, and avoid placing the alcove directly above the dishwasher, as steam can accelerate finish wear.
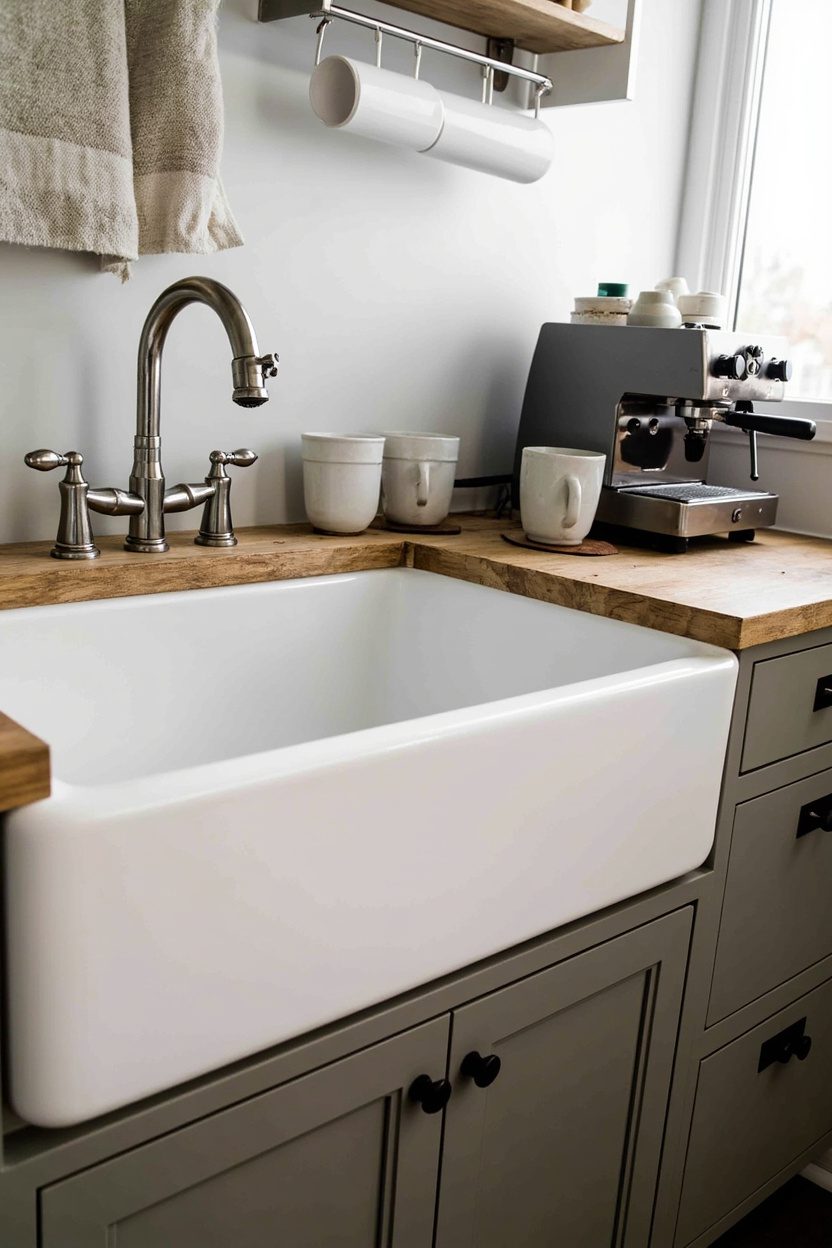
9. Apron-Front Sink Coffee Prep Area
- Effort Level: Weekend DIY.
- Estimated Budget: Under 100.
- Maintenance Level: High (requires daily wipes).
- Best For: Cottage kitchens, bakers
The farmhouse apron-front sink doubles as a rinsing station for coffee gear, position a small rolling cart to the side with a butcher block top sized to the sink height, keep the cart narrow, about 12 to 15 inches, to fit tight aisles and still provide staging space for cups and grinders.
Use a moisture-sealed cutting board as a drip mat over the sink edge to protect wood from steady exposure.
Keep frequently used items in a shallow caddy beside the sink for fast access, and choose rust-resistant baskets for filters and spoons, a common misstep is placing electronics too close to splashes, so maintain a 6 to 8 inch buffer from the sink edge for kettles and grinders.
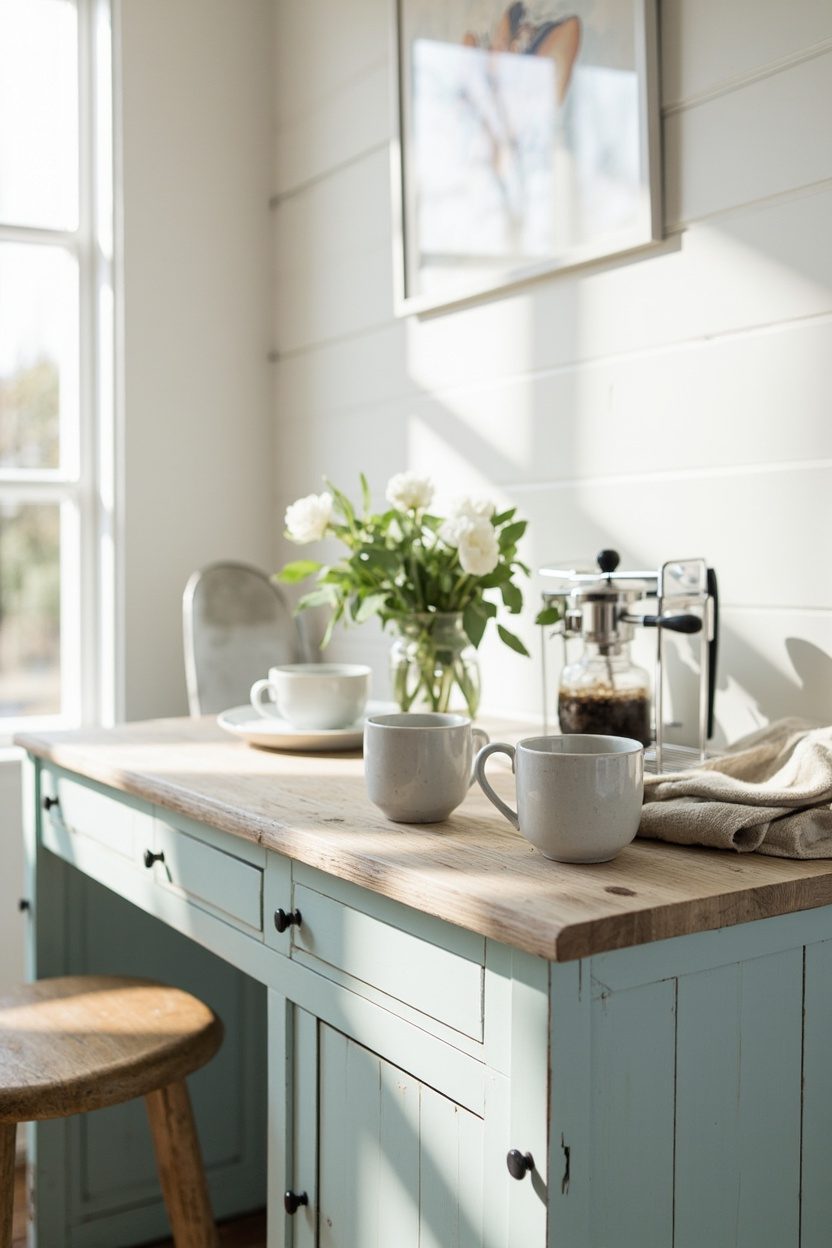
10. Soft Blue Farmhouse Coffee Nook
- Effort Level: Weekend DIY.
- Estimated Budget: $100-$500.
- Maintenance Level: Low.
- Best For: Small kitchens, breakfast corners.
Create a soft blue alcove by repainting a small cabinet or open shelving in a muted, chalky blue, then anchor it with warm wood counter space about 18–24 inches deep for a compact espresso machine.
Keep proportions gentle, choose matte paint so scuffs hide, and place two or three hooks for mugs no higher than 6 inches above the counter for easy reach.
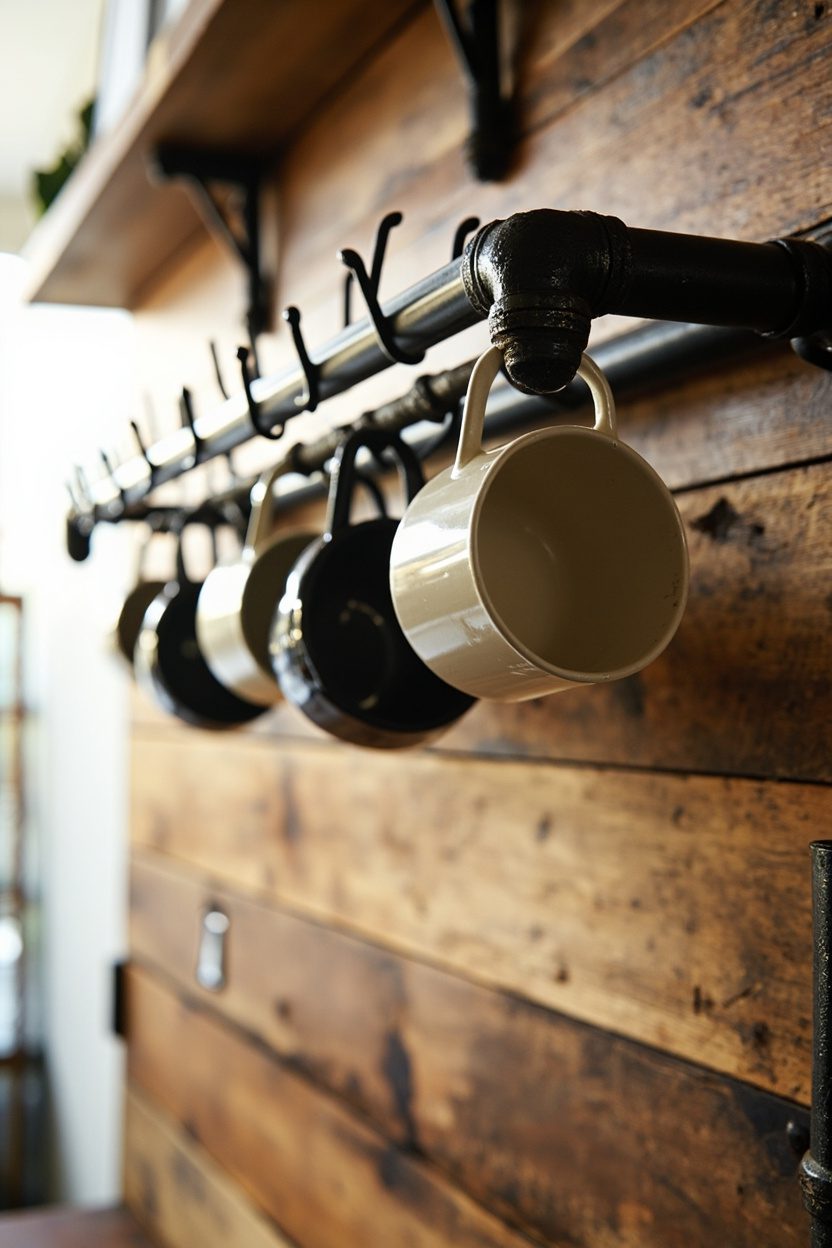
11. Industrial Pipe Mug Rack Feature
- Effort Level: Weekend DIY.
- Estimated Budget: Under $100.
- Maintenance Level: Low.
- Best For: Renters, modern farmhouse kitchens.
An exposed black iron pipe rack adds texture and keeps mugs visible, hang the rack centered over a 12–18 inch counter run to avoid cluttering your workspace.
Use 1/2 inch fittings for a balanced look, screw flanges into studs or use heavy-duty anchors, and stagger hooks so handles do not collide when loaded.
This feature pairs well with reclaimed wood shelves and pairs neatly with a white farmhouse sink, read more ideas in white farmhouse kitchen gallery for styling cues.
12. Glass-Front Cabinet Coffee Bar

- Effort Level: Hire a Pro.
- Estimated Budget: $500+.
- Maintenance Level: High (requires dusting).
- Best For: Full stations, open-plan kitchens.
A glass-front cabinet showcases pretty mugs and jars while keeping dust off beans and filters, opt for clear glass with thin muntins to maintain a light, airy feel, and install interior LED strips at the top for evening ambiance.
Keep heavier equipment like grinders on the lower counter space to avoid overloading shelves, and use matching jars for beans to keep the display cohesive.
When I installed a similar cabinet in my own kitchen I underestimated how often glass fronts show fingerprints, so place a small microfiber cloth nearby and schedule a weekly wipe to keep it photo-ready. For cottage-curated pairings, consider elements from our cottage house interior recommendations.
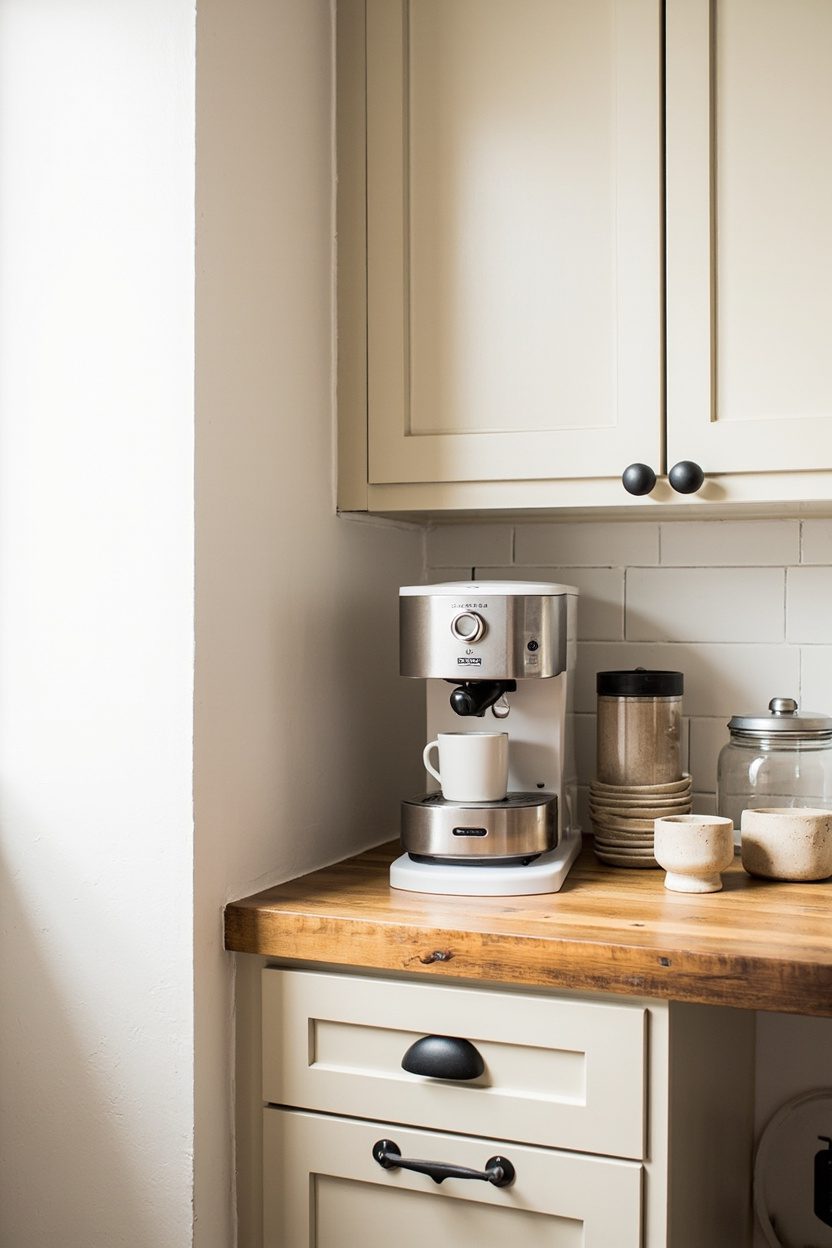
13. Tiny Corner Floating Shelf Nook
Create a slim floating shelf at eye level to hold a compact coffee maker and a couple of mugs, leave 10 to 12 inches clearance above the machine for steam and easy access.
Choose reclaimed pine or oak veneer for a farmhouse touch, and secure with heavy-duty brackets rated for at least 50 pounds to avoid sagging.
Layer in a small tray for beans and a jar for spoons to keep the nook tidy, positioning the tray to the right if you are right-handed, or left if you are left-handed, for smoother morning routines.
14. Vintage Hutch Converted Bar
Repurpose a thrifted hutch by removing interior shelves to make room for a tall brewer, add under-cabinet puck lights for task lighting, and line the back with beadboard paint to match the farmhouse palette. Keep hardware in aged brass or oil-rubbed bronze, swapping knobs in pairs to maintain balance.
Anchor a small milk frother and a coffee grinder on the lower shelf, and store mugs on hooks beneath the top shelf, spacing hooks about 4 inches apart to prevent mug collisions.
FAQ
Aim for at least 14 to 16 inches to fit most brewers and allow ventilation, and increase depth to 18 inches for larger espresso machines.
Butcher block, honed stone, and distressed wood are classic choices. Choose sealed finishes to resist stains and steam damage.
Yes, use freestanding carts, floating shelves, or a fold-down desk that requires minimal drilling, and secure items with removable adhesive anchors when needed.
Use baskets, labeled drawers, and vertical storage like peg rails to keep tools accessible and avoid countertop clutter.