

Create a home study design that supports focus, comfort, and a little joy, even in tight spaces. As an editor who’s reviewed hundreds of study nooks and home offices, I focus on layouts that reduce friction, keep essentials at hand, and introduce pleasing details that make you want to sit down and work.
Good design is about small, decisive moves, not excess. Expect concrete guidance on materials, proportions, and common pitfalls, so each idea is ready to implement in real homes.
Editor’s Pick: Built-In Shelving Around Window Nook — I love this solution because it combines daylight, vertical storage, and a cosy micro-environment; placing a shallow desktop at window height, with 10–12 inch shelf depths, prevents glare while giving room for reference books and a lamp, so it works beautifully in older homes and new builds alike.
- 1. Compact Desk Zones with Storage Drawers
- 2. Built-In Shelving Around Window Nook
- 3. Sculptural Ergonomic Task Chairs
- 4. Wall-Mounted Foldaway Desks
- 5. Soft Organic-Shaped Rugs
- 6. Layered Lighting: Task and Ambient
- 7. Muted Earth Tone Accent Walls
- 8. Floating Shelves for Supplies
- 9. Integrated Cable Management Channels
- 10. Acoustic Panels with Fabric Finish
- 11. Multipurpose Murphy Bed Workstations
- 12. Glass-Front Cabinets for Display
- 13. Window-Nook Study Alcove
- FAQ
- Final Thoughts
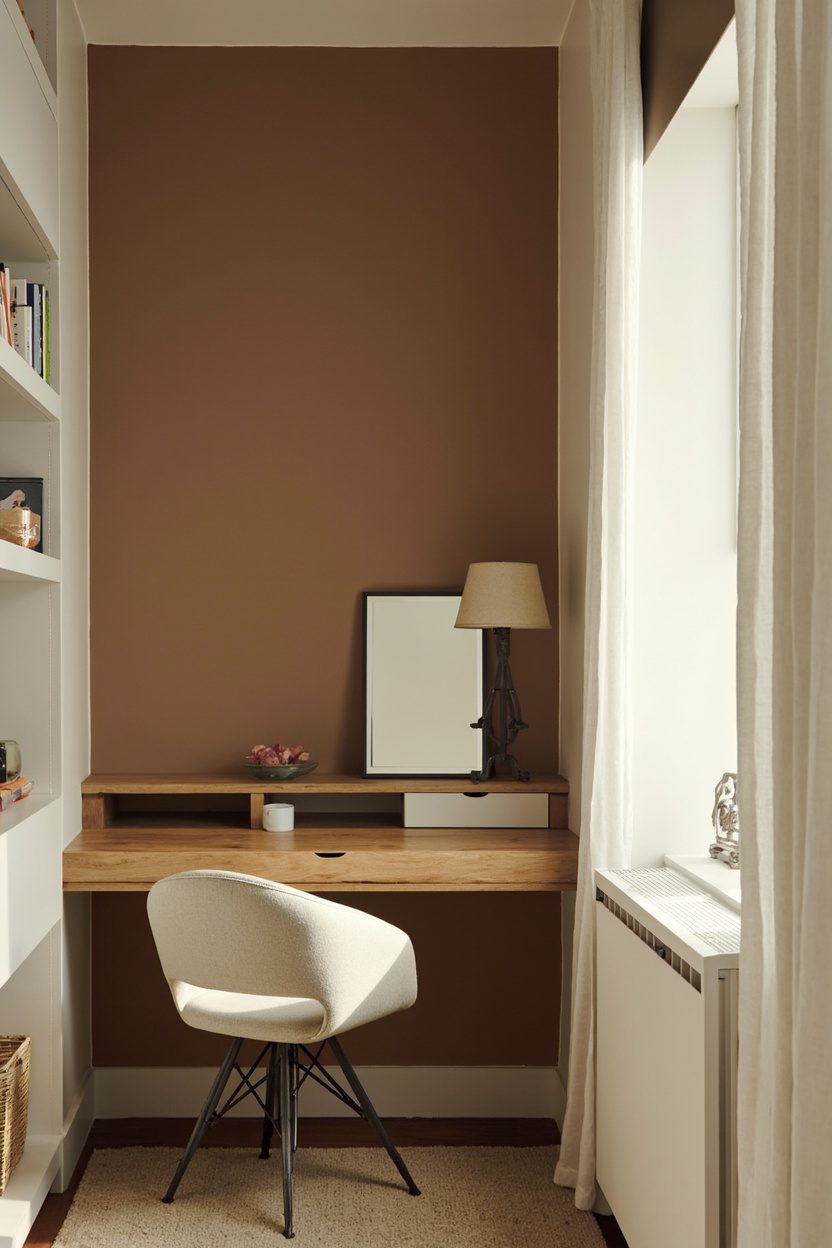
1. Compact Desk Zones with Storage Drawers

- Effort Level: Weekend DIY.
- Estimated Budget: Under $100
Place a compact desk, 36–42 inches wide, against a wall and integrate shallow 12-inch deep drawers beneath the work surface to keep papers, chargers, and stationery out of sight. Opt for laminated plywood or a veneered MDF top for durability, and mount sliding drawer hardware rated for 50+ pounds to avoid sagging over time.
Keep the desktop clutter-free by dedicating one drawer to tech, one to paper, and a top shallow tray for writing tools. This proportion prevents sprawling piles.
A common mistake is choosing drawers that are too deep, which encourages hoarding. Aim for shallow, organized storage instead.
2. Built-In Shelving Around Window Nook
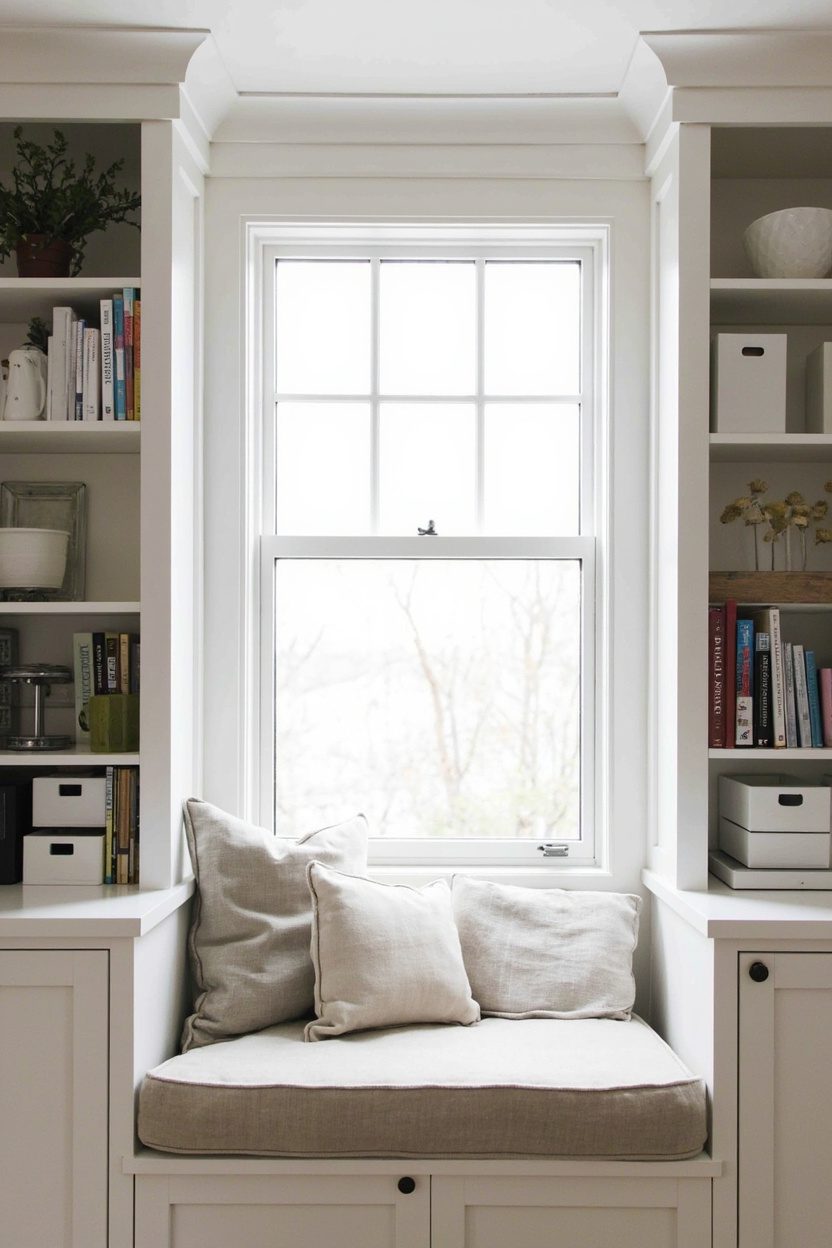
- Effort Level: Hire a Pro.
- Estimated Budget: $500+.
Build floor-to-ceiling shelving flanking a recessed window seat, keeping shelf depths to 10–12 inches to avoid blocking light, and stagger shelf heights to store both books and decorative boxes.
Use painted MDF for a seamless built-in look, and finish the seat with a 3–4 inch foam cushion covered in performance fabric for daily use.
Position the desk surface at window sill height, roughly 28–30 inches, to maintain an ergonomic posture while benefiting from daylight, and add a simple roller blind to control glare.
For inspiration on minimal detailing and warm finishes, see this short guide to Cosy Minimalist Home Touches.
3. Sculptural Ergonomic Task Chairs
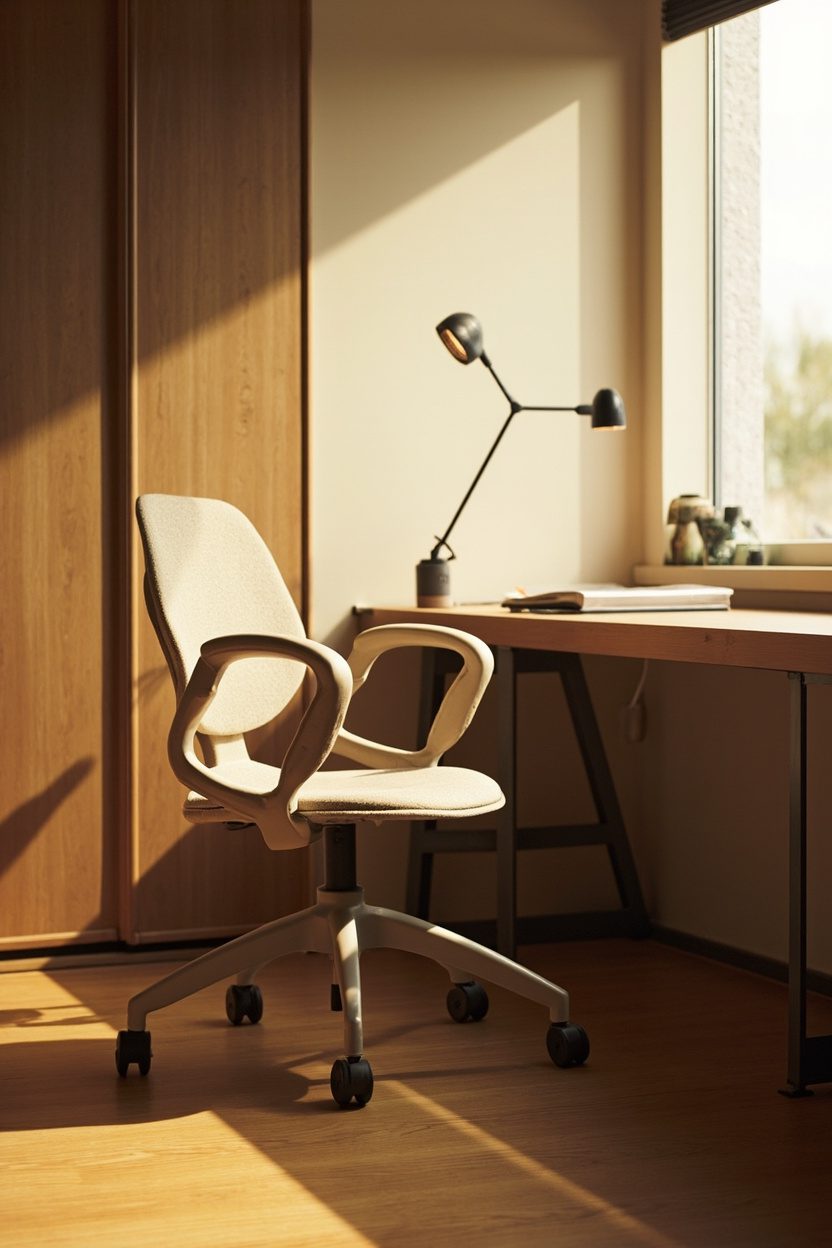
- Effort Level: Weekend DIY.
- Estimated Budget: $100-$500.
Choose a chair with adjustable lumbar support and a seat pan that tilts slightly forward, but pick one with a sculptural back or organic lines to soften the room; materials like molded plywood or breathable mesh work well.
Aim for a seat height range of 16–21 inches to fit most desks, and test for 10–15 minutes before buying, because ergonomic fit is personal.
Pair the chair with a low-profile area rug, about 5×7 feet, to anchor the study area and protect floors. Avoid overly large rugs that swallow the space.
For trend context on softer, organic shapes that help a room feel calming, the Woodgrain trend outlook is a helpful reference.
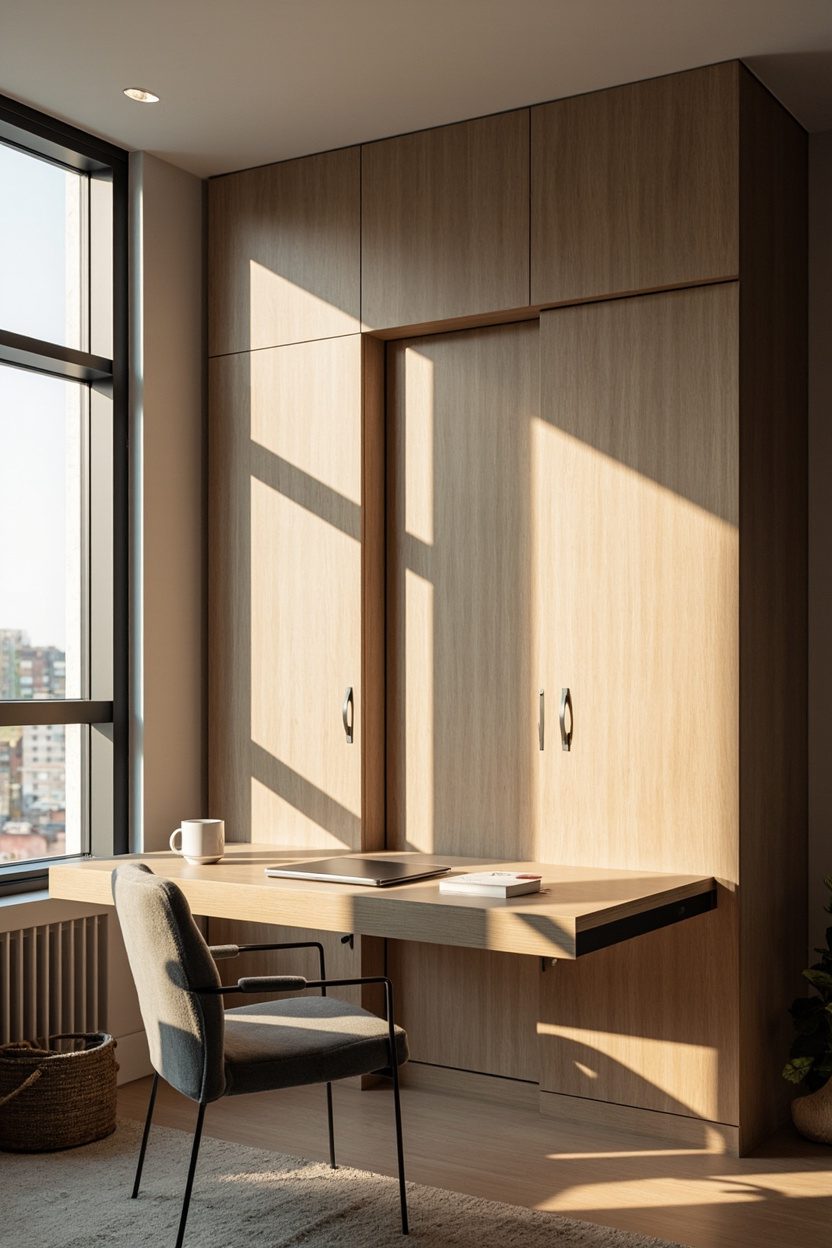
4. Wall-Mounted Foldaway Desks
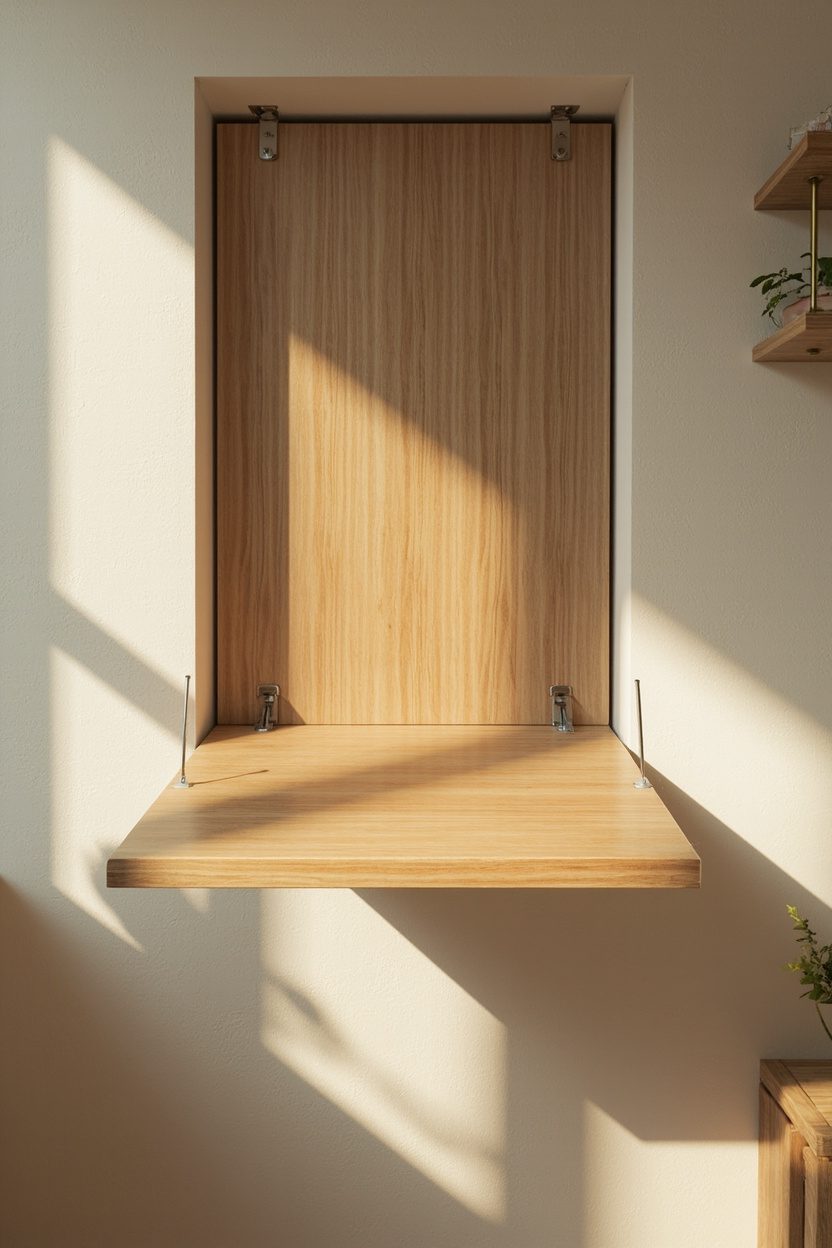
- Effort Level: Weekend DIY.
- Estimated Budget: Under $100.
These slim drop-down desks free floor space; they work especially well in narrow hallways or alcoves where a full desk would feel cramped.
Choose a hardwood or plywood panel at least 3/4 inch thick, mount it with heavy-duty piano hinges and two toggle bolts into studs for a stable surface that holds a laptop and a lamp.
Style with a shallow floating shelf above the desk to store pens and a slim monitor, keeping the work surface clear and focused.
Avoid mounting the desk too high, aim for 28 to 30 inches from the floor to the surface for ergonomic comfort, and fold it away when you want the room to feel tidy.
5. Soft Organic-Shaped Rugs
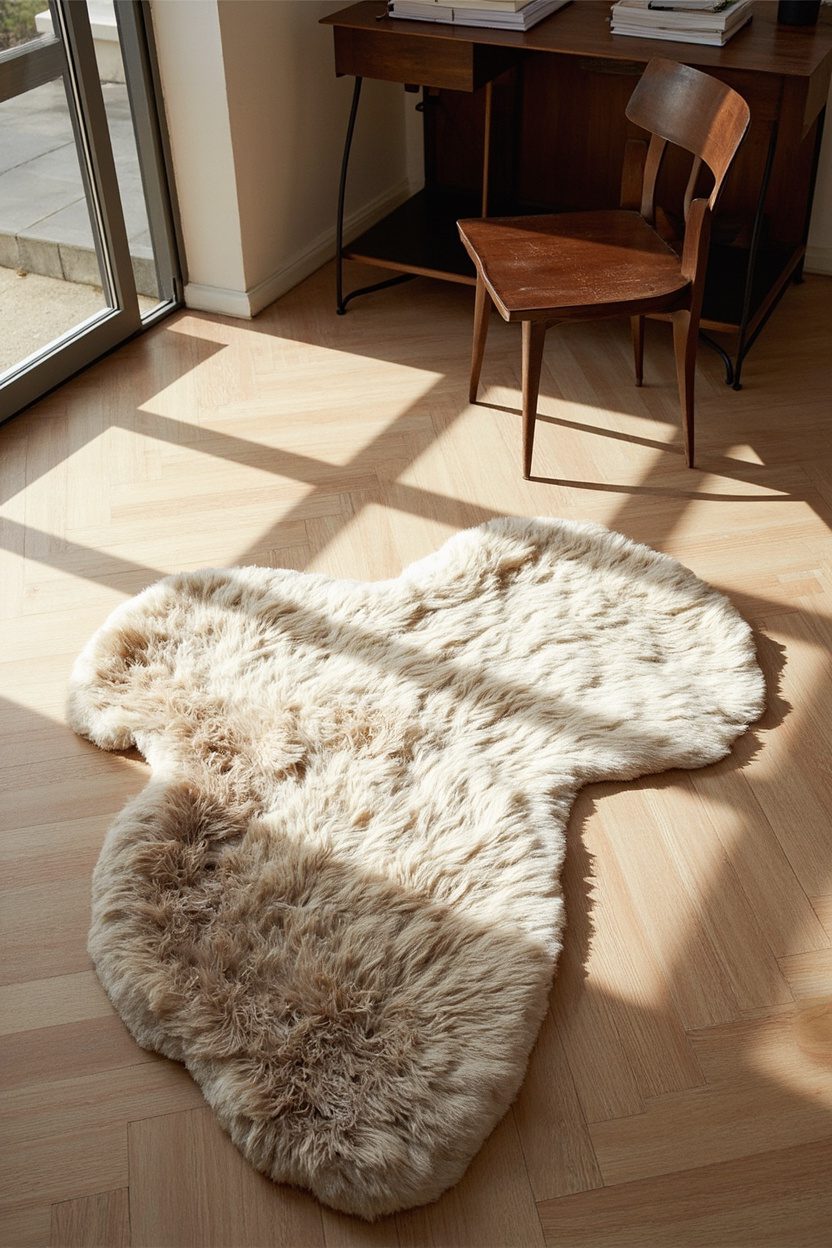
- Effort Level: Weekend DIY.
- Estimated Budget: $100-$500.
Organic-shaped rugs, with rounded edges and irregular contours, soften a study corner and anchor the desk without the formality of a rectangle.
Opt for low-pile wool or a dense synthetic blend, around 5×7 feet for a single-seat study, so your chair still moves freely without catching the rug edge.
When I tried this in my own apartment, I picked a warm, pebble-shaped wool rug and noticed it made the corner feel calmer, but I underestimated chair movement and picked a rug with no anti-slip backing.
I recommend adding a thin non-slip pad underneath and positioning the front legs of the chair on the rug to prevent wear and slipping.
6. Layered Lighting: Task and Ambient

- Effort Level: Weekend DIY / Hire a Pro.
- Estimated Budget: Under $100.
Combine a focused task lamp with softer ambient light to reduce eye strain and create a pleasant study mood.
Aim for 4000K for the desk lamp and 2700K to 3000K for ambient fixtures to balance clarity and warmth.
Place the task light on the opposite side of your writing hand to avoid casting a shadow, and use a dimmer on ambient lighting to shift the room energy between focused work and relaxed reading.
For built-in solutions, consider a small wall sconce behind the monitor and a clamp lamp at the desk edge, both on separate circuits.
This allows precise control of light layers. If you want trend-forward shapes, pick sculptural fixtures to echo 2026 tendencies for organic curves; they bring visual movement while serving clear functional roles.
7. Muted Earth Tone Accent Walls
- Effort Level: Weekend DIY.
- Estimated Budget: Under $100.
Choose a muted clay, warm taupe, or soft olive to anchor a home study without overpowering focus, paint the wall behind the desk, and keep the other walls crisp white to preserve light.
For a refined look, paint the lower third of the wall in the accent tone and cap it with a slim trim. This proportion creates visual interest while keeping contrast gentle.
Use matte or eggshell finish to reduce glare from task lamps, and pair the wall with natural wood shelving and a woven rug to reinforce a calm, tactile palette.
Avoid painting every wall; a single accent plane is the common mistake that keeps the room cozy rather than cave-like.
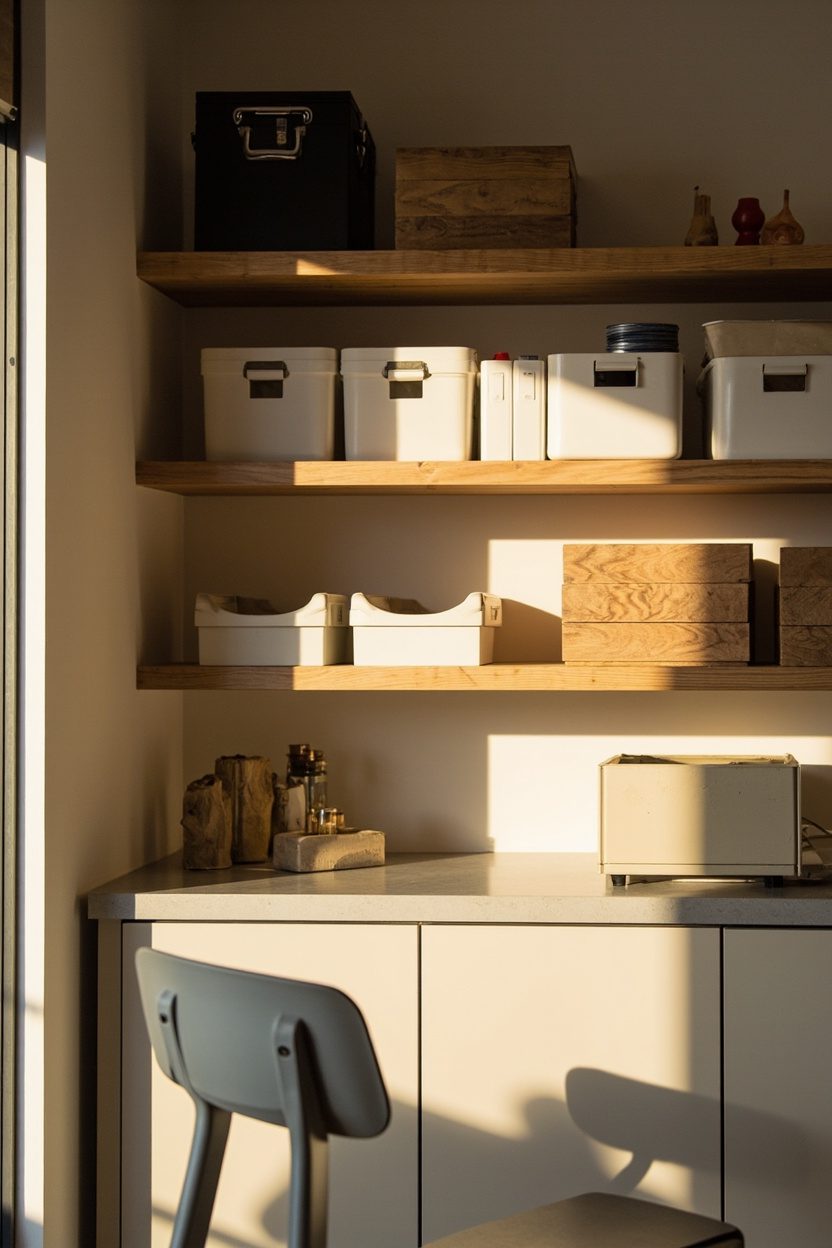
8. Floating Shelves for Supplies
- Effort Level: Weekend DIY.
- Estimated Budget: Under $100.
Install 10 to 12-inch deep floating shelves above the desk at eye level to store textbooks and a few decorative items, keeping the desktop clear for work.
Stagger shelves vertically in thirds of the wall height; this spacing prevents crowding and makes each shelf reachable without standing on a chair.
Use solid pine or birch boards with concealed brackets for a clean look that hides hardware, and paint the underside the same color as the wall to visually lift the shelf.
If you want style tips for minimal shelving, see Cosy Minimalist Home Touches for complementary ideas and proportions.
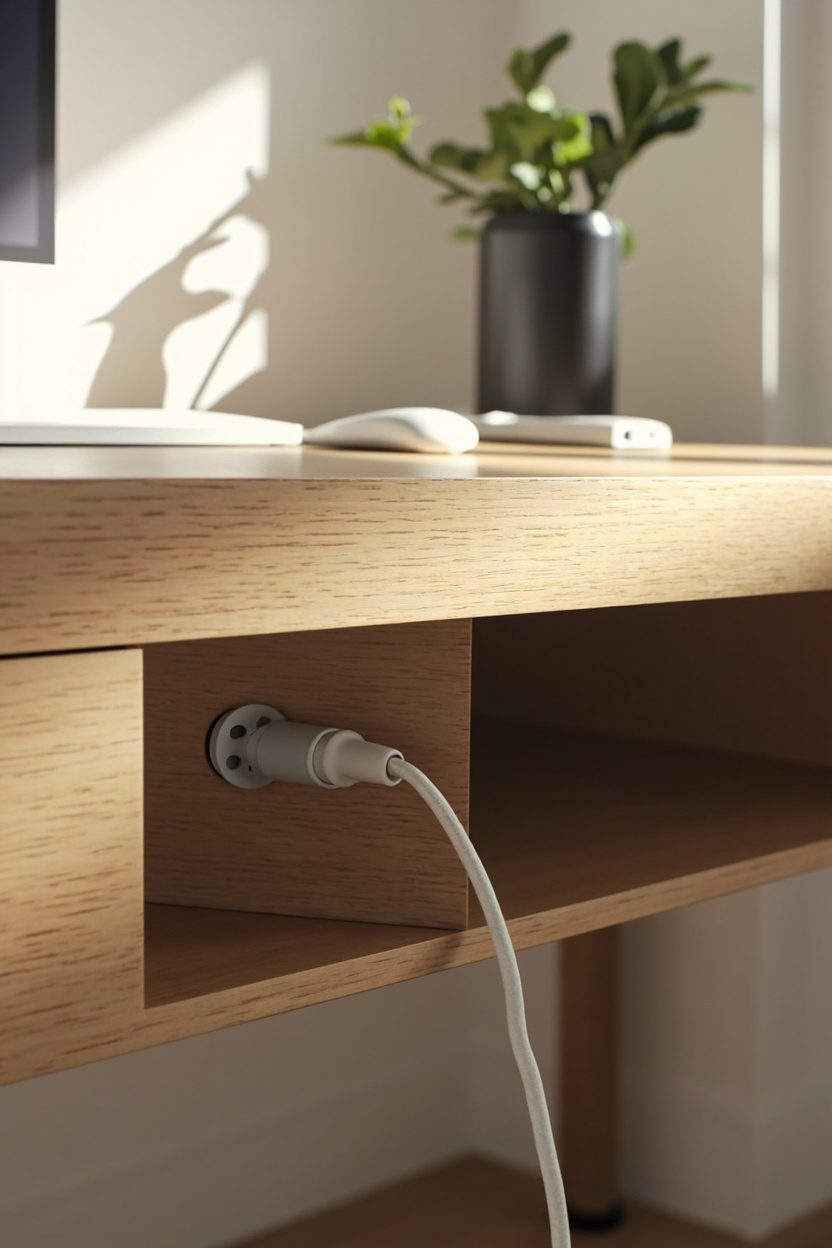
9. Integrated Cable Management Channels
- Effort Level: Weekend DIY.
- Estimated Budget: Under $100.
Run a slim cable channel along the back edge of the desk or a recessed groove in a plywood desk top to hide chargers and monitor cords. Keep the channel width to 1 to 1.5 inches so it accommodates multiple cables without bulging. Use adhesive-backed channels that match the desk color, or paint them so they disappear into the finish.
Real-talk warning, I once routed cables under a floating shelf without leaving access panels, and after changing devices, it became a tangle that took an afternoon to fix. Plan for removable lids or velcro straps to make future swaps simple.
For tech-friendly desks paired with calm interiors, consider materials and placement so outlets remain reachable yet out of direct sight. A common execution detail is placing the main outlet 6 inches above the desk surface for easy plug access.
10. Acoustic Panels with Fabric Finish

- Effort Level: Weekend DIY.
- Estimated Budget: $100-$500.
Layering fabric-wrapped acoustic panels tames echo and creates a calm study backdrop, especially useful in rooms with hard floors or lots of glass.
Choose 2-inch thick panels covered in tightly woven linen or wool blend, and arrange them in a staggered grid around the desk to keep reflections away from the monitor and video calls.
For a polished look, mount panels at ear height behind seating, and add a trio above the work surface to reduce vertical flutter.
Avoid covering the entire wall; a 40 to 60 percent coverage is enough to make a noticeable difference without making the room feel claustrophobic.
11. Multipurpose Murphy Bed Workstations
- Effort Level: Hire a Pro.
- Estimated Budget: $500+.
A Murphy bed that folds into a slim cabinet with an integrated desk is perfect for shared spaces, letting a bedroom double as a functional study.
Specify a tabletop depth of 20 to 24 inches and place cable grommets near the hinge to keep devices charged while the bed is tucked away.
Choose a soft-close mechanism and add vertical storage pockets on the cabinet door for pens and notebooks.
This prevents clutter when the bed comes down. When sizing the unit, keep 36 inches of clear floor space in front so the desk remains usable whether the bed is stowed or deployed.
12. Glass-Front Cabinets for Display

- Effort Level: Weekend DIY.
- Estimated Budget: $100-$500
Glass-front cabinets turn reference books, curated objects, and inspiring artwork into part of the room’s design, while protecting items from dust.
Use low-iron glass for clearer viewing and fit interior LED strip lighting on the underside of each shelf, spaced every 12 inches, to create even illumination without glare.
Keep lower shelves for heavy reference volumes and position frequently used items at elbow height for easy reach; this prevents constant bending and preserves sightlines.
For styling, mix books stacked horizontally with vertical files, and reserve one shelf for rotating inspiration to keep the study feeling fresh and purposeful.
13. Window-Nook Study Alcove
Create a compact study alcove in a window recess, positioning a shallow desk that follows the sill depth, about 16 to 20 inches, so it doesn’t block light.
Choose a low-profile chair and a single task lamp, and add a slim shelf above the window for books, avoiding bulky storage that will crowd the nook.
Place a soft cushion and a light-filtering blind to control glare, and anchor the space with a narrow rug that extends under the chair by at least 18 inches. This keeps the area feeling intentional and separate from the rest of the room.
A useful follow-up is 8 Home Updates on a Budget That Make Your Space Feel Brand New.
FAQ
A desk depth of 20 to 30 inches is ideal; 24 inches balances laptop space and tabletop surface without feeling bulky in smaller rooms.
Use visual boundaries like rugs or shelving, choose a corner or alcove, and add acoustic panels or a high-back chair to create a sense of separation.
Built-ins offer optimized storage and a tailored fit; they are worth it if you plan to stay in the space long-term and want a clutter-free study area.
Combine cool-task LED lighting at eye level with a warm ambient source, aim for 4000K for clarity, and a desk lamp with an adjustable arm for precise positioning.
Final Thoughts
Designing a study that feels less like a chore comes down to defining a clear zone, prioritizing ergonomic surfaces, and choosing materials and storage that suit how you actually work.
Small investments in lighting, acoustics, and proportion pay off by making the space inviting and functional, whether you need a quiet nook or a creative sink-equipped workstation.
Which of these works best for your space? Let us know in the comments!
Further reading on evolving trends and sculptural shapes in interiors is useful when choosing forms and finishes. See this analysis from Woodgrain for trend context. For more context, see Top trends. For tips on creating a calm, minimal base in your home study, explore ideas on Cosy Minimalist Home Touches.