

Home theater design blends performance with polish, so the room looks intentional even when the screen is off.
Start by aligning the tech to the architecture, then layer lighting, texture, and acoustics that support the experience rather than shout over it.
The smartest setups borrow from built-in furniture and gallery lighting, use concealed components, and keep cable management ruthless.
Current upgrades like recessed screens, multi-piece soundbars, and content-synced lighting add impact without visual clutter, as noted by recent trend reporting.
My Pick: Recessed Screens With Luxe Millwork — I suggest this for real homes because the screen disappears into tailored joinery, giving you a calm, elegant wall every day and a true theater moment on movie nights.
- 1. Cinematic Themes That Feel Intentional
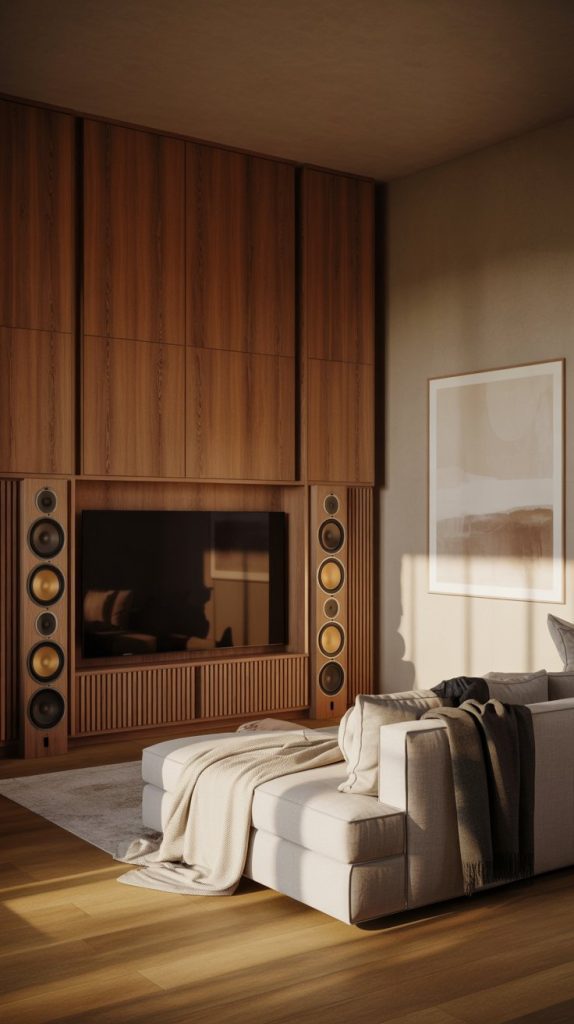
- 2. Hidden Speakers, Visible Style
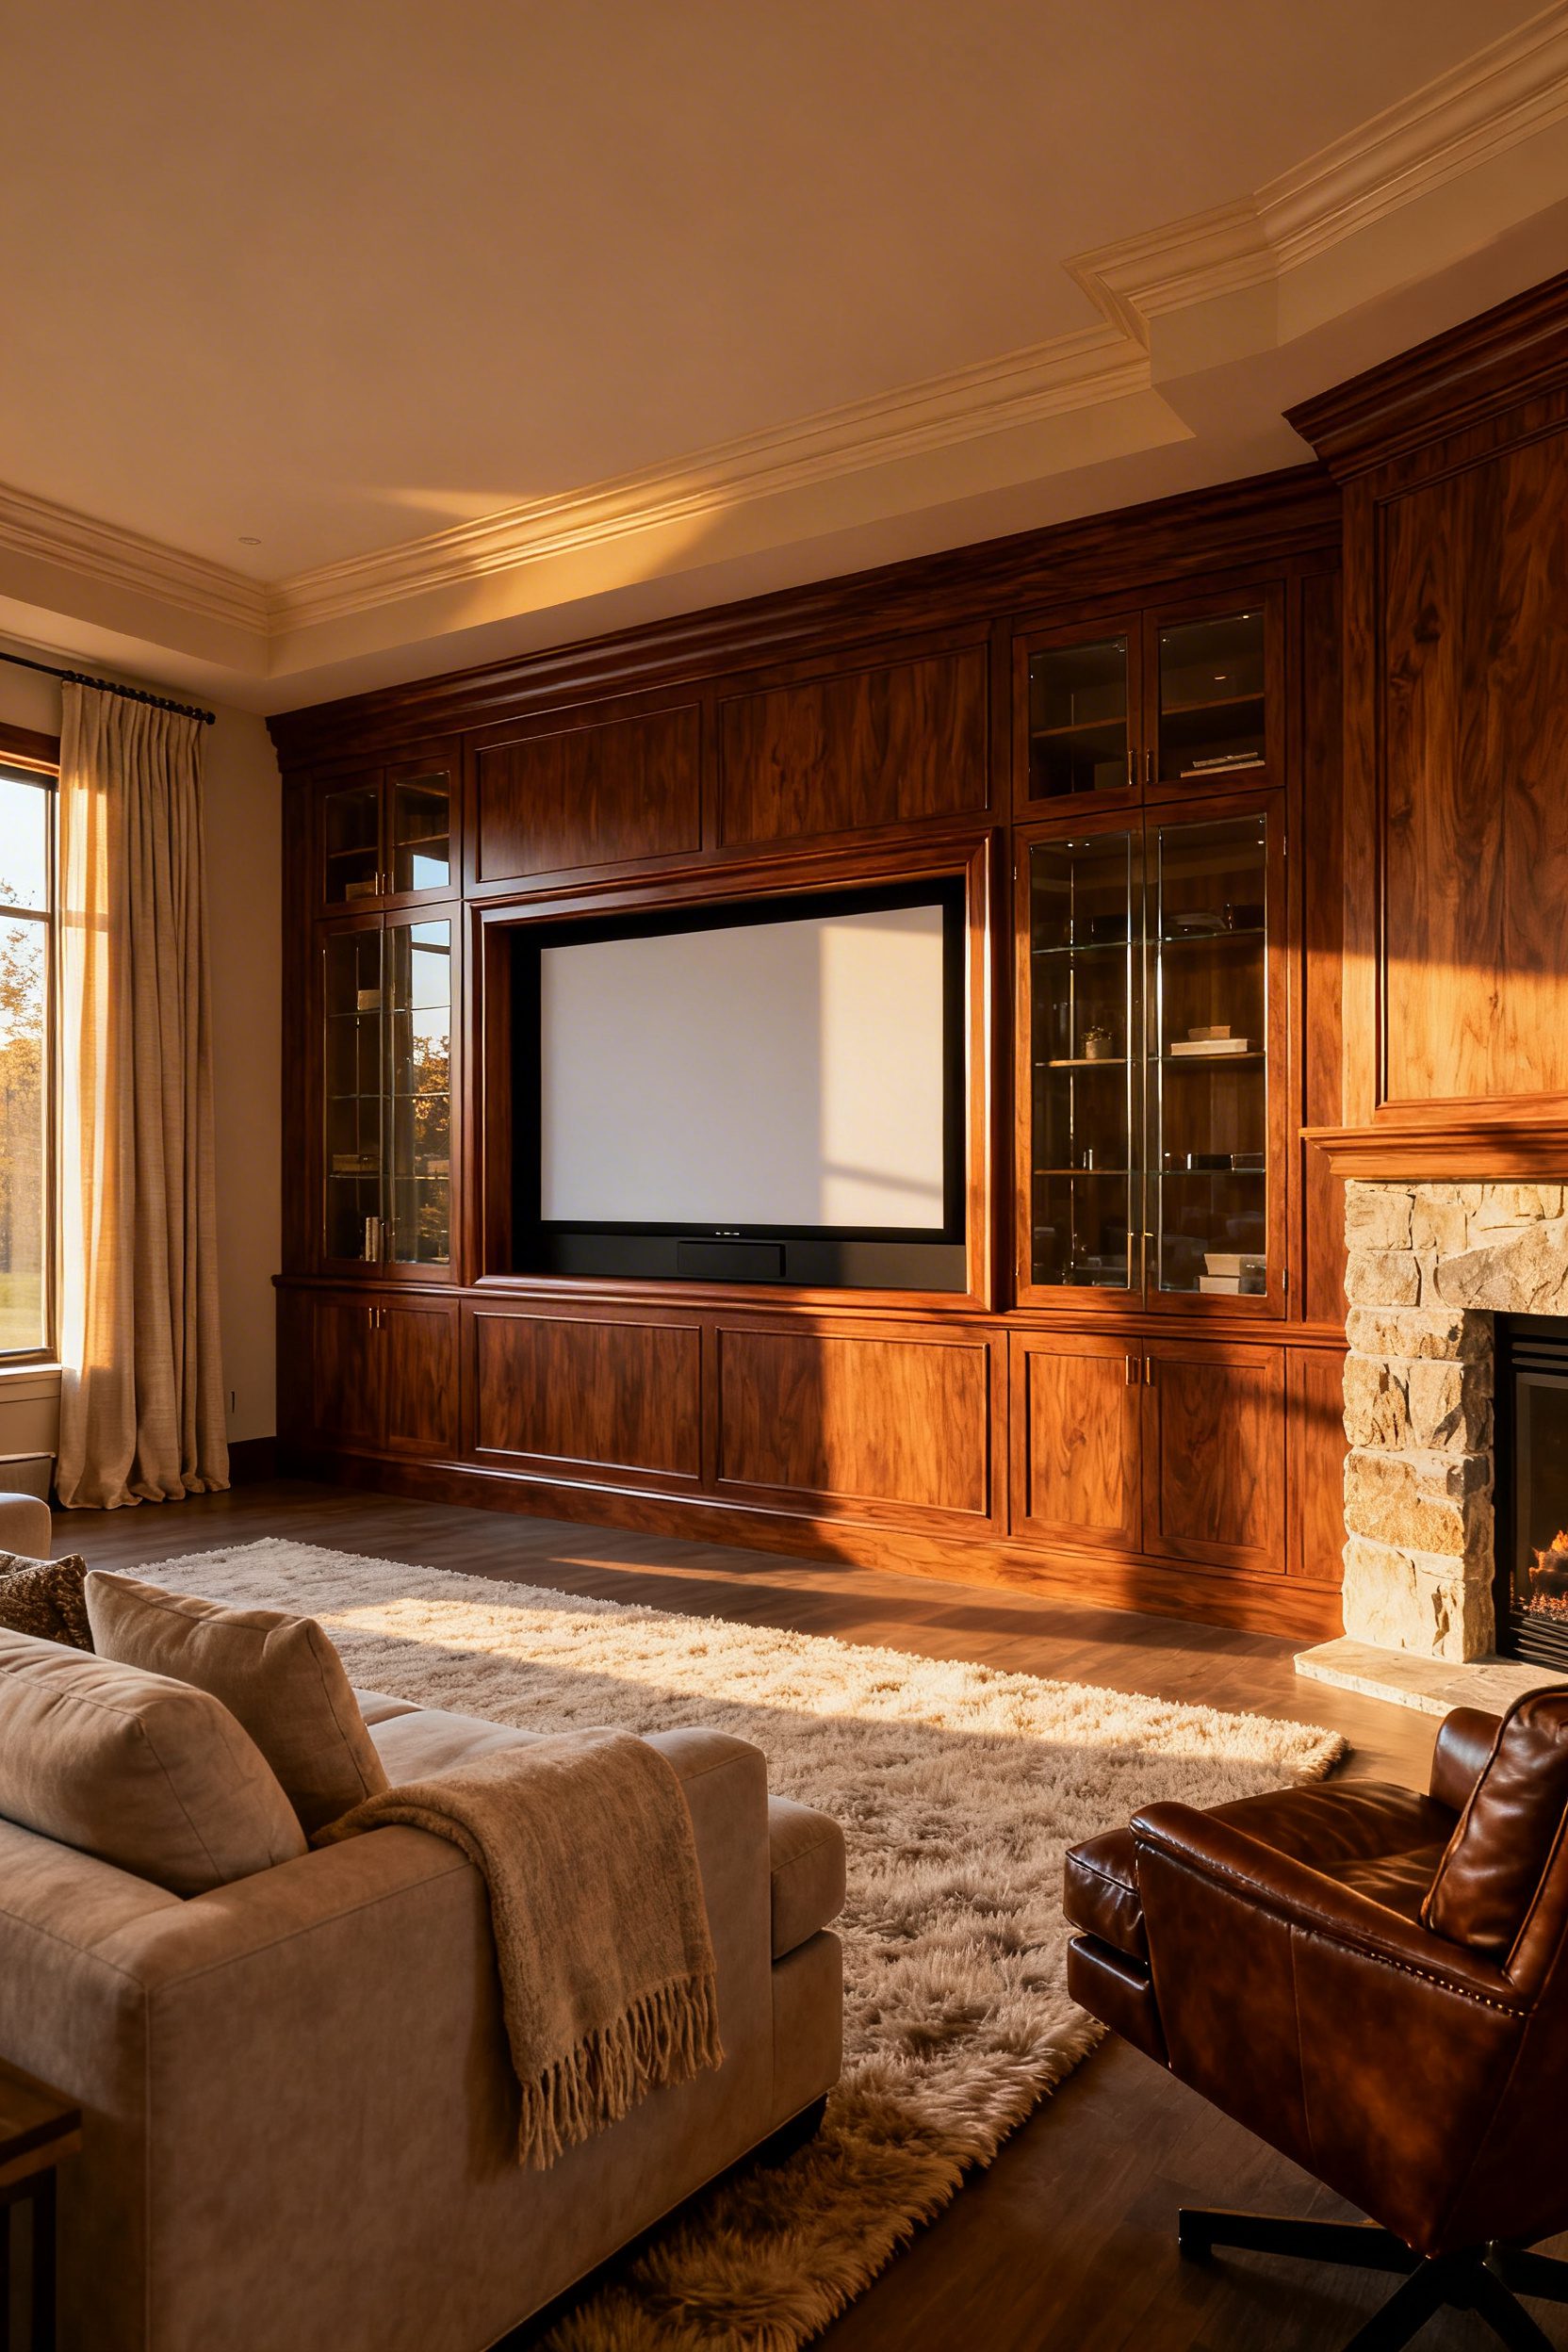
- 3. Recessed Screens With Luxe Millwork
- 4. 8K-Ready Layouts and Sightlines
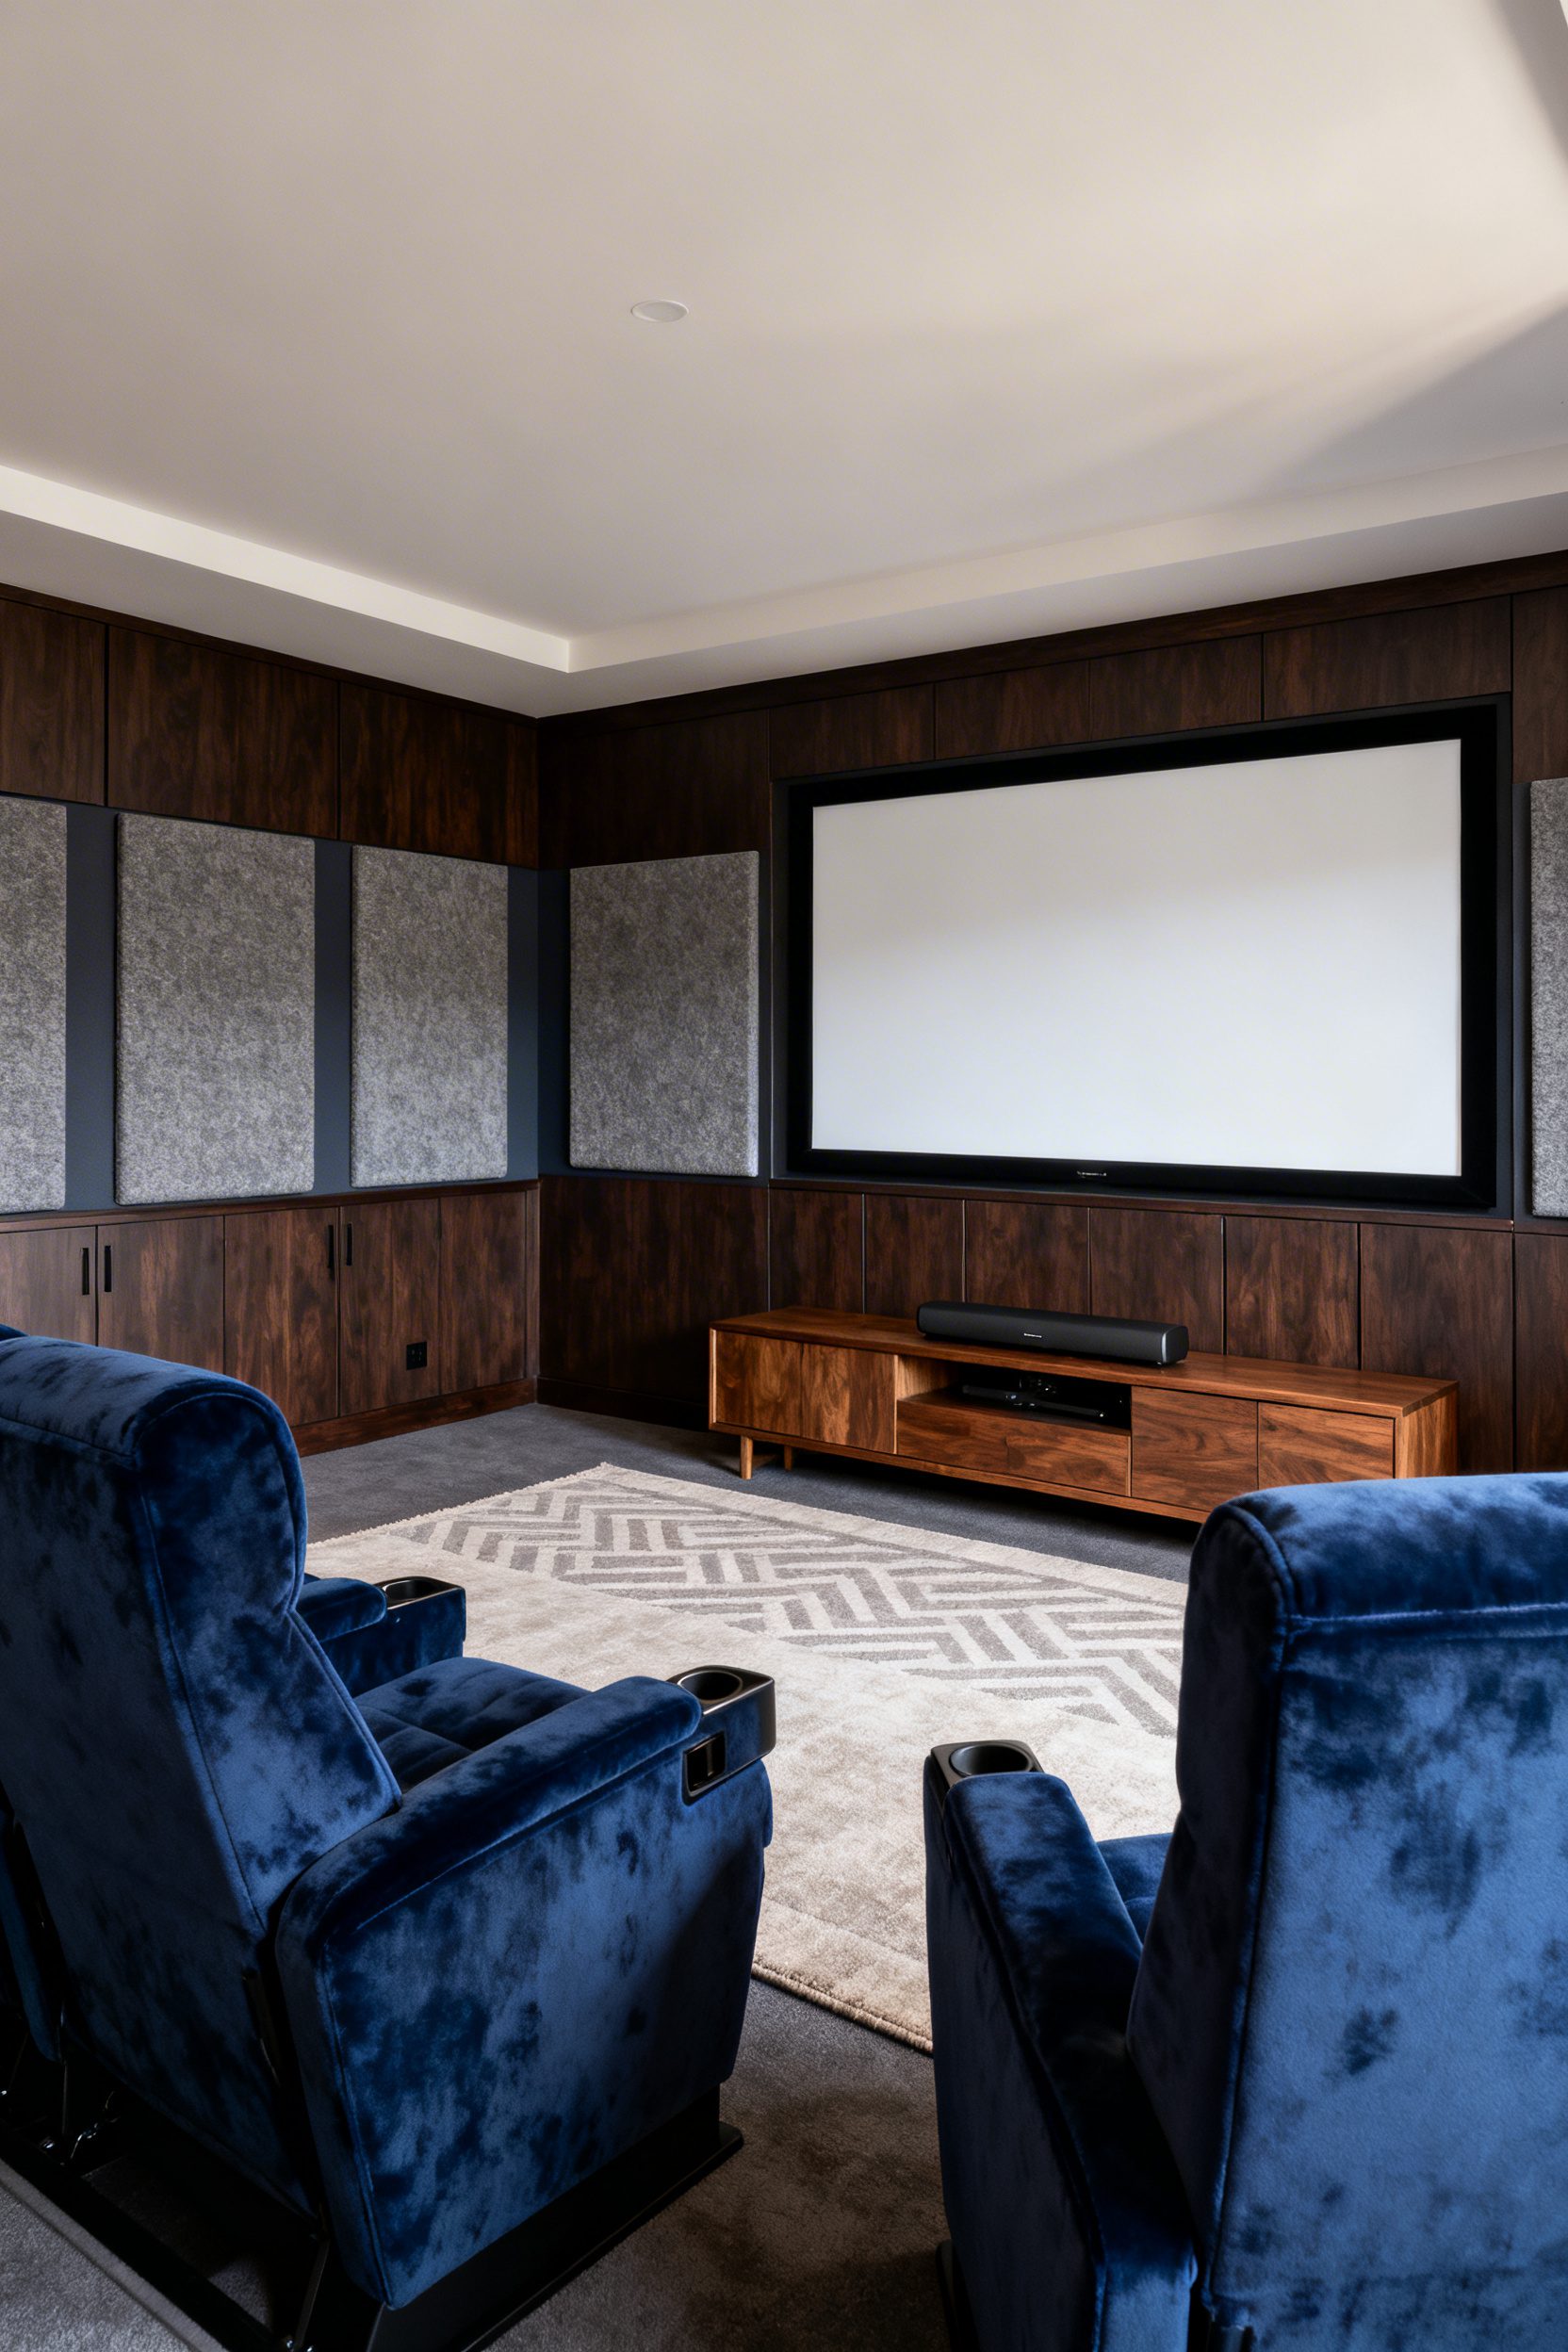
- 5. Acoustic Panels As Wall Art
- 6. Custom Lighting Synced to Scenes
- 7. Multi‑Piece Soundbars, Cohesive Aesthetics
- 8. Minimalist Control Panels, Clutter‑Free
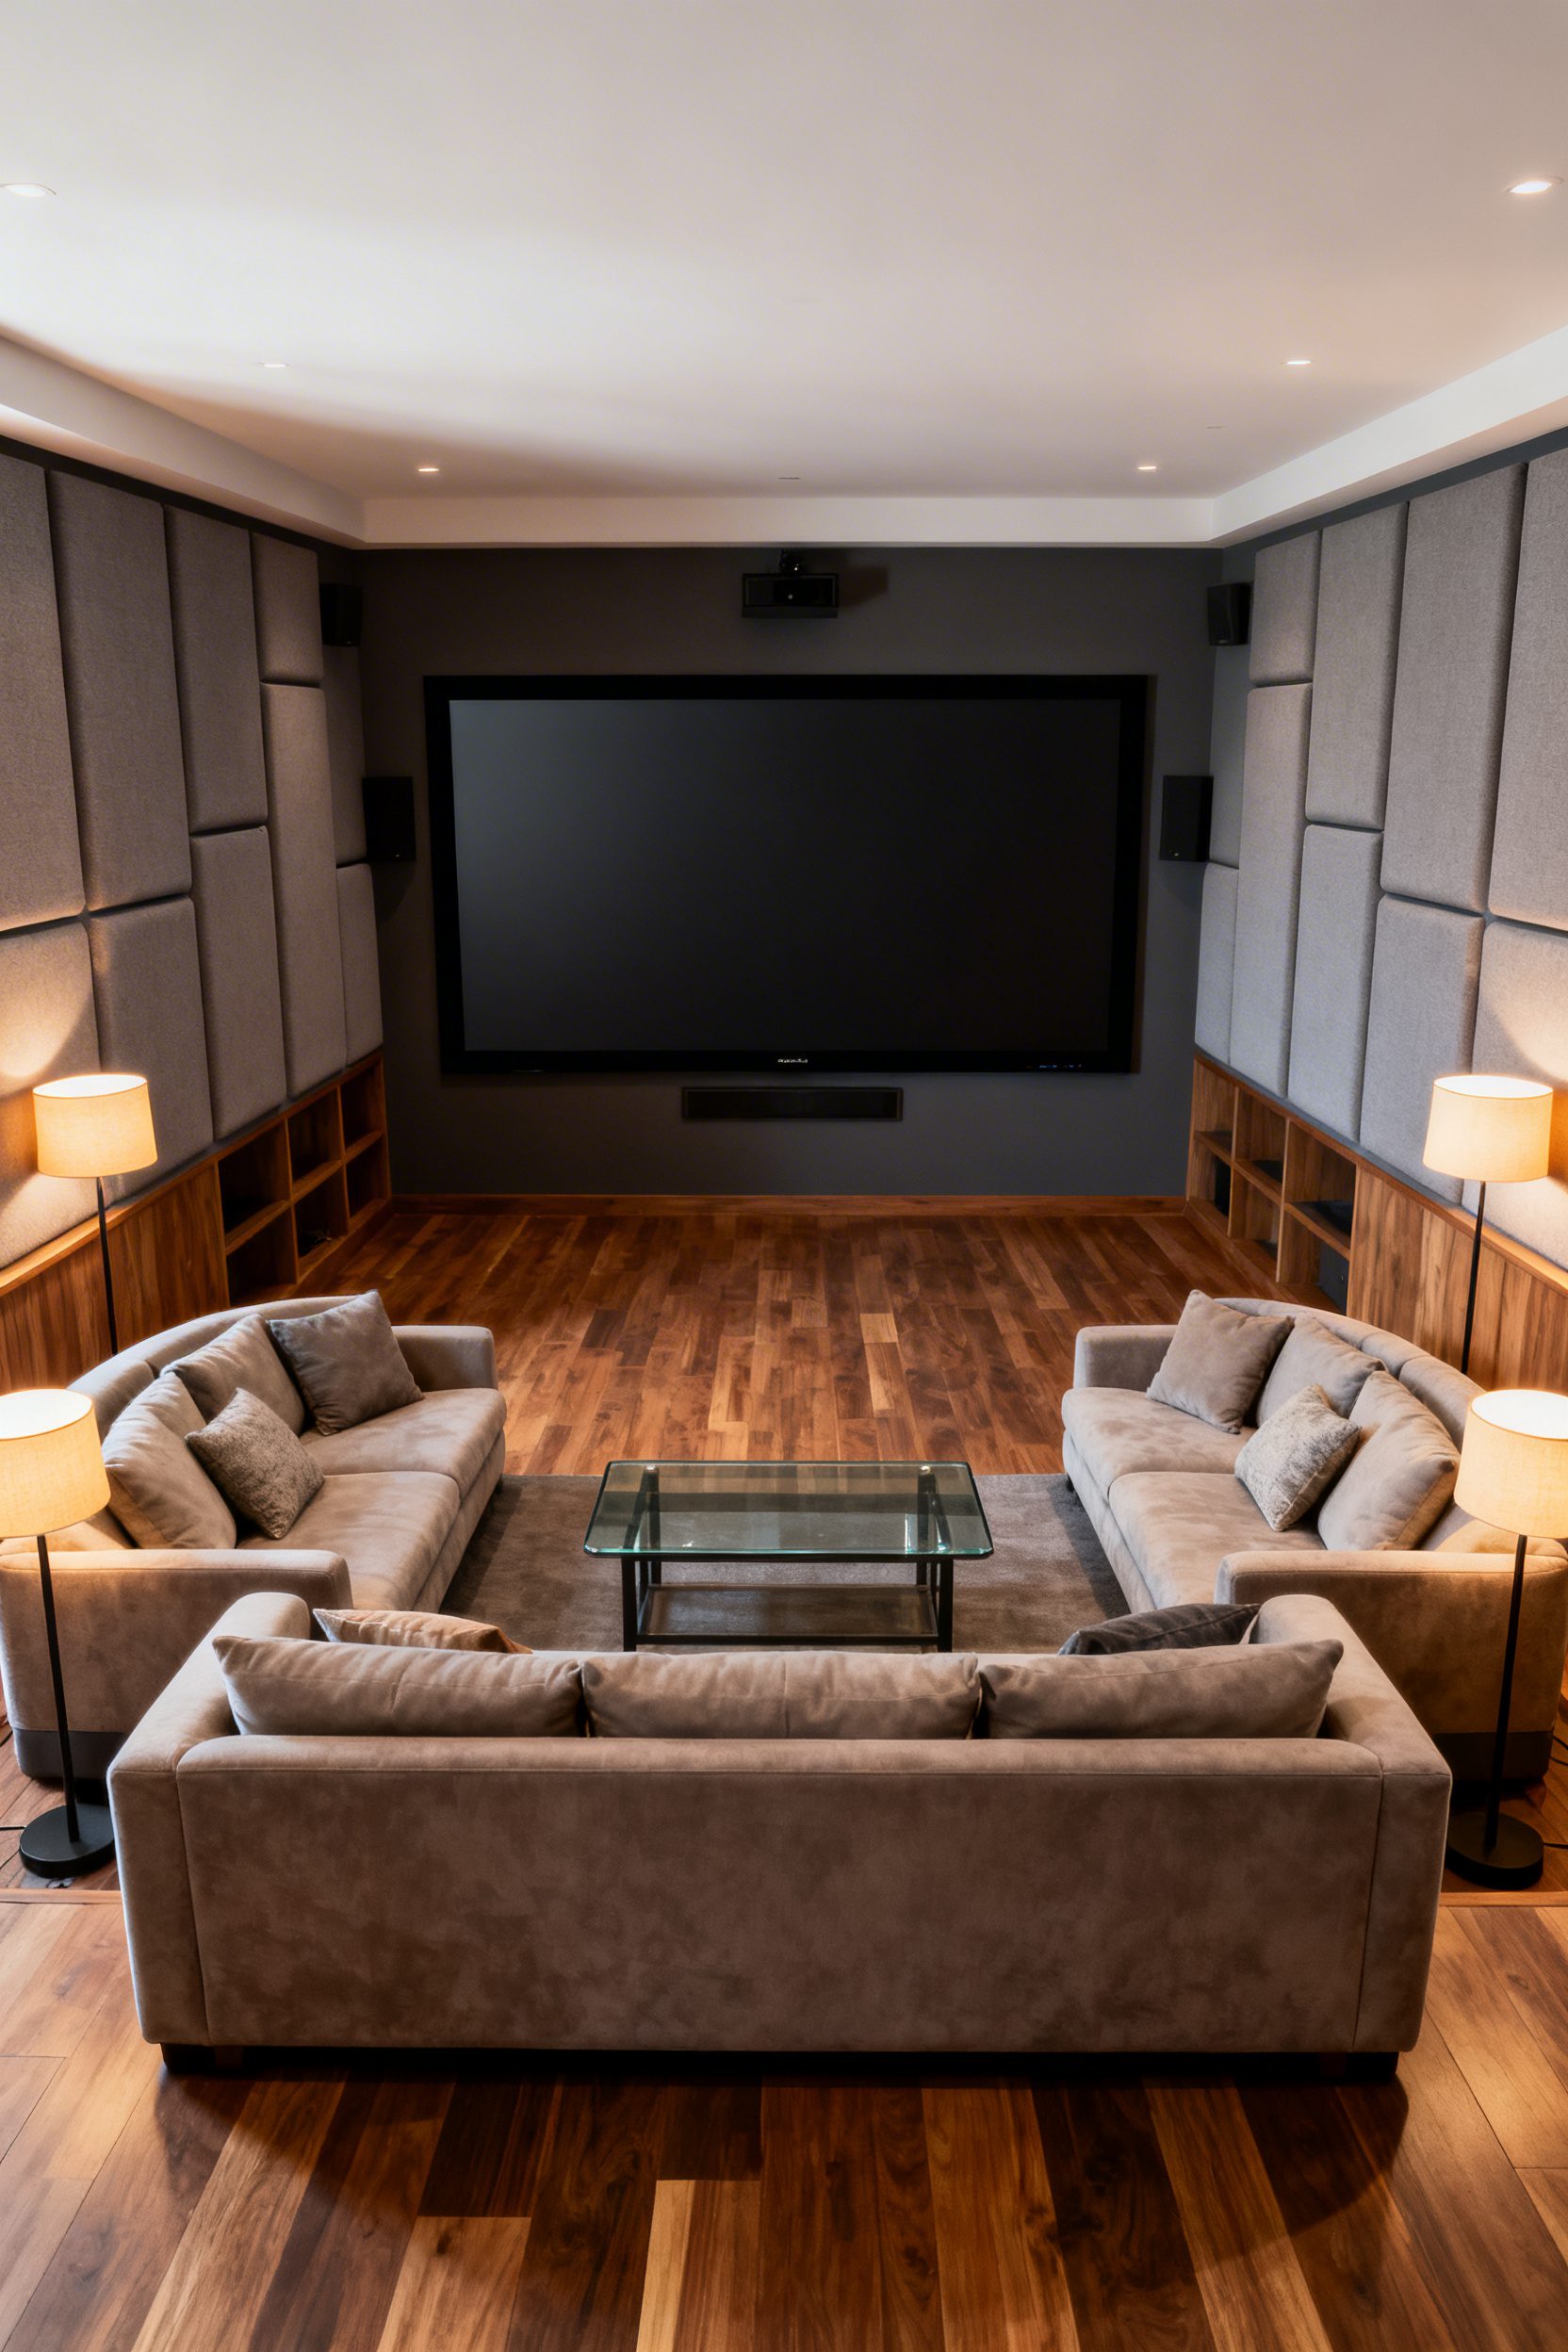
- 9. Tiered Seating With Plush Textiles
- 10. Dark Palettes That Sharpen Contrast
- 11. Cable‑Free Wireless AV Zones
- 12. Drapery, Carpets, and Bass Control
- 13. Built‑In Snack Bars and Niches
- 14. Sound‑Isolating Doors and Seals
- FAQ
1. Cinematic Themes That Feel Intentional
- Effort Level: Weekend DIY.
- Estimated Budget: 100-500.
- Maintenance Level: Low (requires dusting).
- Best For: Renters.
Pick a tight palette and two to three motifs, then repeat them, for example, vintage one-sheets in identical frames, velvet accents, and ribbed wood panels. Houzz research shows that starting with a clear theme keeps choices cohesive and avoids prop-shop overload.
Scale matters, so hang art at seated eye level, about 42 inches to the center, and keep frames in the same finish to quiet visual noise. Balance soft surfaces, a wool rug, and lined drapery, with matte walls to deepen contrast without making the room feel heavy.
Style the surfaces sparingly, a sculptural tray and low bowl on the table, to avoid light spill that competes with the screen, see ideas in Minimalist Coffee Table Decor. Avoid glossy paint behind the display; it reflects and reduces perceived black levels.
2. Hidden Speakers, Visible Style
- Effort Level: Pro install recommended.
- Estimated Budget: 500+.
- Maintenance Level: Low (occasional grille cleaning).
- Best For: Open living rooms.
Choose in-wall or in-ceiling speakers with paintable magnetic grilles, align them with millwork reveals, then color-match to the wall for a near-invisible read. Multi-piece soundbars are a strong alternative, letting you place compact surrounds discreetly while keeping a clean front stage, a 2026 trend highlighted by Digital Trends.
Plan wire paths early, running 14/2 or 14/4 CL2 in conduit to future-proof, and land terminations in a ventilated cabinet.
Keep fabric panels or slatted doors over the equipment bay for IR pass-through and airflow, maintaining sightline calm.
Calibrate after furnishings are in place, rugs and drapery change response, and save profiles for day and night listening.
For a style-first focal point, pair the concealed audio with a restrained hearth treatment, borrowing texture ideas from Diy Fireplace Surround Ideas.
3. Recessed Screens With Luxe Millwork
- Effort Level: Advanced carpentry or pro build.
- Estimated Budget: 500+.
- Maintenance Level: Low (annual dusting).
- Best For: Dedicated rooms and feature walls.
Design a niche that is 2 inches wider and taller than your display, then wrap it in rift oak, walnut, or painted MDF with a 3/8 inch shadow reveal for a gallery finish. Use a flush outlet and recessed cable box within the cavity to eliminate visible cords.
Add acoustic fabric panels or fluted stiles around the niche to tame reflections, then integrate a dimmable LED channel 2 inches from the screen edge for bias lighting.
Current installation trends point to recessed displays and minimalist controls for a seamless wall, as covered in Touch & Feel’s 2026 home theatre report.
Specify a matte or satin sheen on surrounding millwork to reduce glare, and set the center of the screen 36 to 42 inches off the floor for sofa-height sightlines. If you prefer a pattern elsewhere in the room, keep this wall calm, reserving bolder moments for adjacent zones, like a softly patterned Boho Wallpaper accent behind the seating.
4. 8K-Ready Layouts and Sightlines
- Effort Level: Weeknight planning
- Estimated Budget: 100-500
- Maintenance Level: Low (requires dusting)
- Best For: Dedicated rooms
Anchor the primary seating so your eyes land dead center on the screen, not above it, and keep the center channel tweeter at ear height when seated.
For 8K panels, aim for a viewing distance of roughly 1 to 1.5 times the screen height, then verify that the back row clears front-row sightlines by at least 4 inches of eye height.
Run recessed conduit for future HDMI 2.1 or wireless transmitter hubs, and leave a 6 to 8 inch service chase behind millwork so you can swap components as standards evolve.
Hidden speakers and recessed screens read clean, and they align with current upgrades in wireless AV and multi-piece soundbars, as noted by Digital Trends.
If your theater shares space with a living room, float a low-profile sofa and use a slim table behind it to keep walking paths outside the cone of vision.
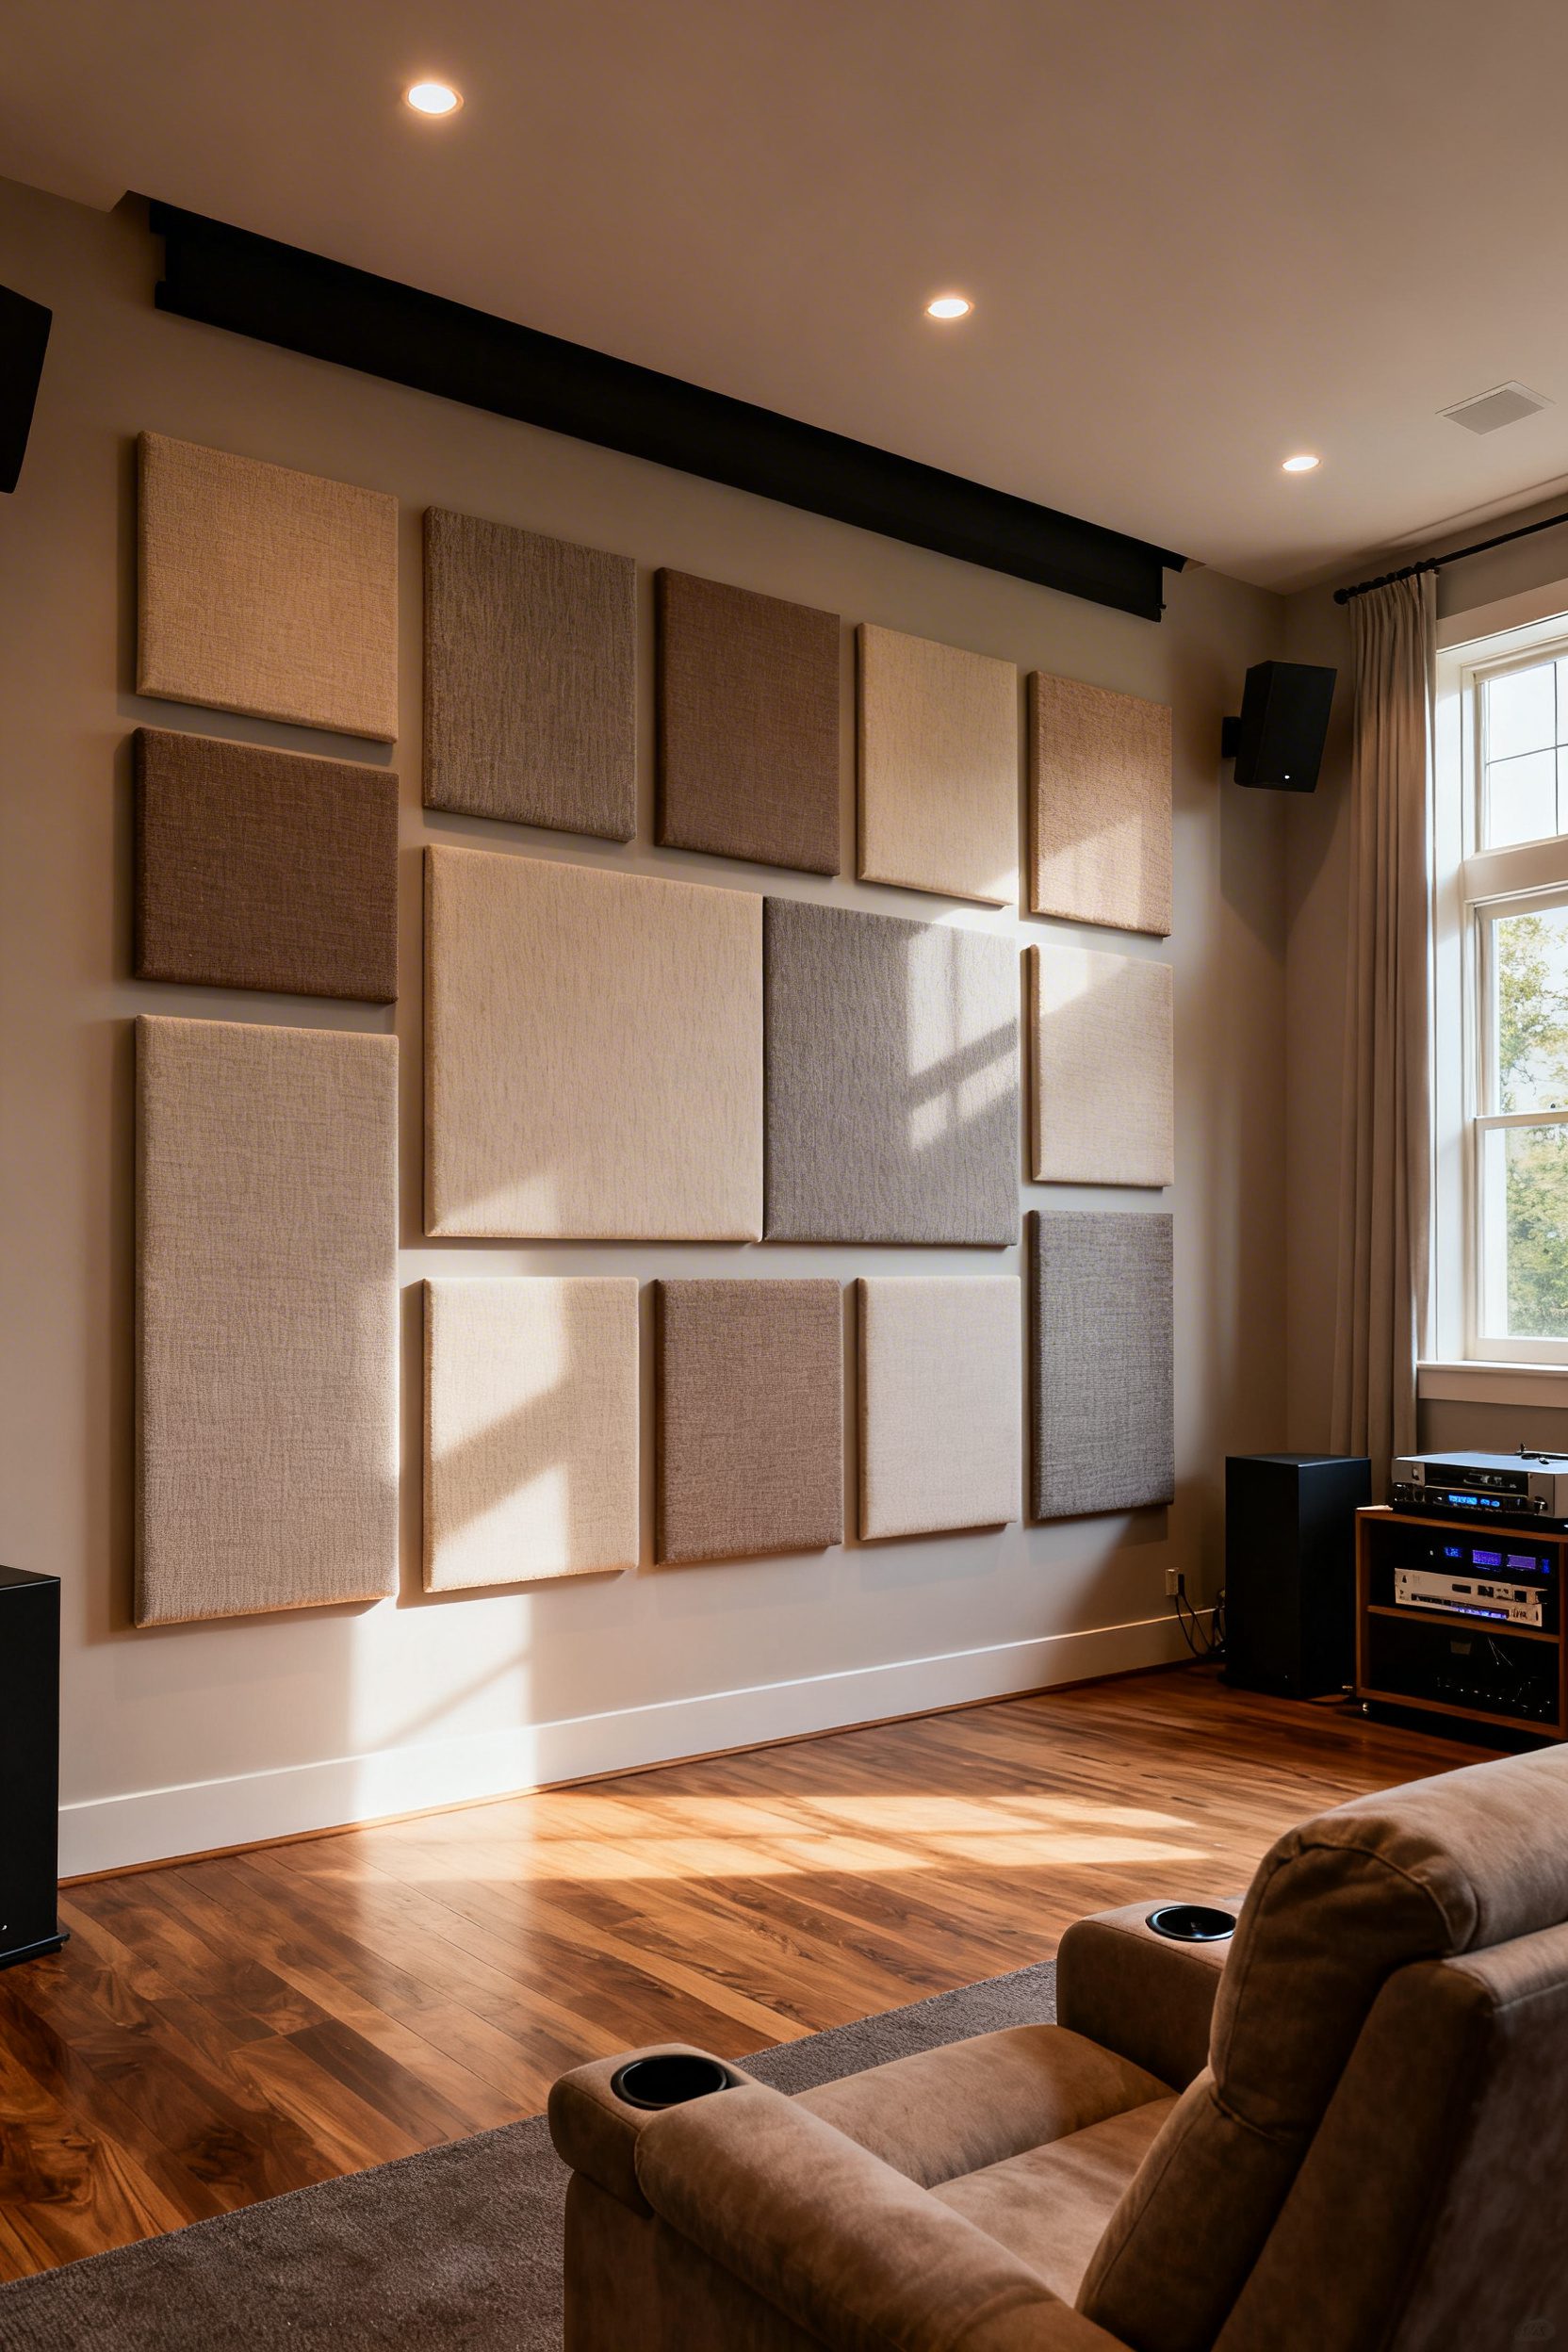
5. Acoustic Panels As Wall Art
- Effort Level: Weekend DIY
- Estimated Budget: 100-500
- Maintenance Level: Low (requires dusting)
- Best For: Renters
Wrap 2 to 4-inch mineral wool in upholstery-grade fabric, then frame it with 1×2 poplar for gallery-style panels that double as broadband absorbers.
Mount at first-reflection points, typically halfway between speakers and seating at ear height, and stagger sizes for a curated look.
When I tried this in my own living room, I made the mistake of using glossy fabric, which reflected both light and some high frequencies.
Switching to a matte, open-weave textile tightened dialogue immediately, and a French cleat made the panels renter-friendly.
Introduce one or two patterned panels to carry the room’s style, keeping the rest in a solid tone to avoid visual noise.
6. Custom Lighting Synced to Scenes
- Effort Level: Weekend DIY
- Estimated Budget: 500+
- Maintenance Level: Low (occasional recalibration)
- Best For: Multipurpose living rooms
Layer LED cove strips, low-glare sconces, and aisle markers on separate zones, then tie them to your media hub so lights fade to 10 percent when playback starts.
Keep any front wall lighting behind baffles to prevent screen washout, and set bias lighting to D65 for truer perceived contrast.
Look for systems that support content-synced scenes, hidden drivers, and minimalist keypads, trends reaffirmed in current home theater installations where custom lighting pairs with recessed screens.
If your setup includes a fireplace wall, thread the light channels around millwork, and plan wiring while exploring Diy Fireplace Surround Ideas.
Calibrate light levels with a simple lux meter, targeting 2 to 5 lux on the screen during playback and 30 to 50 lux for intermission.
For a deeper tech context on multi-piece audio and evolving control ecosystems, see this industry overview.
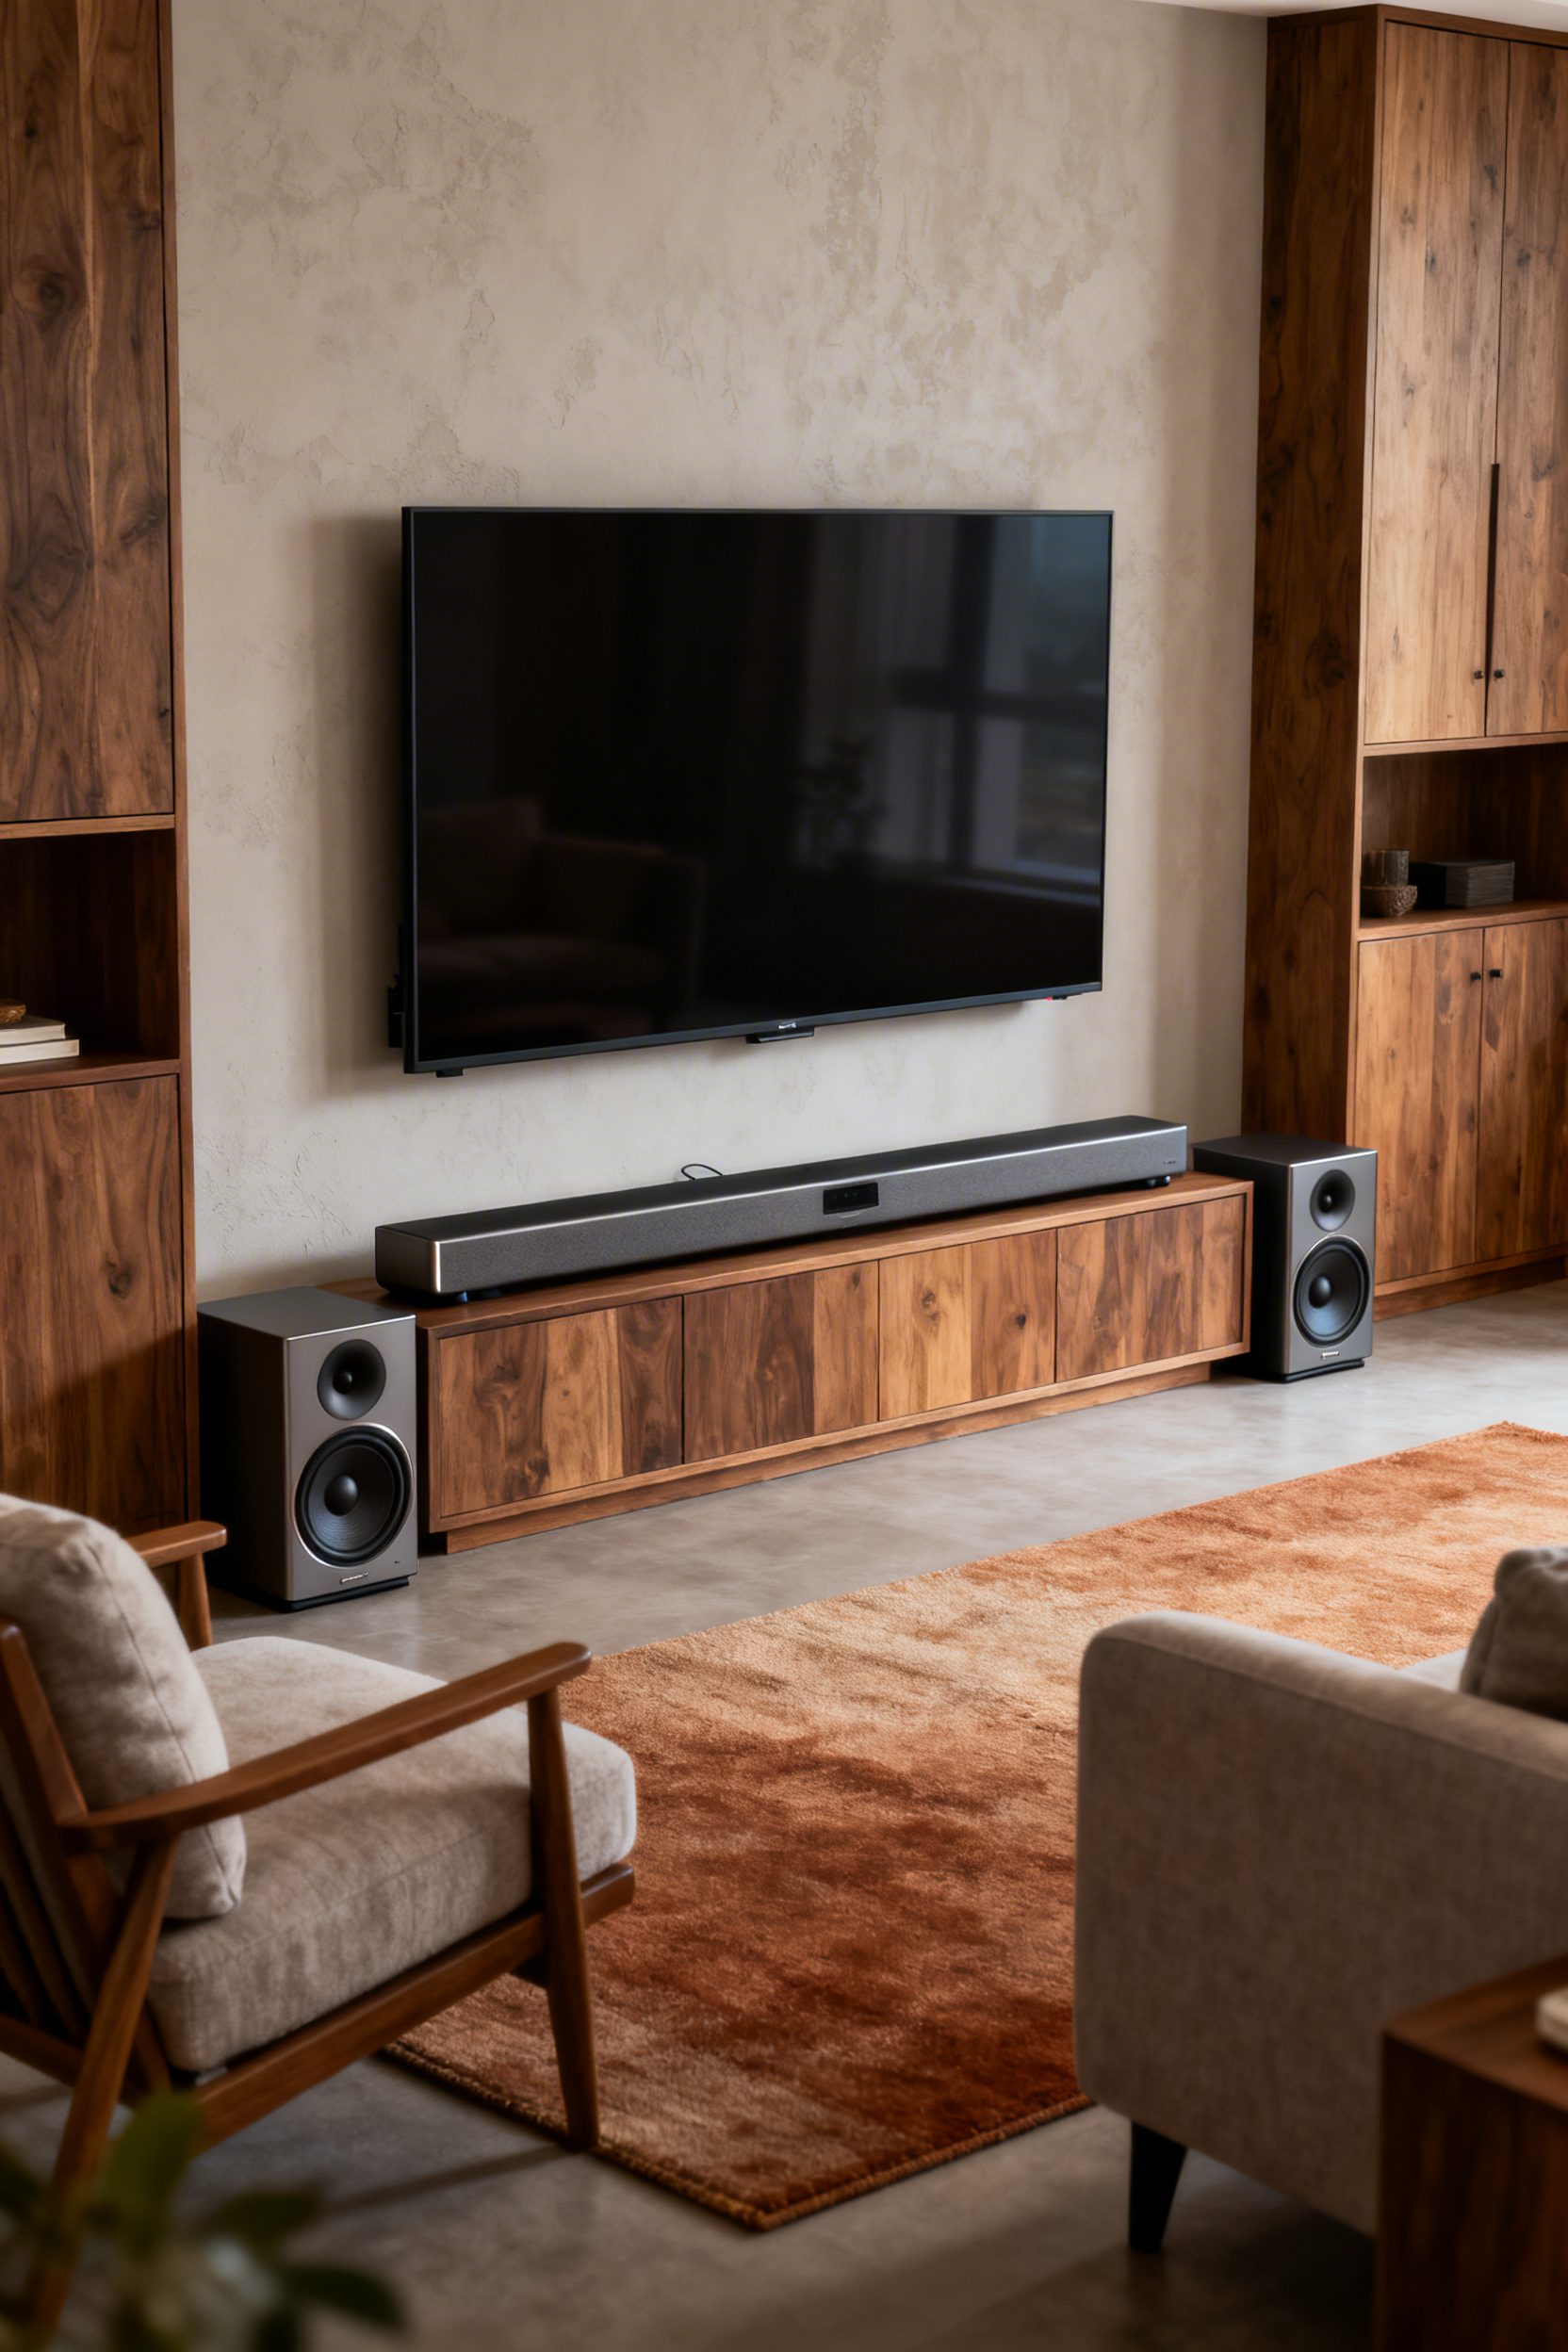
7. Multi‑Piece Soundbars, Cohesive Aesthetics
- Effort Level: Weekend DIY.
- Estimated Budget: 100-500.
- Maintenance Level: Low (requires dusting).
- Best For: Renters.
Opt for a modular soundbar set with wireless surrounds, then color-match the grille fabric to trim or wall paint for visual calm. Keep rear speakers at ear height, about 38 to 42 inches, and place the sub slightly off center to avoid boomy corners.
Hide power and cable runs with paintable cord channels, and float the center bar 2 inches below the TV for clean sightlines.
If your room is open plan, choose a low-profile media shelf to anchor components without competing with decor.
For a modern living room setup, anchor the coffee table styling lightly so audio has clear paths; a restrained vignette from Minimalist Coffee Table Decor pairs well.
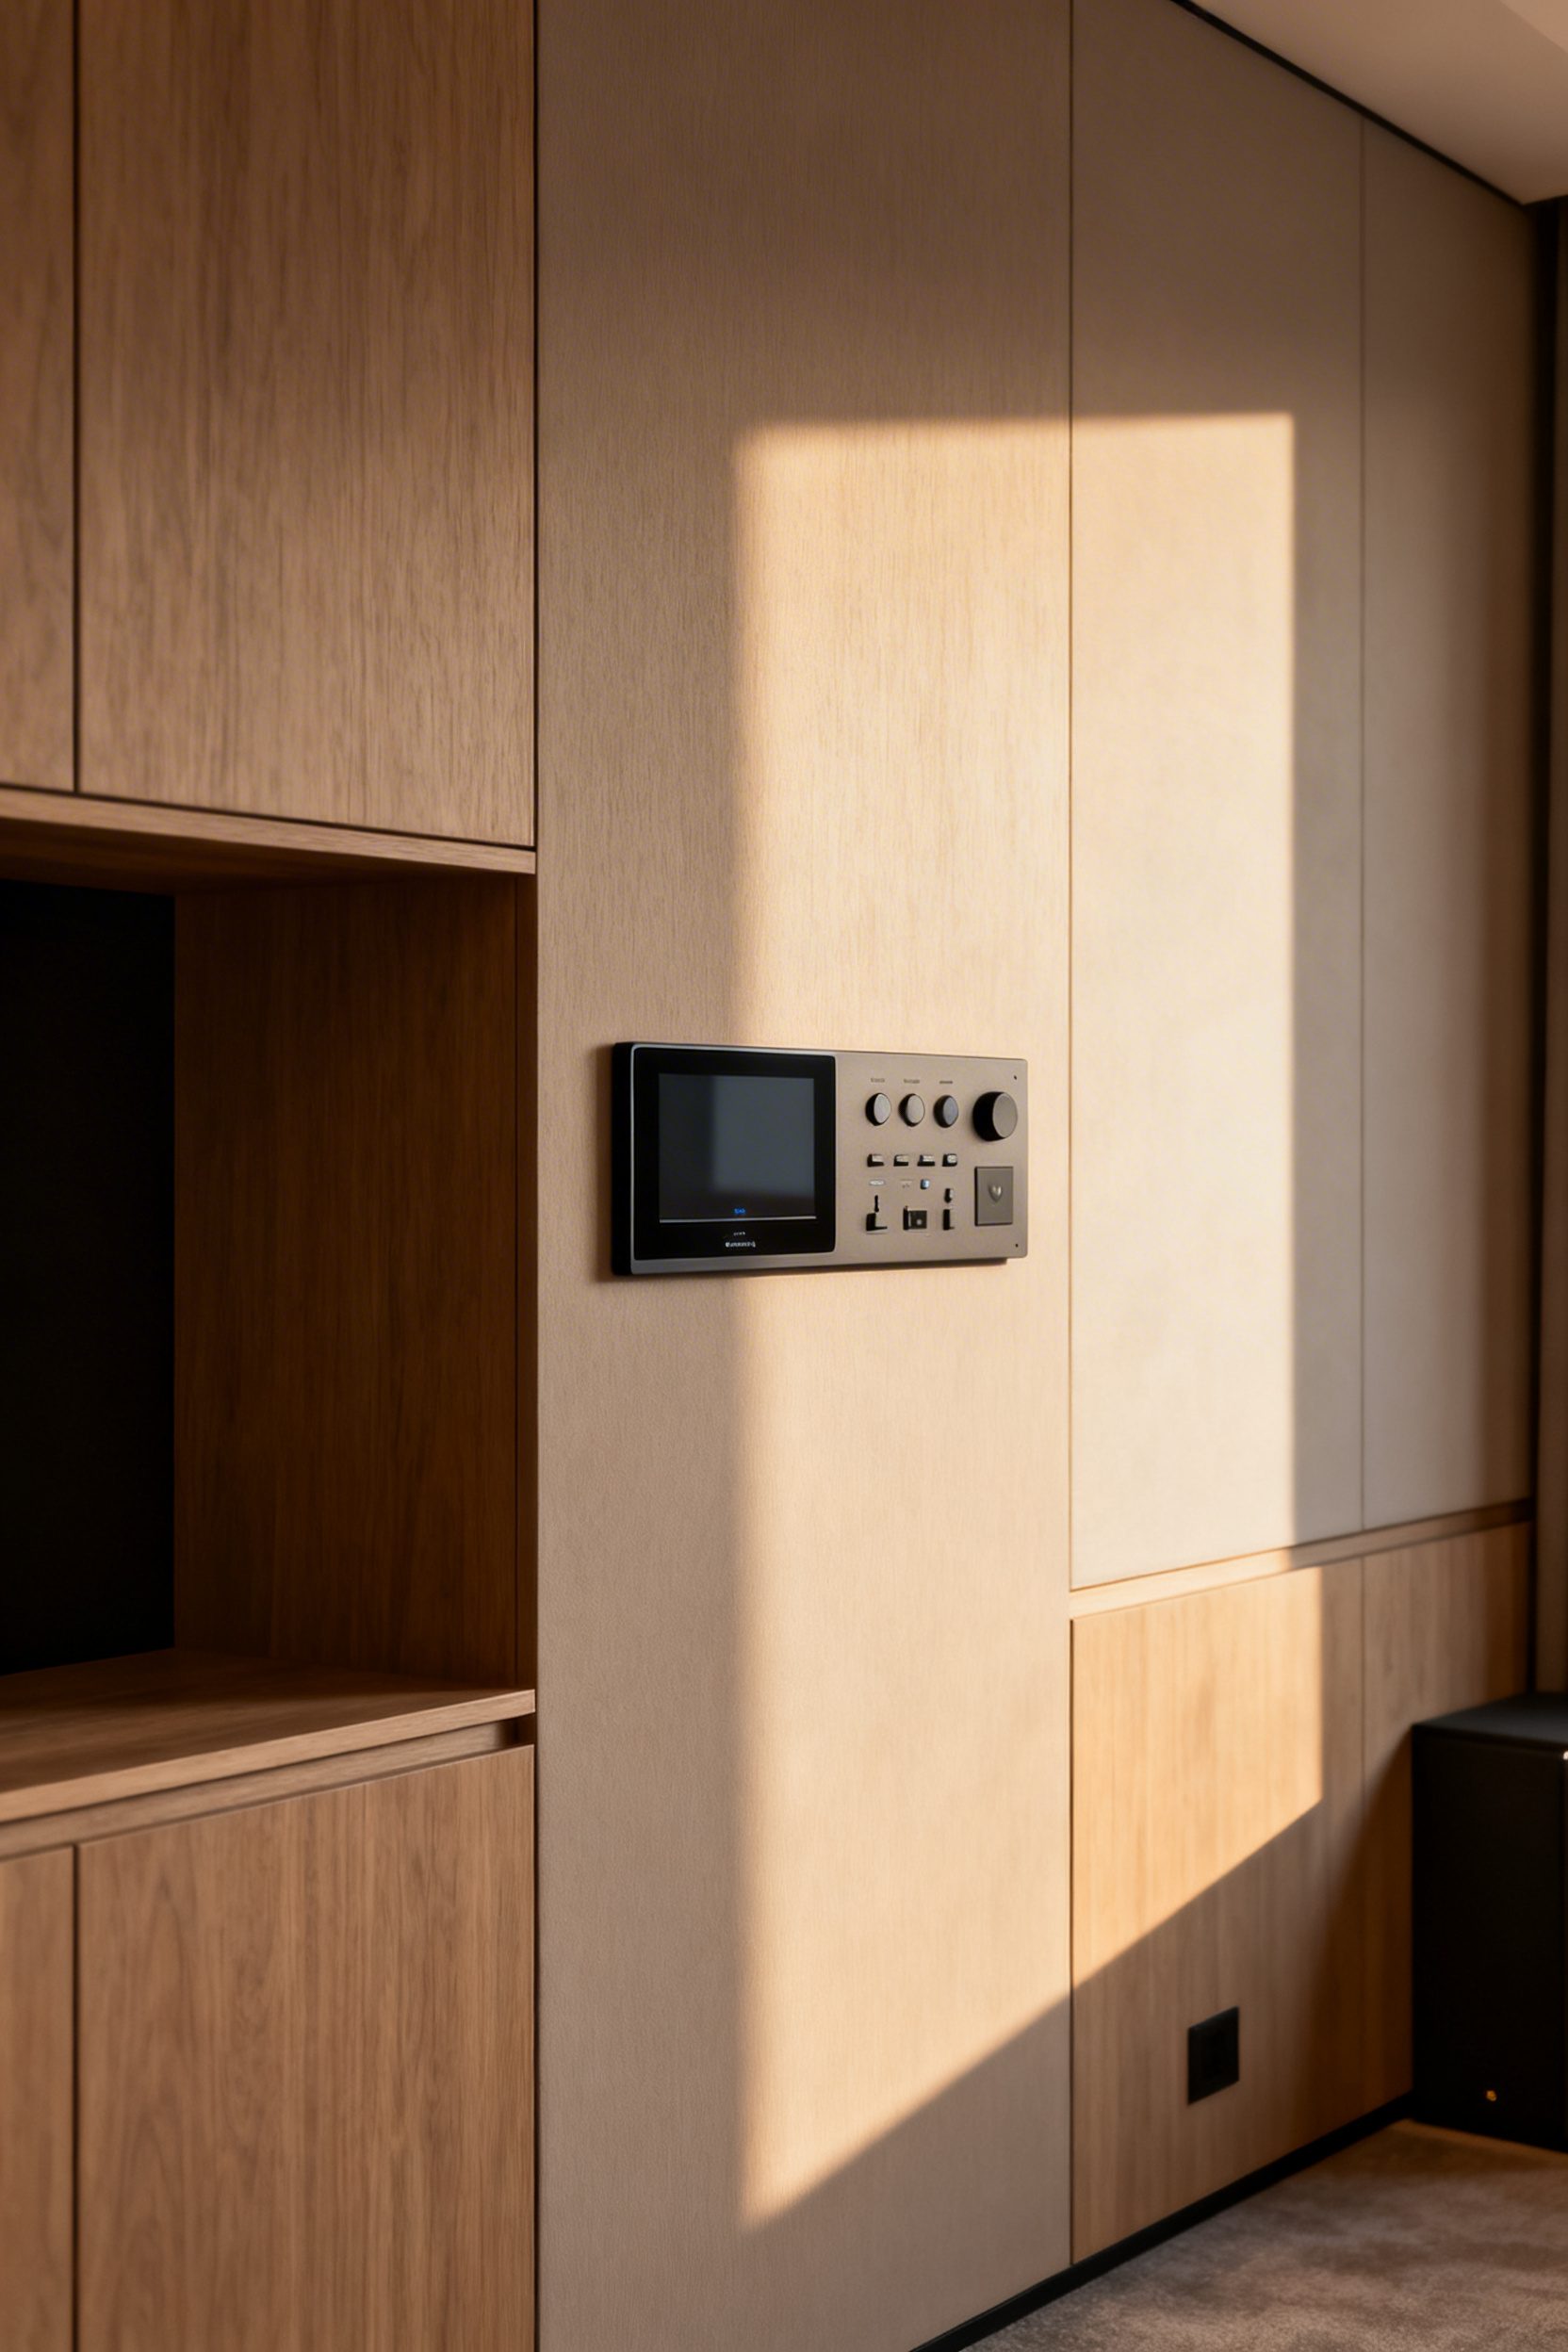
8. Minimalist Control Panels, Clutter‑Free
- Effort Level: Weekend DIY.
- Estimated Budget: 100-500.
- Maintenance Level: Low (occasional firmware updates).
- Best For: Small living rooms.
Consolidate remotes into a single low-profile hub mounted at 44 inches on a side wall, never the front, so the screen wall reads quiet.
Use a 1-gang decora plate to house only essentials, scene lighting, and source select, with labels engraved, not stickered.
Program two scenes only, Movie and Intermission, to avoid decision fatigue and visual clutter. Keep the panel color matched to the wall in an eggshell finish; glossy plates catch the projector spill and distract.
If you are wrapping the screen with a simple surround, borrow trim proportions from Diy Fireplace Surround Ideas for a tidy frame.
Hidden speakers and recessed screens align with this streamlined look, a trend echoed in current home theater installs.
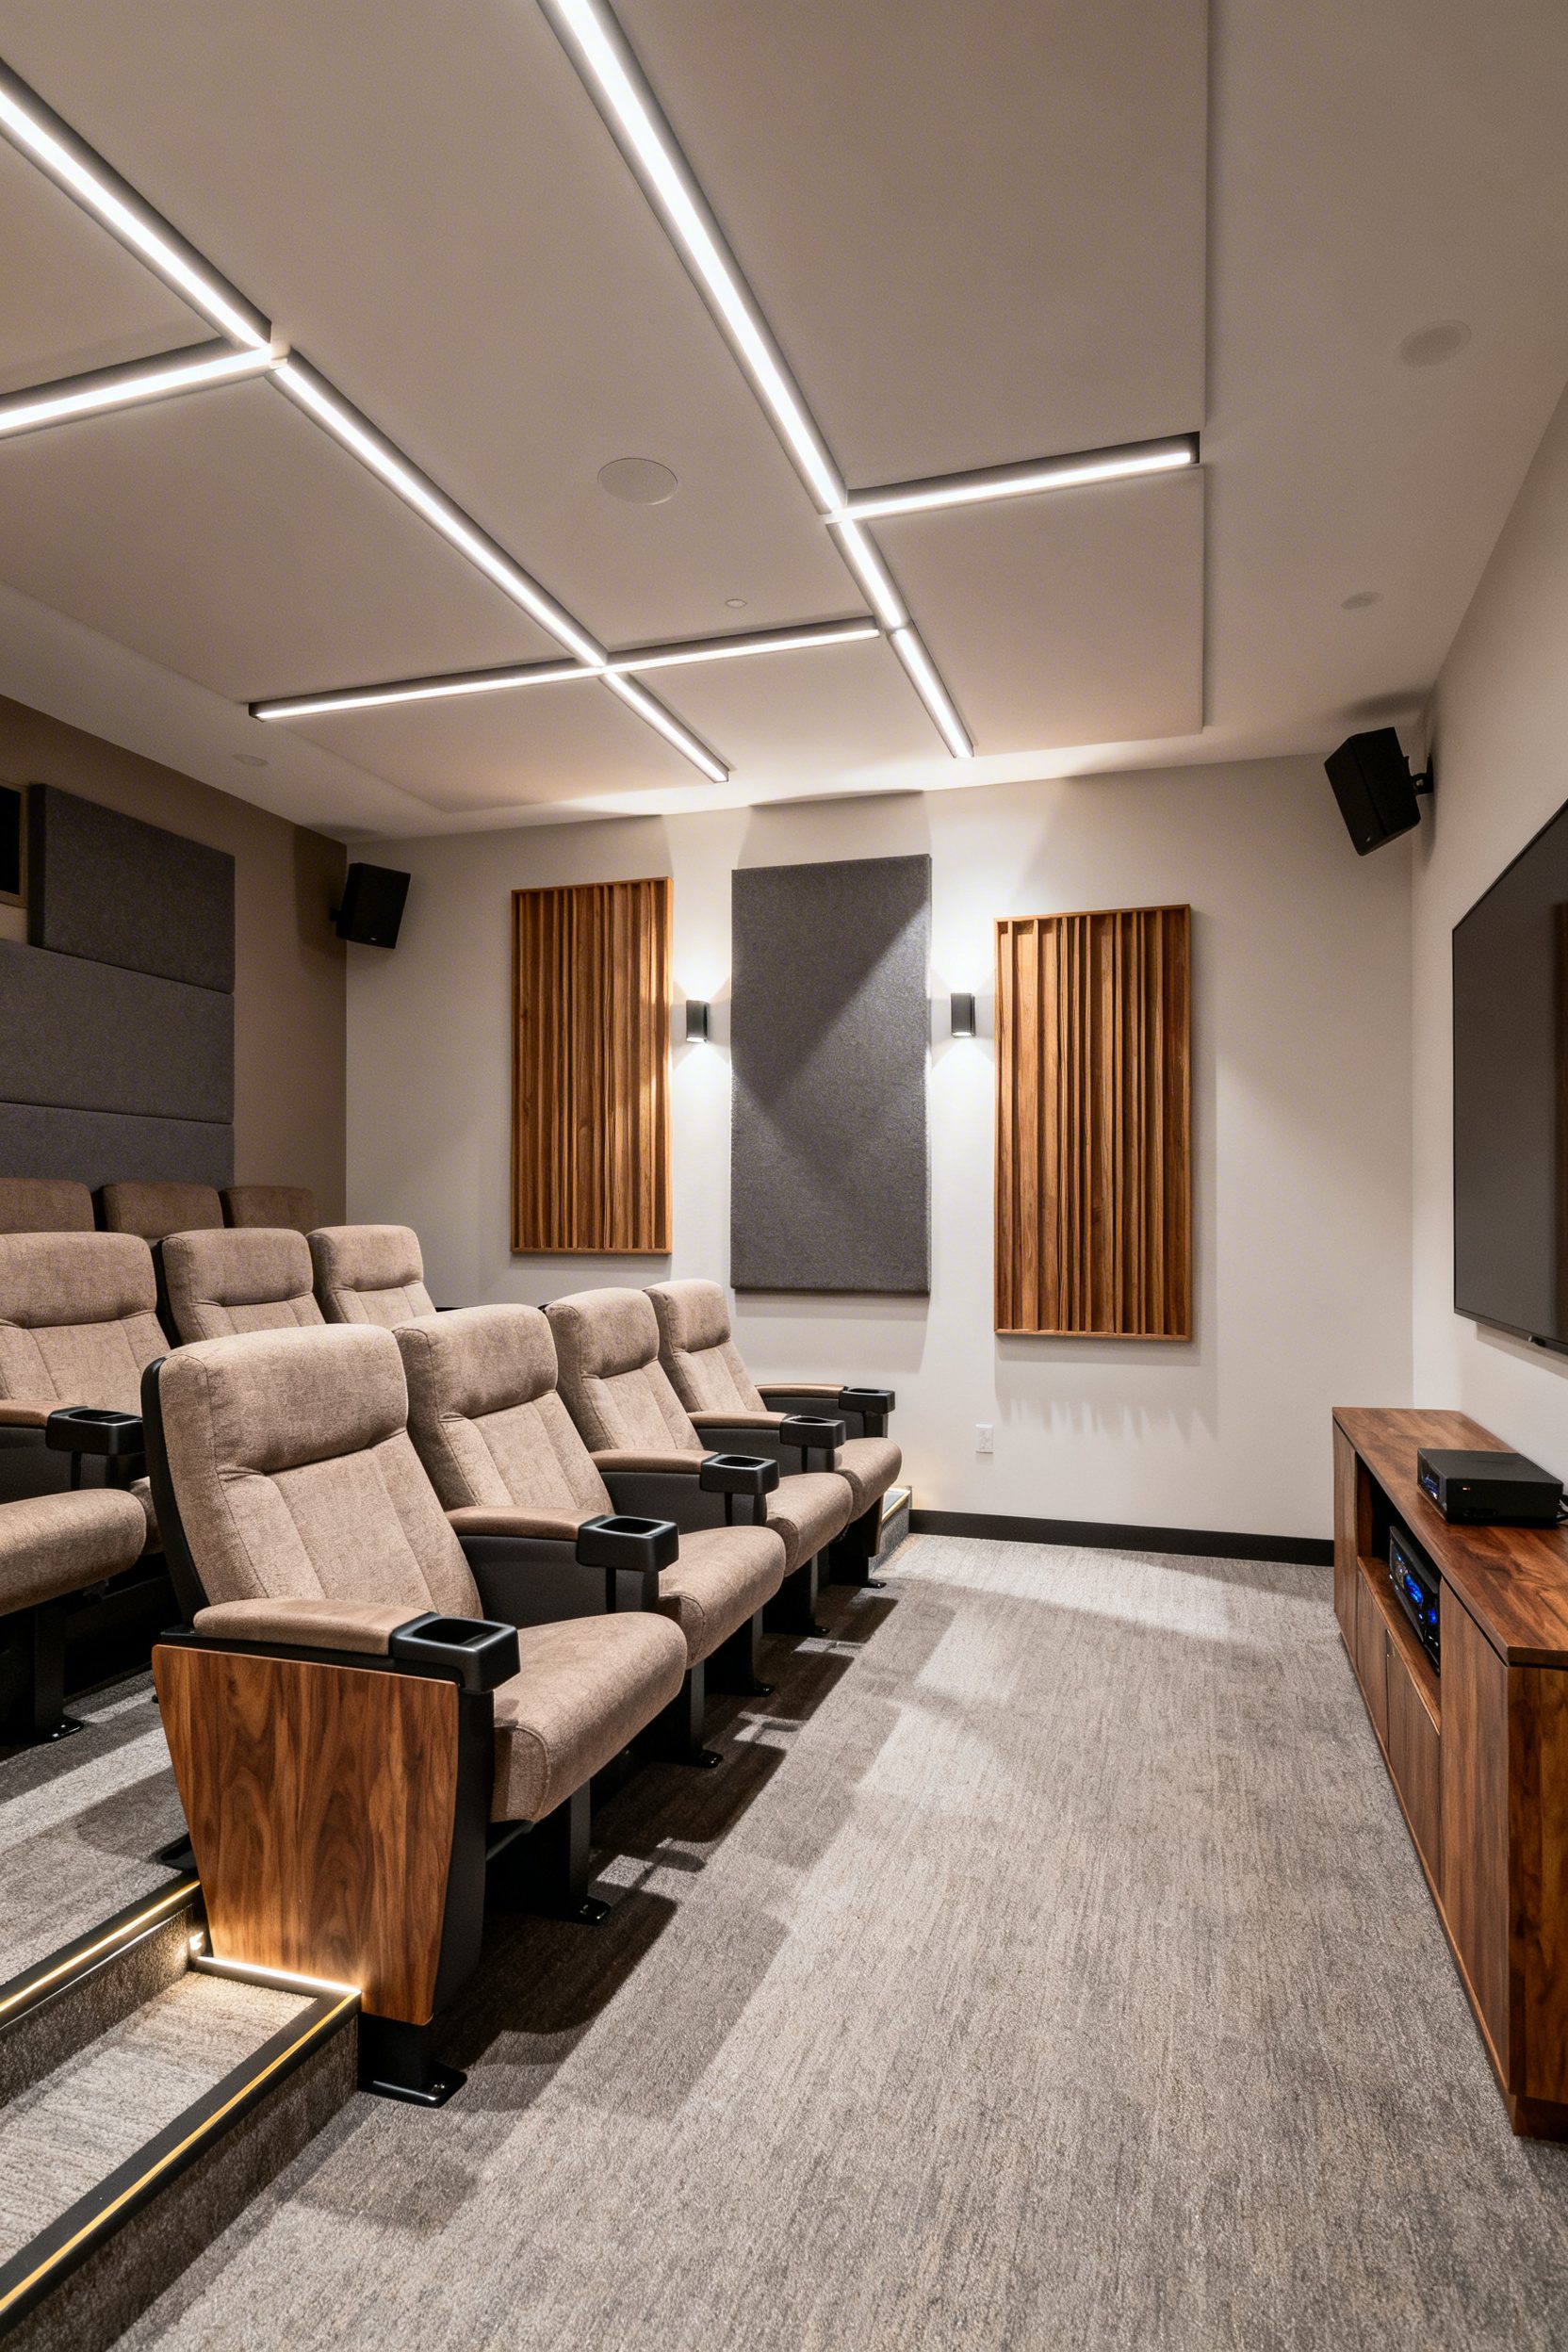
9. Tiered Seating With Plush Textiles
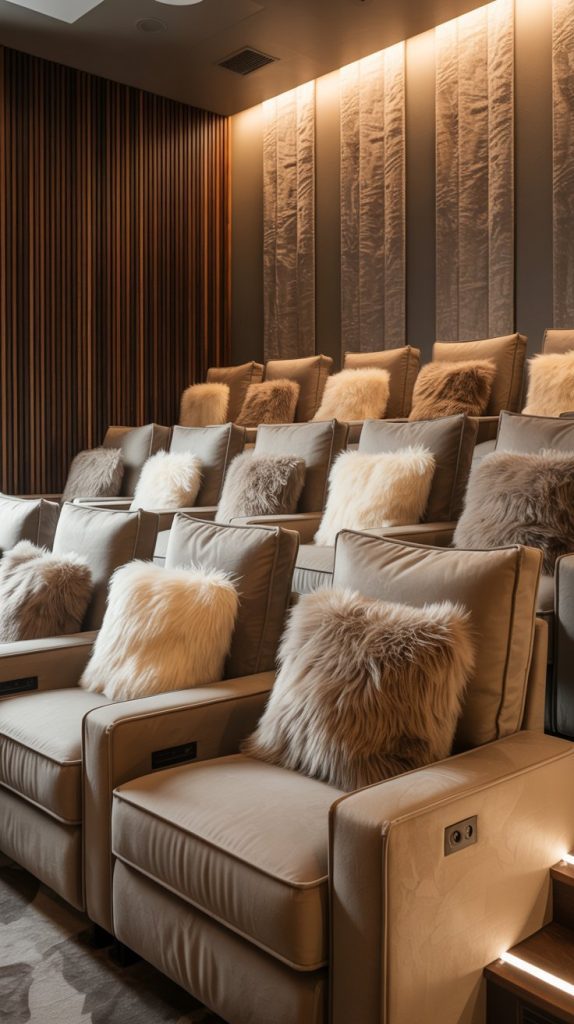
- Effort Level: Weekend DIY.
- Estimated Budget: 500+.
- Maintenance Level: Medium (vacuum upholstery).
- Best For: Dedicated rooms.
Build a 7 to 10 inch riser for the second row using 2×8 framing and rockwool inside for bass trapping, then cap with 3/4 inch plywood and carpet tile. Ensure a 12-inch clear sightline overhead, measure seated eye height at roughly 42 inches to set riser depth.
Choose performance velvet or chenille in deep neutrals; fabric with an 80,000 double rub rating survives marathon nights. Layer a wool rug underfoot and blackout drapery along the side walls to tame reflections and boost perceived contrast.
Keep aisles at a minimum of 24 inches between rows for comfortable pass-throughs. For inspiration on cozy textures that do not skew busy, reference the restraint of Wabi Sabi Home Interior Design and punctuate with only one patterned throw per row.
10. Dark Palettes That Sharpen Contrast
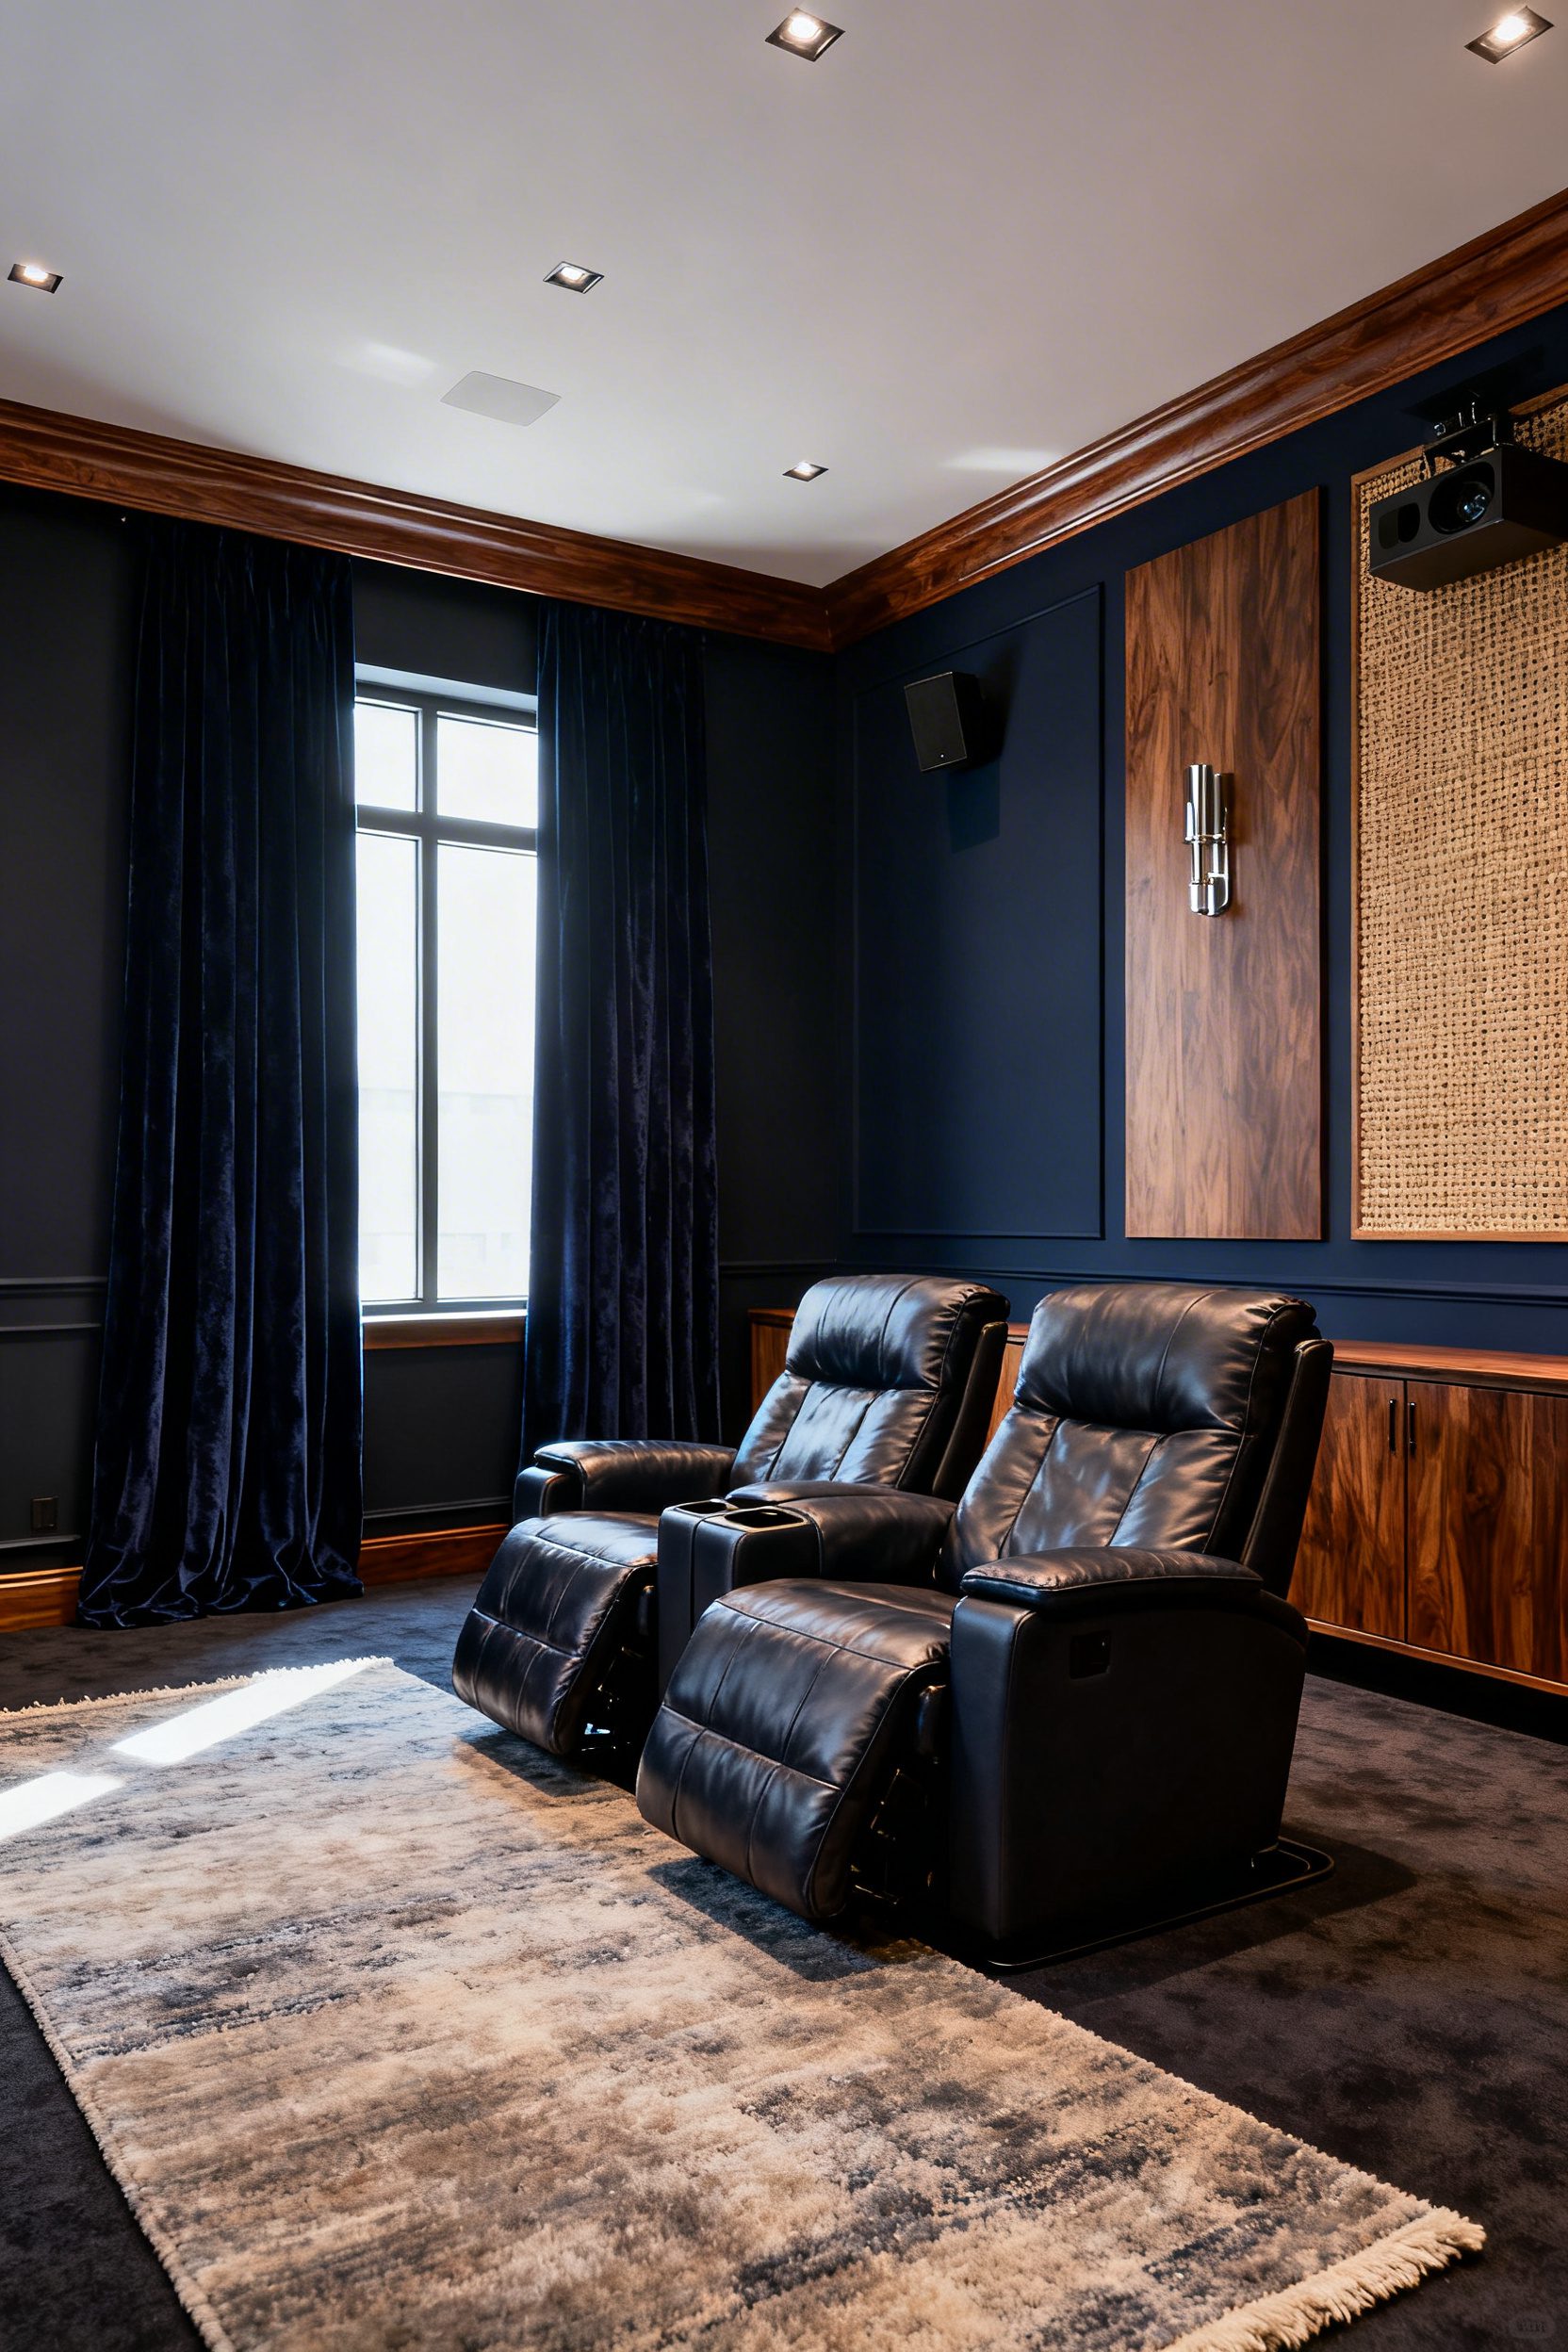
- Effort Level: Weekend DIY.
- Estimated Budget: 100-500.
- Maintenance Level: Low (requires dusting).
- Best For: Dedicated rooms.
Paint walls, ceiling, and trim in a deep matte charcoal, not satin, to kill light bounce and make HDR content feel punchier. Keep sheens consistent, a flat 3 to 5 percent is ideal, and extend the color 18 to 24 inches onto the floor with a dark rug to frame the screen.
Swap glossy furniture for low-reflectance finishes and a narrow-profile media console. If you keep a coffee table, choose a non-glare surface, then style it minimally as in Minimalist Coffee Table Decor, so you do not create hotspots.
Use a single warm 2700K dimmer circuit, plus bias lighting behind the display to reduce eye strain without washing out blacks.
Houzz notes that a clear theme sets tone, so let posters or sconces be the only lighter accents to preserve contrast while adding cinematic character.
11. Cable‑Free Wireless AV Zones
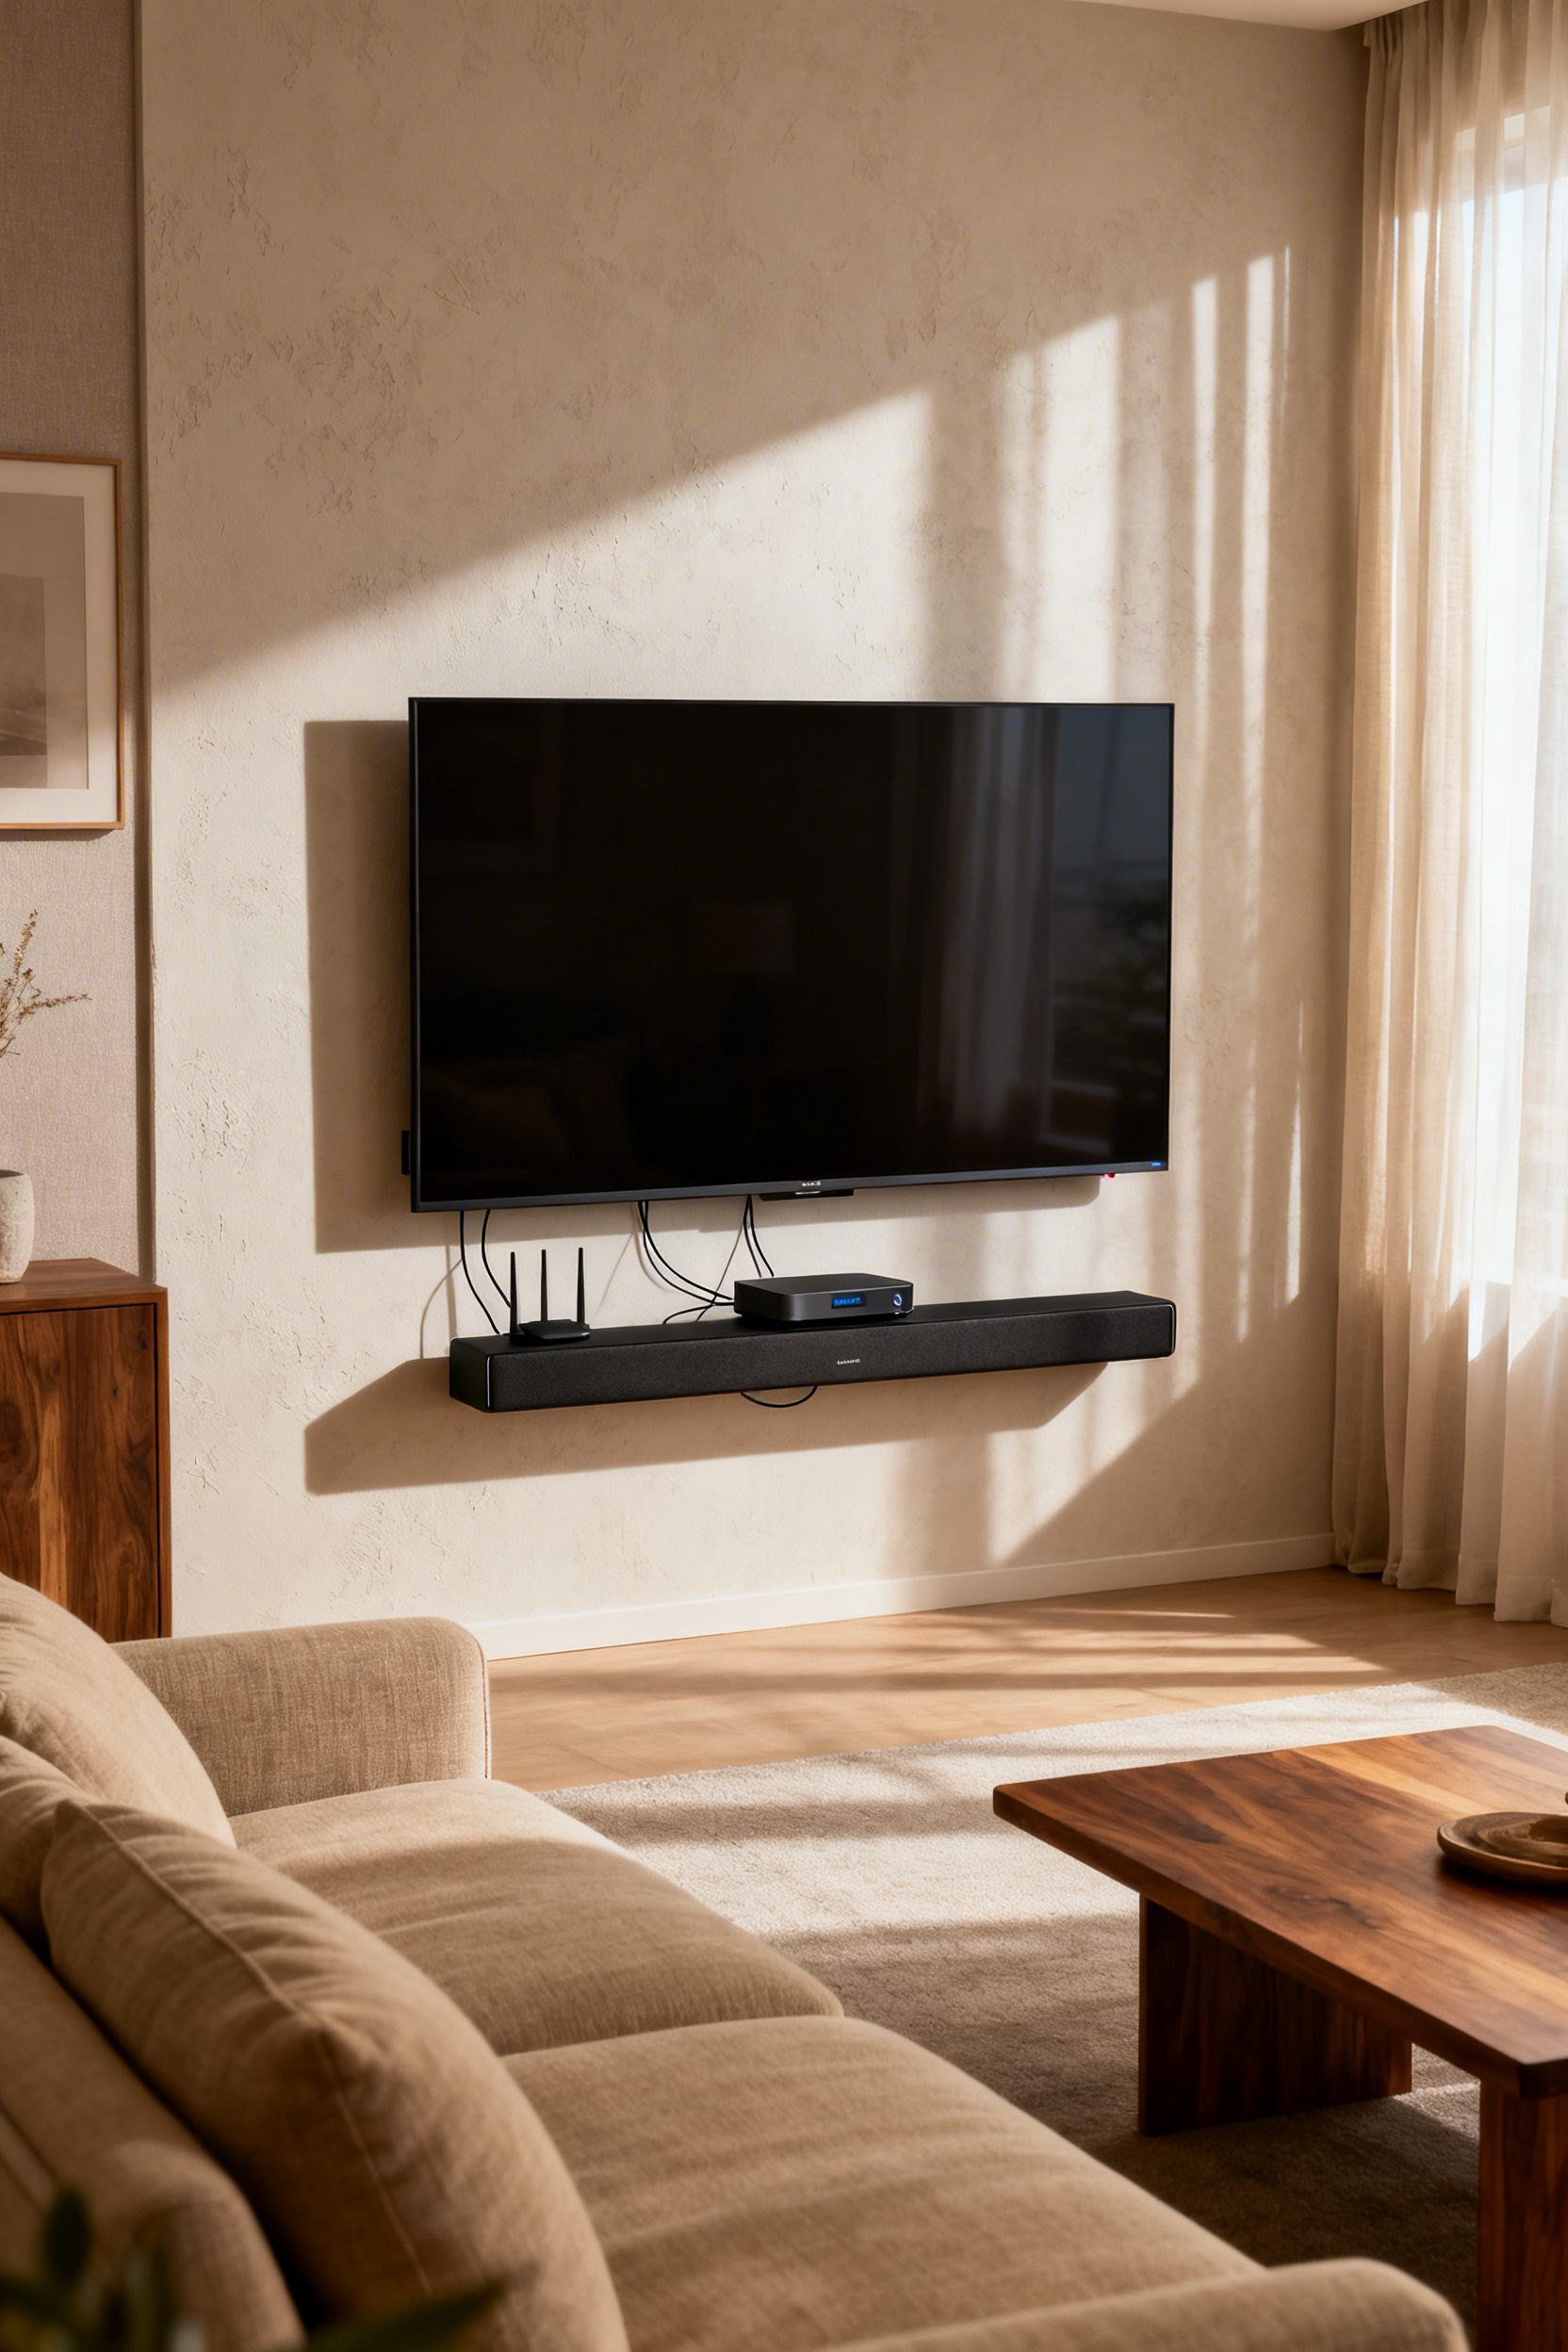
- Effort Level: Weekend DIY.
- Estimated Budget: 500+.
- Maintenance Level: Medium (firmware updates).
- Best For: Renters and multipurpose rooms.
Lean into multi‑piece soundbar ecosystems, a 2026 trend that lets you place compact surrounds without drilling, then hide the sub under a side table. A minimalist control panel and a recessed or roll‑down screen keep sightlines clean in living rooms that double as theaters.
Place your hub near the router, keep a line of sight where possible, and assign a dedicated 5 GHz band for the rear channels to avoid dropouts.
For deeper context on the shift to multi‑module soundbars, see this overview from Digital Trends.
If you plan ambient automation, choose systems that sync lighting with content so scenes fade with the credits, a feature highlighted in recent AV trends. That way, the room reads curated, not gadget-heavy, even when the gear is doing the heavy lifting.
12. Drapery, Carpets, and Bass Control

- Effort Level: Weekend DIY.
- Estimated Budget: 100-500.
- Maintenance Level: Medium (vacuum and lint roll).
- Best For: Echoey living rooms.
Full height, wall‑to‑wall drapery in a dense twill or wool blend tames slap echo around the screen; aim for 2x fabric fullness on a ceiling track. Pair with an 8 by 10 low-pile rug plus a felt pad, and add two bass traps in the front corners to smooth sub response.
When I tried this in my own living room, I hung the curtains too short and stopped 6 inches shy of the wall edge, which left reflections unaddressed. Extending the track past the window line and sealing light gaps made dialog clearer and the center channel feel anchored.
Keep textiles dark and matte to avoid light bloom, then layer a discreet accent pattern on pillows only if they read near solid on camera.
If your theater shares a fireplace wall, plan soft treatments around the surround detailing, or refresh it with ideas from Diy Fireplace Surround Ideas, so acoustics and architecture work together.
13. Built‑In Snack Bars and Niches
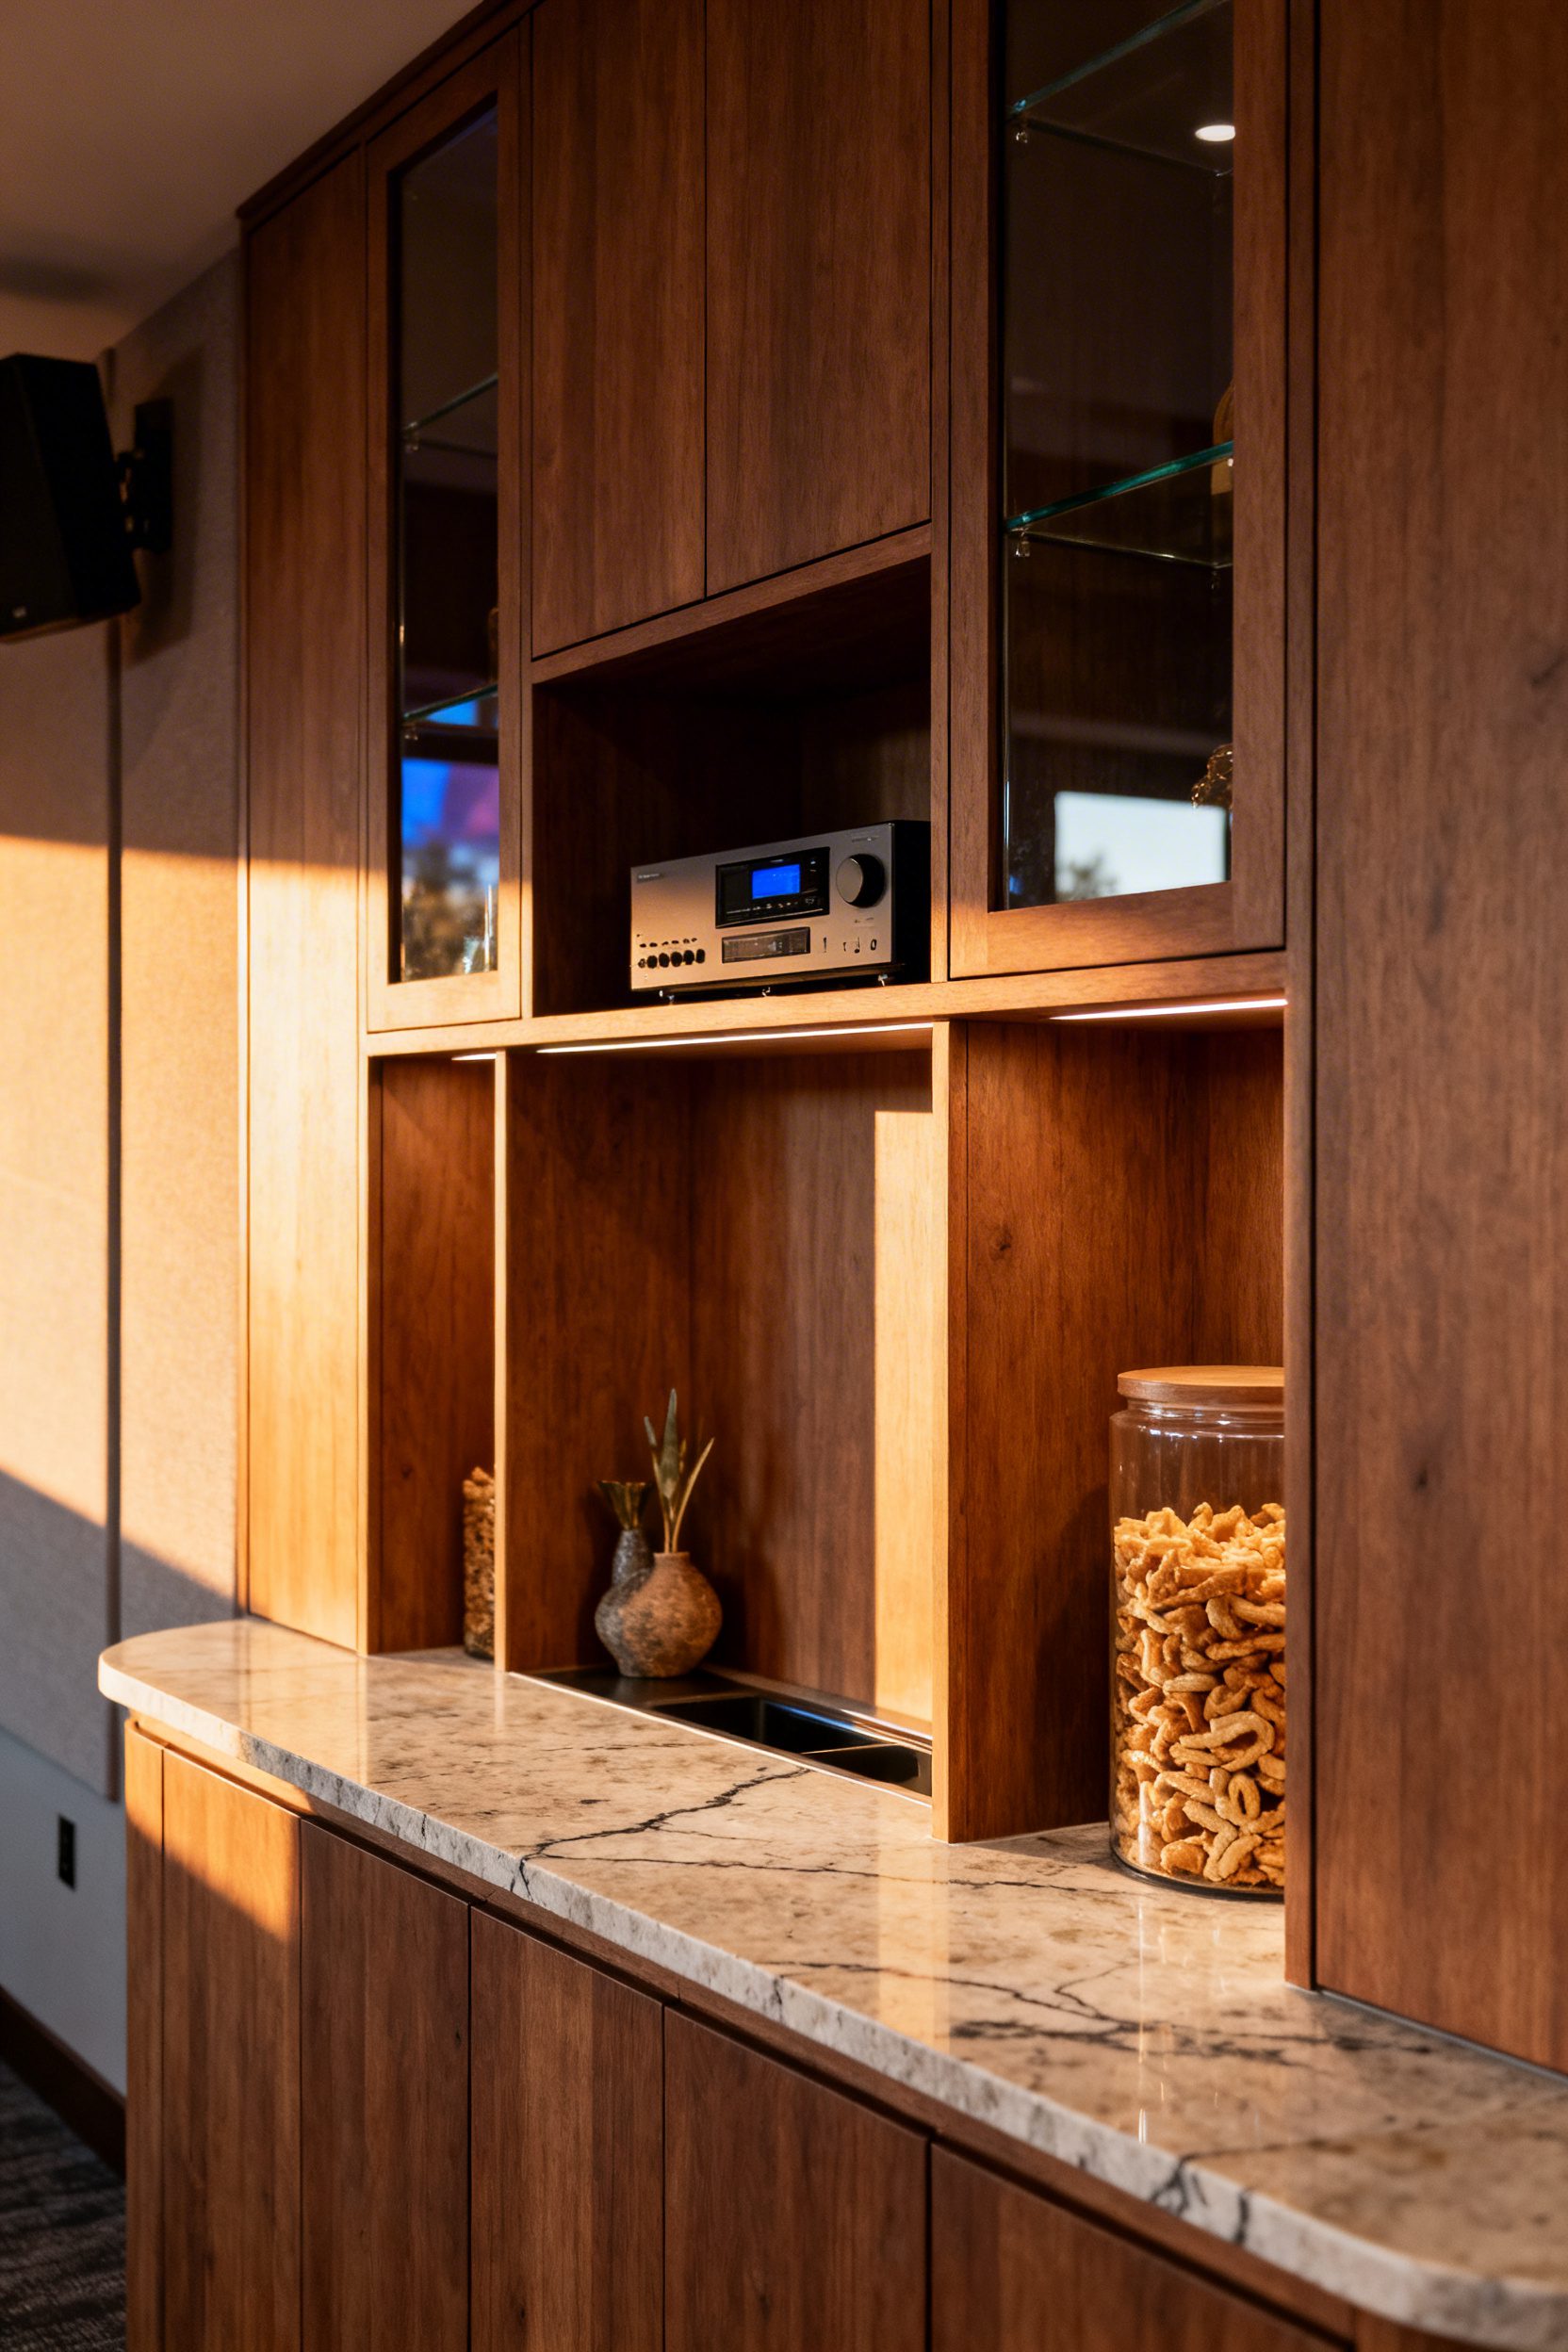
- Effort Level: Weekend DIY.
- Estimated Budget: 100-500.
- Maintenance Level: Low (requires wiping spills).
- Best For: Family rooms and dedicated theaters.
Frame a 12 to 16-inch deep niche between studs and finish it with a durable laminate or quartz top so drinks have a wipeable landing spot. Add a shallow drawer for remotes and a 15-inch undercounter fridge, keeping the door swing clear of the main aisle.
Use LED strip lighting with a low-glare diffuser under the shelf lip, and specify soft-close hinges so rattles do not compete with dialogue.
If your aesthetic leans clean, echo your palette from the seating area, or keep it minimal to complement a restrained setup like you would in Minimalist Coffee Table Decor.
Tile the backsplash in a matte, dark finish to hide splashes, and choose a 24 to 30 inch counter height to align with typical armrest heights for an easy reach.
A common mistake is crowding the niche with appliances; keep clear vent space behind a microwave or skip it entirely to avoid hum during quiet scenes.
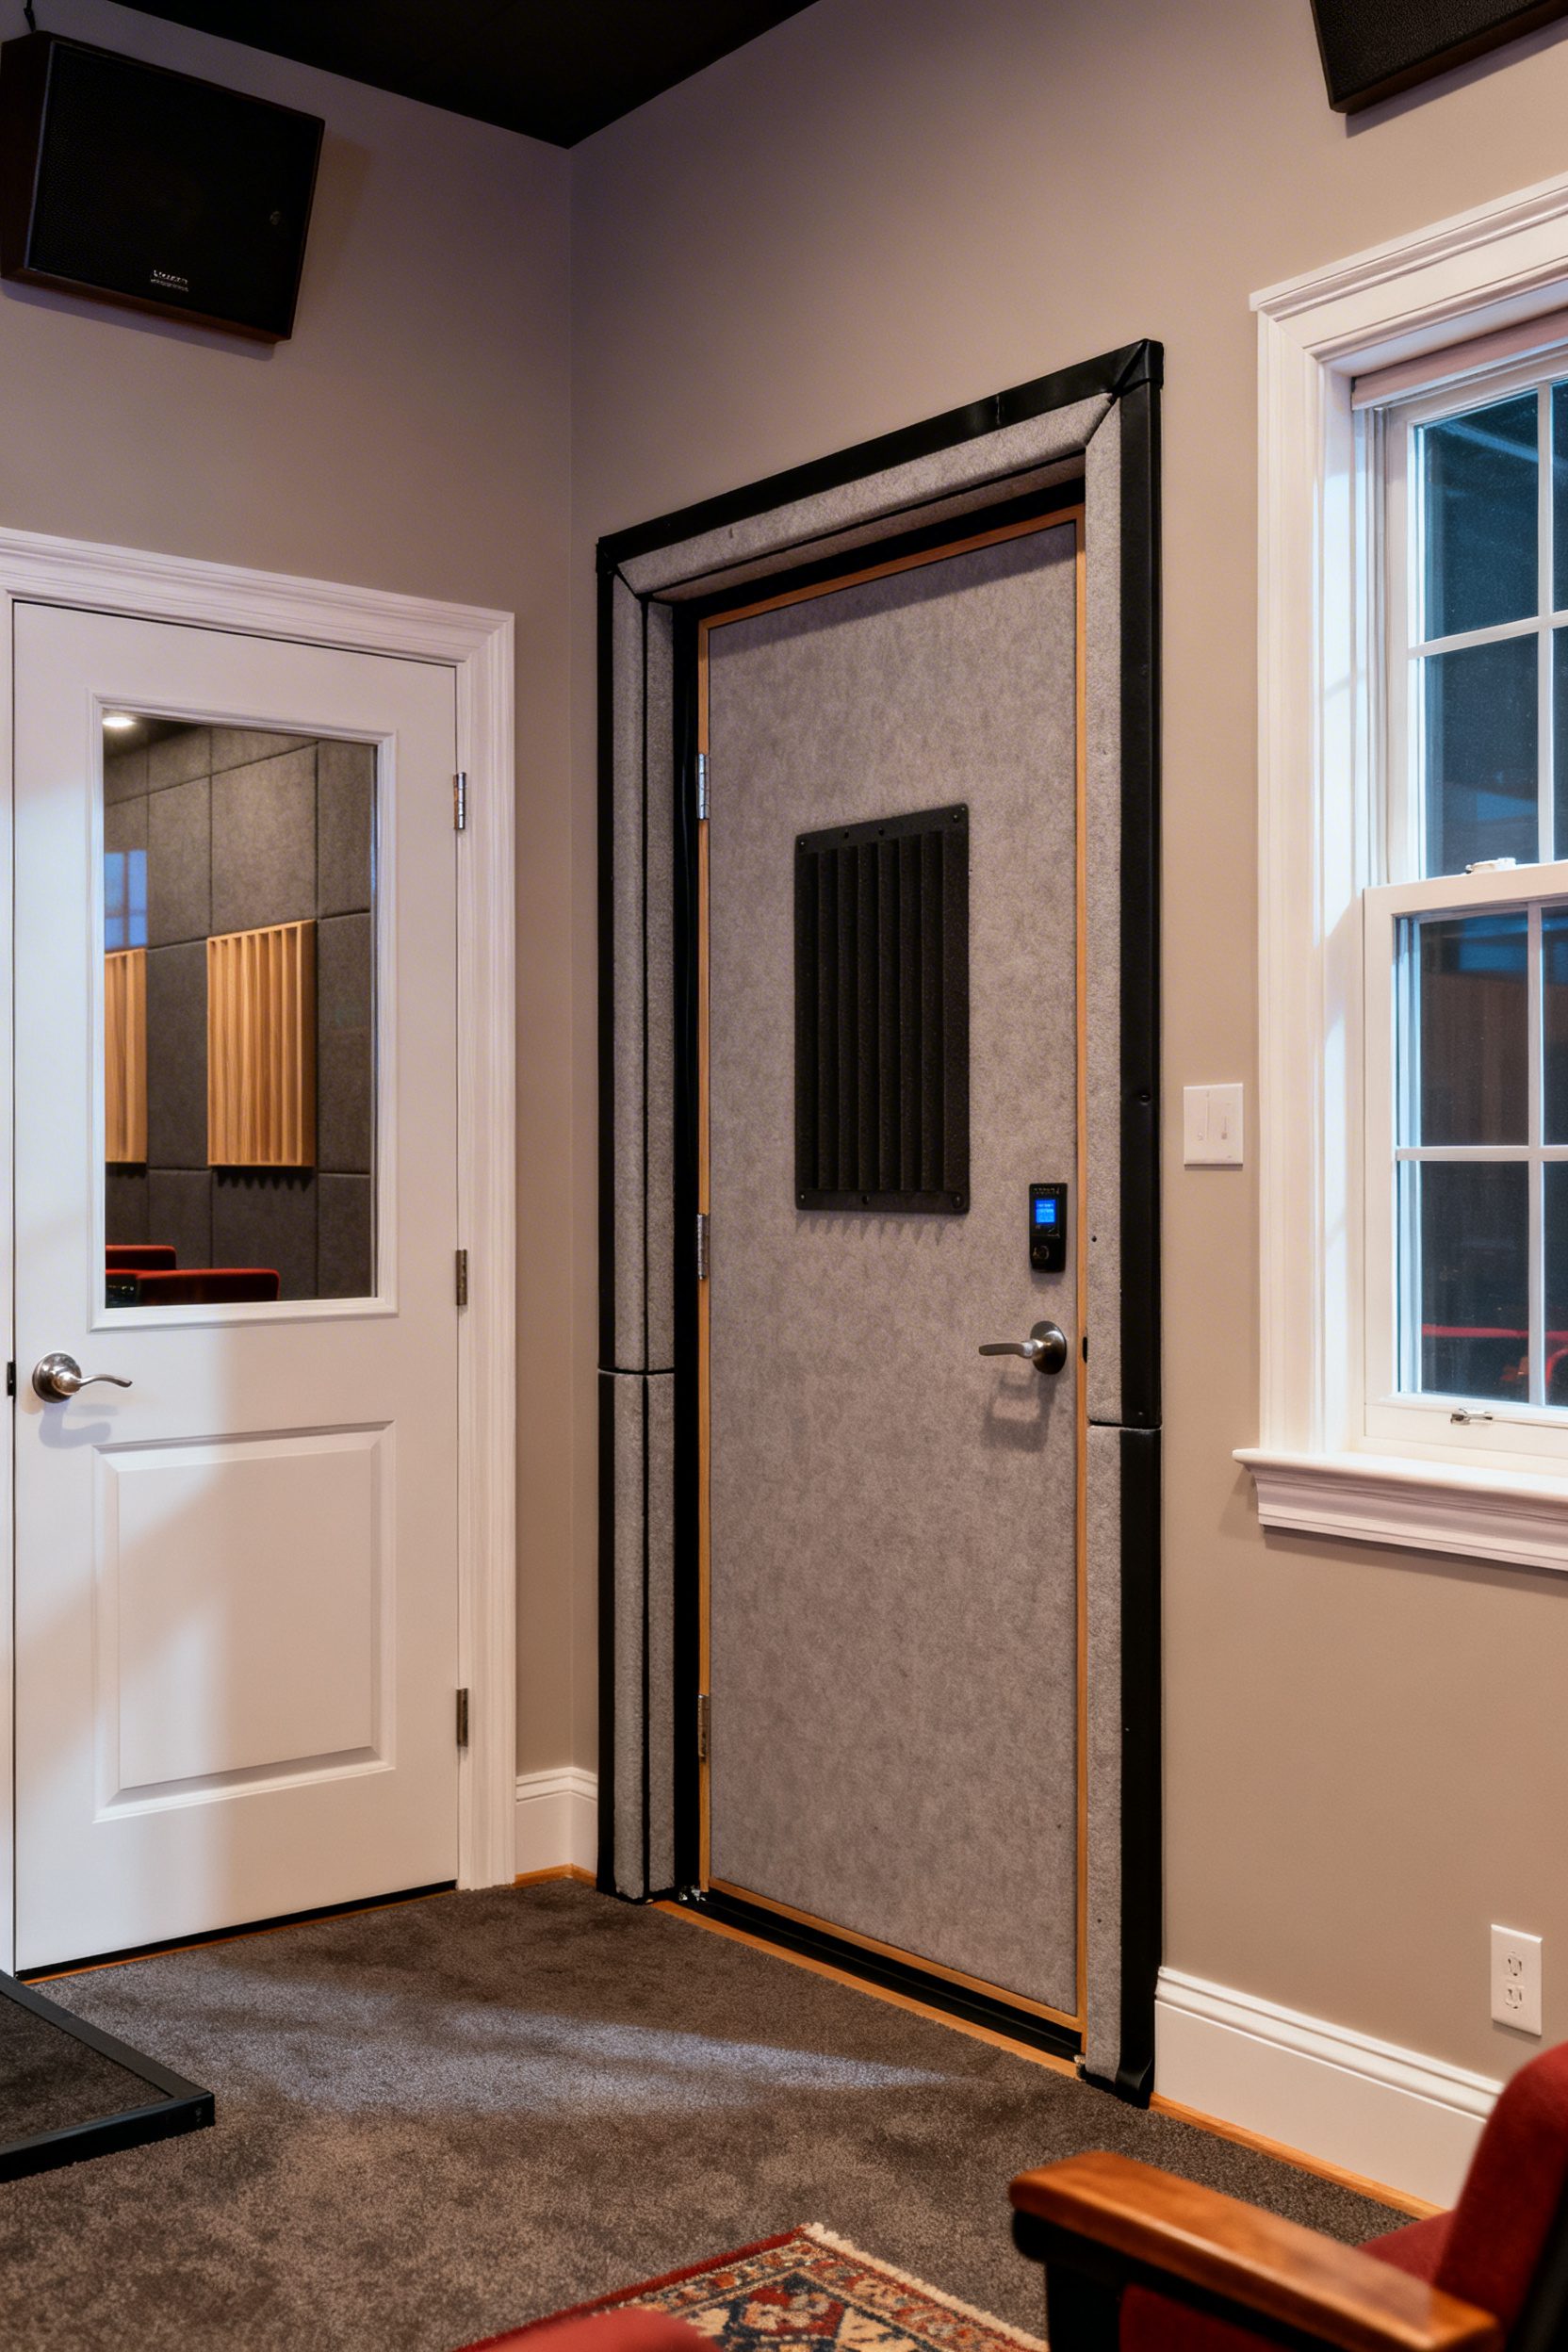
14. Sound‑Isolating Doors and Seals
- Effort Level: 500+.
- Estimated Budget: 500+.
- Maintenance Level: Low (inspect seals quarterly).
- Best For: Dedicated rooms and open-plan zones off bedrooms.
Swap hollow-core doors for solid-core slabs with perimeter compression gaskets and an automatic drop seal at the threshold.
Aim for tight tolerances, a 1/8 inch gap or less around the frame, and backfill the jamb with acoustic sealant, not foam, for a cleaner STC gain.
When I tried this in my own living room, the upgrade only worked after I added a door sweep that actually contacted the floor and replaced a squeaky latch with a magnetic one.
The first install leaked at the hinge side, so I shimmed the hinges slightly and re-routed the strike plate to center the latch, which cut the hallway spill by a noticeable margin.
If you are chasing extra isolation, couple the door work with a simple wall treatment like fabric-wrapped panels, guided by current theater trends on hidden tech and controlled lighting from this industry overview.
For a complementary decor approach, see decorative pillow ideas.
FAQ
Most simple, non-structural niches do not require a permit, but always verify with your local building department. Avoid cutting into load-bearing walls, and use a stud finder to reroute or protect any electrical lines you uncover.
Yes, a solid-core door provides a measurable improvement over hollow-core, especially when paired with quality seals and a drop threshold. The combination can significantly reduce mid to high frequency bleed, which is what typically disturbs adjacent rooms.
Laminate is budget-friendly and durable, while quartz offers superior stain resistance with a sleek finish. Choose a matte surface to minimize light reflections that can distract during dark scenes.
Opt for dimmable, indirect LEDs with a 2700K to 3000K temperature and shielded profiles aimed away from the screen. Place switches or smart controls at the entry so you can settle seats before dimming to viewing levels.