

The wall above your couch is the single most powerful canvas in a living room. When I help clients plan above-couch wall decor farmhouse projects, I start with proportion and purpose, not trends.
That phrase above couch wall decor farmhouse should guide your decisions: think welcoming layers, durable textures, and a scale that reads correct from across the room.
In my experience, homeowners often pick pieces they love but ignore sightlines and seating scale. A well-planned farmhouse grouping feels effortless because each element, from the frame width to the wood finish, answers a clear functional choice.
Below, I lay out exact measurement rules, realistic cost expectations, and material trade-offs so you can execute a warm farmhouse look that lasts.
- Choosing the Right Scale: Measuring Above-Couch Proportions
- Budget Breakdown: Typical Costs for Farmhouse Wall Groupings
- Material Choices: Wood, Metal, and Textile Explained
- Creating European-Farmhouse Symmetry with Architectural Pieces
- Gallery Wall Layouts That Anchor a Farmhouse Sofa
- Layering Textures: Shelves, Signs, and Vintage Finds
- Installation Guide: Hardware, Studs, and Safe Hanging Tips
- Styling Tips for Seasonal Swaps and Long-Term Cohesion
- FAQ
- Final Thoughts
- Related Decor Reads
Choosing the Right Scale: Measuring Above-Couch Proportions
Why scale matters more than style?
Scale determines whether wall decor looks intentionally curated or accidentally clipped. A piece too small will vanish over your sofa, while one too large will overwhelm the furniture and make the room feel cramped.
I continually see clients choose art by emotional pull, then regret the imbalance; measuring first prevents that misstep.
Concrete measurement rules I use with clients
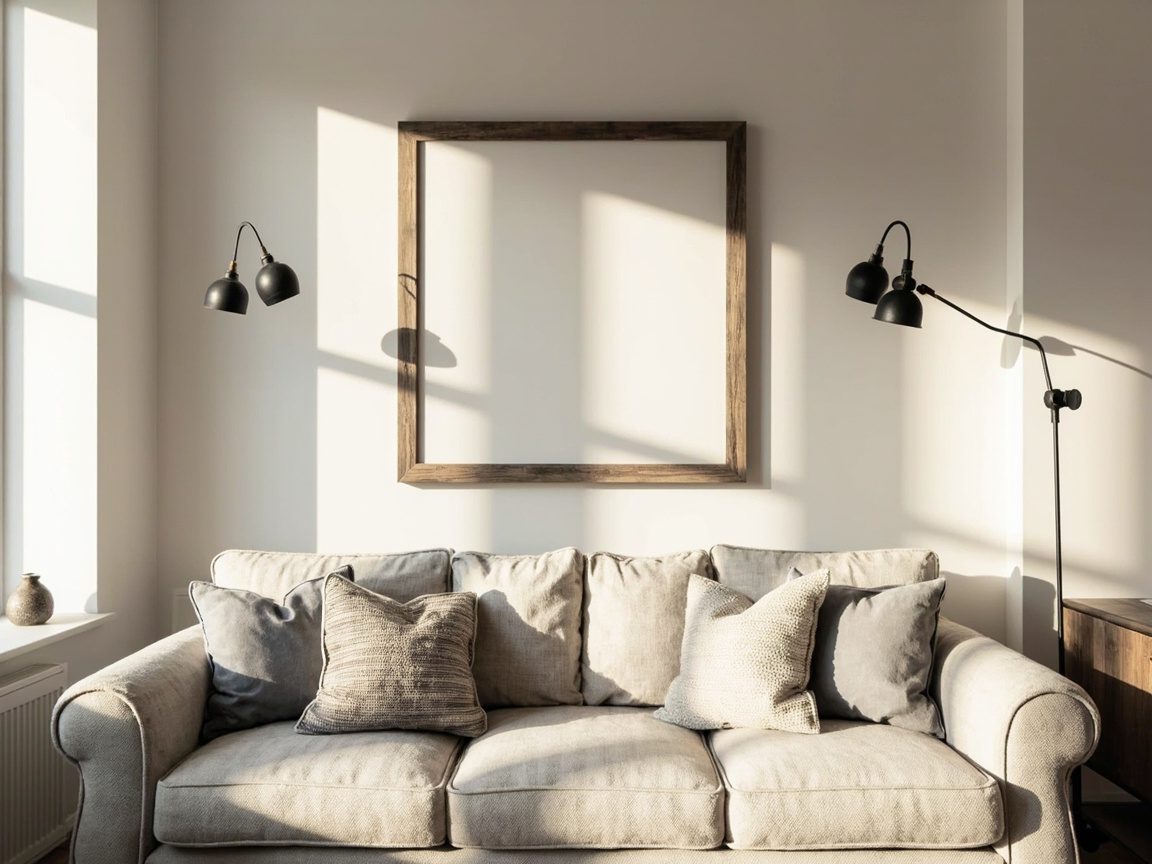
- Aim for wall art or a grouping to cover about 60% to 75% of the couch width for a single focal piece, or for a gallery, keep the outermost edge of the grouping within those bounds.
- Leave 6 to 12 inches of space between the top of the couch back and the bottom of the artwork for a cohesive visual gap. Shorter backs and low-profile sofas trend toward 6 inches; taller channel-tufted backs need closer to 12.
- For rooms with low ceilings, lower the artwork so its midpoint sits roughly 56 to 60 inches from the floor; for taller rooms, center the grouping a few inches higher so sightlines from standing positions remain comfortable.
Quick reference table for common sofa sizes
| Sofa Width | Target Artwork Width (60–75%) | Vertical Gap Above Sofa | Recommended Number of Pieces |
|---|---|---|---|
| 60 inches (small loveseat) | 36–45 inches | 6–10 inches | 1 medium piece or 3 small pieces |
| 78 inches (standard sofa) | 47–59 inches | 6–12 inches | 1 large piece or 3–5 grouped pieces |
| 96 inches (sectional/sofa + chaise) | 58–72 inches | 8–12 inches | 1 oversized piece, or a balanced triptych/panel set |
Budget Breakdown: Typical Costs for Farmhouse Wall Groupings
What influences price most?
Materials, finishing, and framing push costs up quickly, while prints, DIY frames, and thrifted finds keep budgets modest.
Custom reclaimed wood signs, hand-forged metal, or antique frames bring authentic farmhouse character, but expect to pay more for craftsmanship and restoration.
Real-world cost tiers I recommend
| Most homeowners are aiming for an authentic but affordable style | Typical Spend | What You Get | When to Choose |
|---|---|---|---|
| Economy | $50–$200 | Prints, simple frames, thrifted finds, DIY shiplap panels | Renters, short-term refreshes, starter farmhouse look |
| Mid-range | $200–$800 | Quality framed prints, small reclaimed wood signs, mixed-material groupings | Most homeowners aiming for authentic but affordable style |
| High-end | $800–$3000+ | Custom salvaged wood pieces, artisan metalwork, professionally framed textiles | Investment pieces, focal art for main living areas |
Cost-saving strategies I use with clients
- Mix one investment piece with budget-friendly companions to get visual impact without overspending.
- Repurpose vintage frames by updating the backing and matting, which often costs less than new custom framing.
- Consider replicated finishes for metal or wood, then add a small authentic accent, like a reclaimed bracket, to anchor the look.
Material Choices: Wood, Metal, and Textile Explained
Wood: warmth, grain, and finish choices
Wood reads as the most “farmhouse” material because it adds natural warmth and visible grain.
Lighter-washed woods create airy European-farmhouse vibes, while darker, distressed planks bring cozy, lived-in character.
When choosing, check for kiln-dried or sealed wood to avoid future warping, especially above heat sources.
| Material | Visual Effect | Durability | Maintenance |
|---|---|---|---|
| Reclaimed wood | Authentic, textured, rich patina | High if sealed | Occasional dusting, reseal every few years if exposed |
| New wood, whitewash | Light, airy, modern farmhouse | High | Simple cleaning, touch-up paint for chips |
Metal: contrast, scale, and finish options
Metal brings crisp lines and visual contrast to soften wood-heavy rooms. Galvanized finishes and black iron are classic farmhouse choices, while aged brass or bronze adds a vintage cottage warmth.
For larger pieces, choose lighter gauge metals or hollow constructions to reduce weight and simplify hanging.
| Metal Type | Farmhouse Use | Weight Consideration | Care |
|---|---|---|---|
| Black iron | Graphic silhouettes, frames, signage | Medium | Wipe with damp cloth, avoid harsh cleaners |
| Galvanized steel | Industrial-look accents, trays | Light–medium | Resists rust, occasional dry dusting |
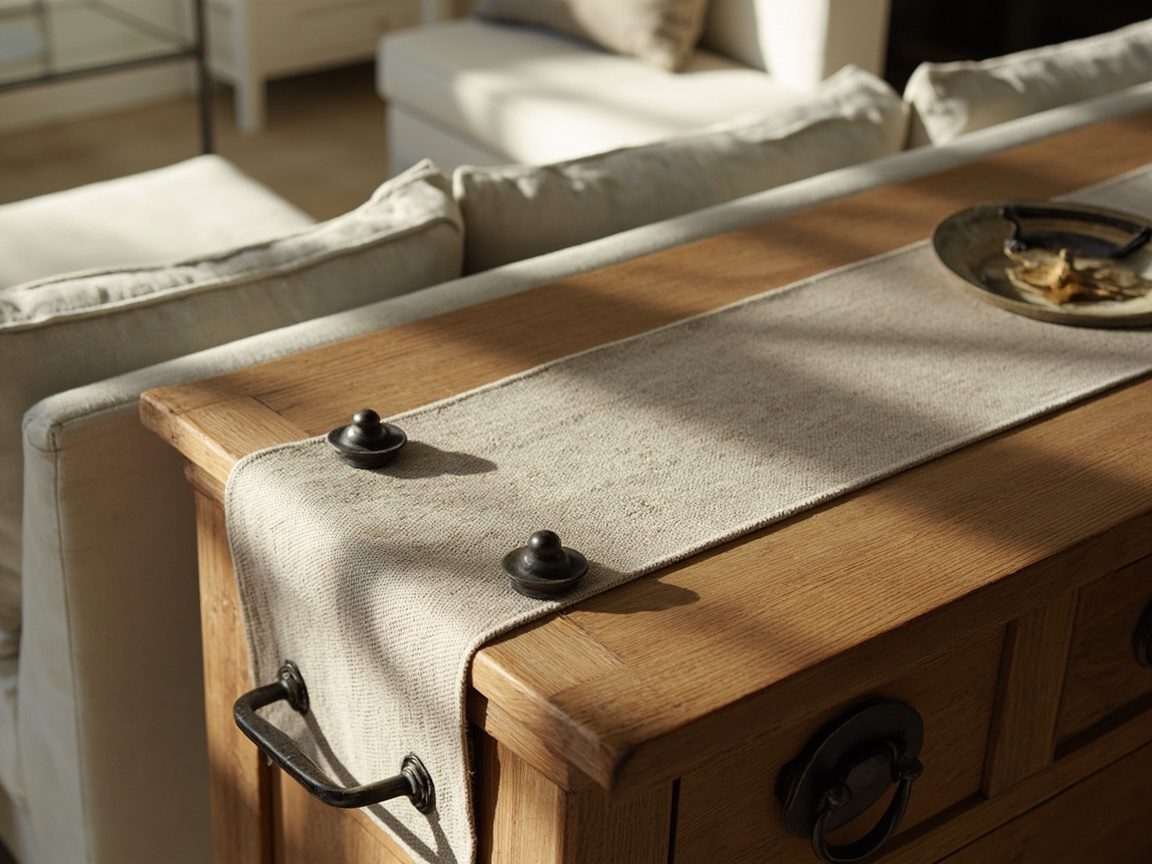
Textile: softness, sound, and layered texture
Textiles, such as woven wall hangings and linen panels, introduce soft texture and acoustic benefits. They balance harder materials and make a seating area feel more intimate.
Choose neutral, slightly imperfect weaves to keep the farmhouse authenticity, and mount fabrics on lightweight stretchers for an easy, reversible installation.
| Stretch over a frame and secure with French cleats | Visual/Acoustic Benefit | Installation Tip |
|---|---|---|
| Woven wall hanging | Soft texture, reduces echo | Use a single centered hook or a slim rod |
| Linen or canvas panel | Subtle, painterly backdrop | Stretch over a frame and secure with french cleats |
In my projects, the most successful farmhouse above-couch installations combine at least two material types, such as a reclaimed-wood shelf with a framed print and a small metal accent.
That mix creates depth, keeps the eye moving, and ensures the vignette reads as intentionally layered, not contrived.
Creating European-Farmhouse Symmetry with Architectural Pieces
Why do architectural pieces work above a couch?
Architectural salvage, like vintage shutters, arched window frames, or carved corbels, brings scale and gravitas that simple art often can’t match. In my experience, those elements read like built-in architecture, which helps a farmhouse sofa feel anchored and intentional rather than floating in a room.
They introduce that quiet European elegance, soft, worn, and proportionally balanced—while still keeping the rustic warmth farmhouse style demands.
How to choose the right pieces for balance and proportion?
Measure the width of your sofa and the wall height first, then select pieces that create a strong horizontal anchor without overwhelming the vertical field.
A good rule I use: combined architectural elements should be about 60–75% of the sofa width for a single focal arrangement, or smaller repeated pairs if you prefer symmetry.
Consider the visual weight, too. Open-lattice shutters read lighter than a solid carved mantel fragment, so mix densities to hit the right balance.
Installation and spacing guidelines
Mount heavier salvaged items on secure studs or use proper wall anchors; do not rely on picture wire for heavy architectural pieces.
For a centered single element, place the midpoint about 8–12 inches above the sofa back; for paired items, keep 10–18 inches between them, depending on their scale.
In my projects, I mark sightlines at eye level while standing across the room, because how these pieces read from a distance matters more than close inspection.
| Piece Type | Recommended Width Relative to Sofa (%) | Visual Weight | Budget Range (USD) |
|---|---|---|---|
| Single arched window frame | 60–75% | Medium | $150–$600 |
| Pair of shutters | Each 25–35% (combined 50–70%) | Light to medium | $80–$400 |
| Carved corbels or mantel fragment | 40–60% | Heavy | $200–$1,200 |
| Repurposed door panel | 70–90% | Heavy | $250–$1,500 |
Styling tips and common mistakes to avoid
Pair one strong architectural piece with softer textiles on the sofa, like a linen throw and a boucle pillow, to prevent the wall from feeling cold.
I continually see clients mount items too high, which severs the visual connection to the sofa; keep the lower edge of the piece within that 8–12 inch range above the sofa back.
Finally, if your walls are new and pristine, lightly distressing or painting architectural finds in a pale, warm white can help them read as authentic European farmhouse rather than museum props.
Gallery Wall Layouts That Anchor a Farmhouse Sofa
Choosing a layout that complements the sofa’s shape
Your gallery needs to mirror the sofa’s silhouette, not compete with it. For low-profile sofas, arrange artwork in a tighter, horizontal cluster that sits just above the sofa back.
For taller, high-backed sofas, vertical stacking or a larger central piece flanked by smaller works creates a pleasing proportion.
I often sketch the layout on kraft paper and tape it to the wall to test scale before making holes.
Mixing frame styles, art types, and negative space
Farmhouse galleries benefit from contrasted aged wood frames with simple black metal, botanical prints with ink drawings, and one sculptural element, like a metal sunflower or small wooden tool.
Maintain consistent mat margins or frame edge thickness to prevent visual clutter.
The negative space between frames should be consistent; I recommend 2–4 inches for small compositions and 4–8 inches for larger, roomier arrangements.
| Room Size | Recommended Grid Size | Ideal Frame Variety | Typical Spacing Between Frames |
|---|---|---|---|
| Small living room | 3–5 pieces | 2 frame styles | 2–3 inches |
| Medium room | 6–9 pieces | 3 frame styles | 3–5 inches |
| Large room | 10+ pieces or a mix with large central piece | 3–4 frame styles | 4–8 inches |
Practical hanging process
Use a central anchor point to build outward, rather than trying to balance each piece independently. I lay out frames on the floor first, photograph the arrangement, then recreate it on the wall using paper templates.
For heavy pieces, always use wall anchors or screws into studs; for lightweight frames, a rail system or picture-hanging kit keeps the arrangement level and easy to adjust.
Layering Textures: Shelves, Signs, and Vintage Finds
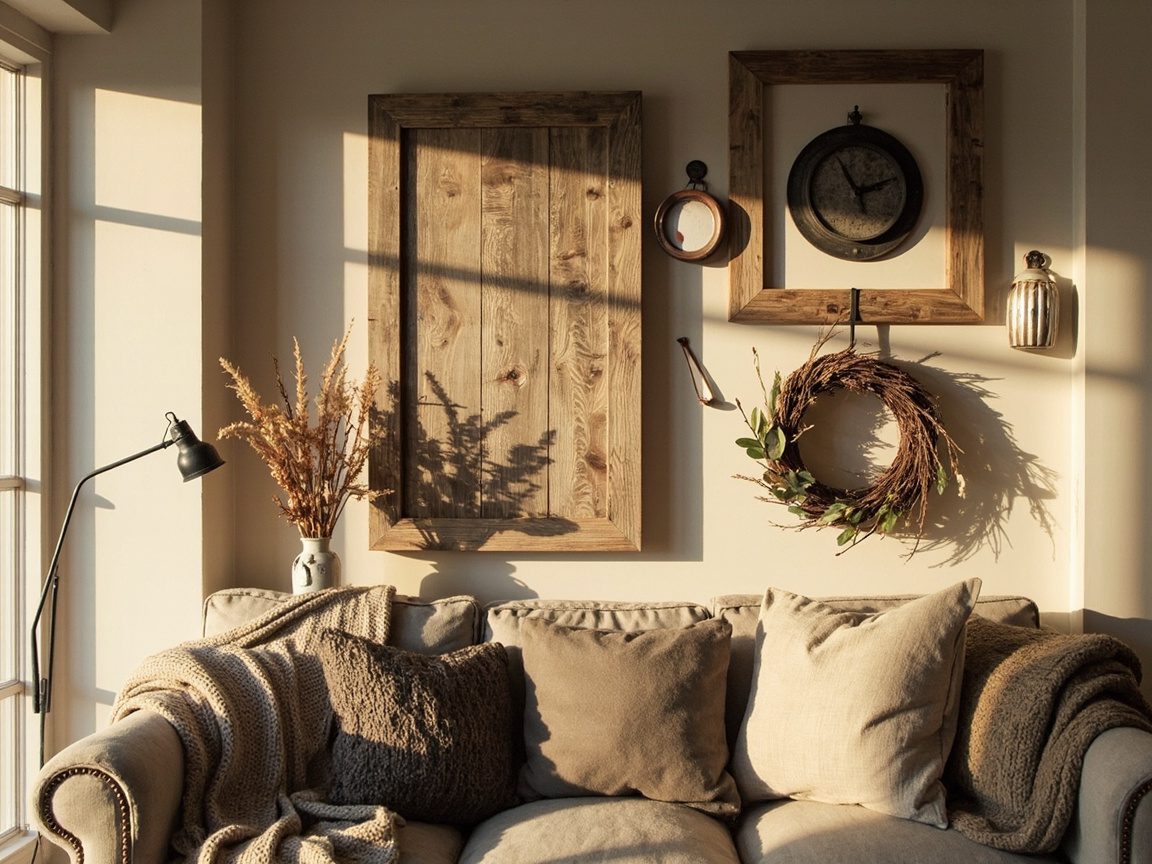
Why does layering matter in farmhouse styling?
Layering introduces depth and tells a story, which is what makes farmhouse spaces feel lived-in and welcoming.
Open shelves, vintage signs, and small found objects create tactile interest and allow you to change the display seasonally.
I love swapping a ceramic rooster for a basket of dried lavender in spring, because those small shifts refresh the room without a full redesign.
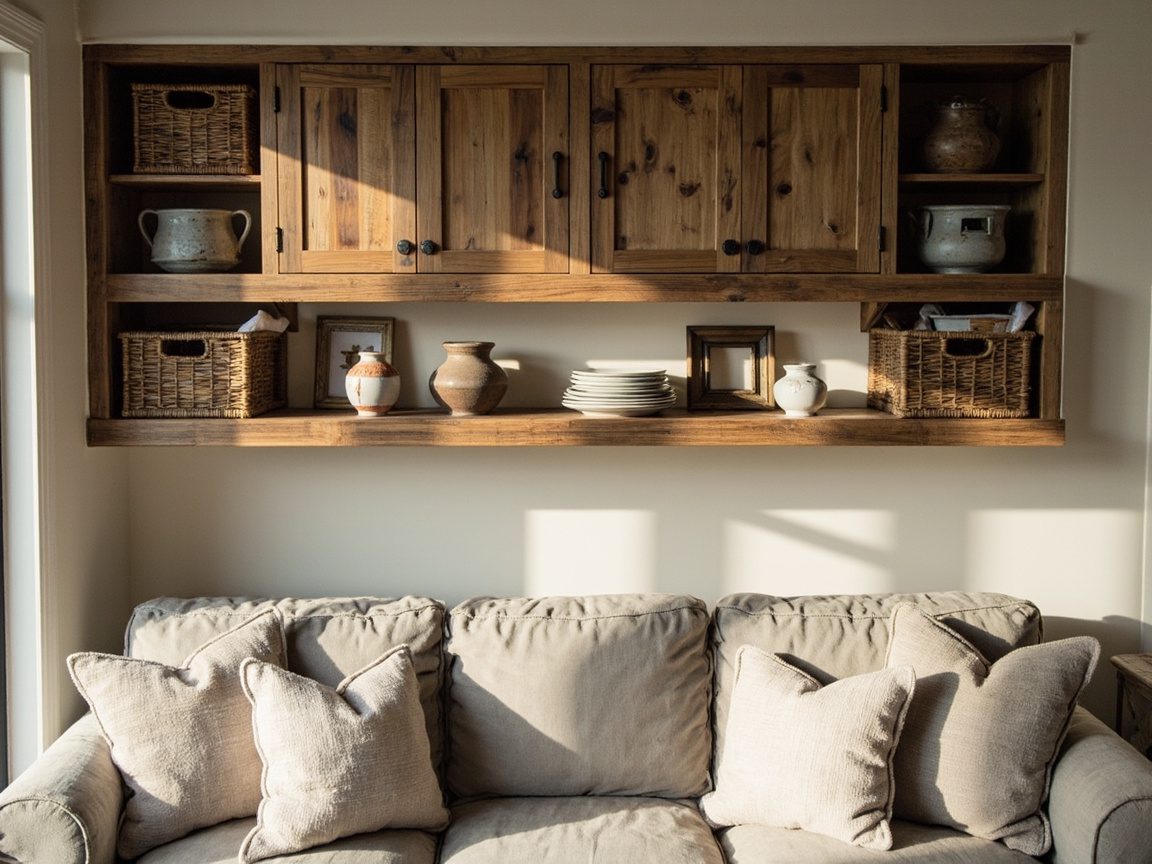
Practical shelf selection and placement
Choose floating shelves or reclaimed planks mounted on hidden brackets for a less fussy, European-flavored look. Shelves should be 8–12 inches deep for decorative collections, and their total width should be no more than 70–80% of the sofa’s width if used alone.
When combining multiple shelves, stagger heights by 6–12 inches to create movement while keeping the arrangement cohesive.
| Item | Recommended Depth | Best Materials | Price Range (USD) |
|---|---|---|---|
| Floating shelf | 8–12 inches | Reclaimed wood, painted pine | $40–$250 |
| Thick plank shelf with brackets | 10–14 inches | Oak, walnut, distressed pine | $80–$400 |
| Small wall-mounted cabinet | 8–12 inches | Metal or aged wood | $150–$700 |
Curating objects and avoiding clutter
Layer items by scale: place larger items like framed prints or a small lamp at the back, then add medium objects, and finish with one or two small, tactile pieces up front. Use odd numbers for groupings; I typically do threes or fives to keep things dynamic.
Avoid filling every inch—leave breathing room so each piece reads, especially when mixing signs and vintage finds.
Maintenance and seasonal swaps
Design with rotation in mind: keep a small set of interchangeable accents in storage for quick swaps, such as woven linens, candlesticks, or seasonal botanicals. Dust shelving collections regularly, and check hanging hardware annually to prevent sagging.
Installation Guide: Hardware, Studs, and Safe Hanging Tips
Assess the wall and know your load
Before grabbing screws or picture wire, identify what you plan to hang and its weight. Heavier items like solid-wood signs, framed mirrors, or gallery clusters over 15–20 pounds need stud support or toggles rated for that load.
In my experience, people underestimate combined weight when layering shelves, hooks, and framed pieces; add the weights together and pad by 20 percent to be safe.
Finding studs and choosing anchors
A reliable stud finder is your best friend, but verify with a small pilot hole since electronic finders can be fooled by wiring or metal corner beads.
Use the following quick criteria when selecting anchors and hardware based on wall type and weight:
| Wall Type | Weight Range | Recommended Hardware | Notes |
|---|---|---|---|
| Wood stud (2×4) | Up to 100+ lbs | Wood screws into stud, 2”–3” length | Fastest, strongest option for heavy art and mirrors |
| Drywall without stud | Up to 25–50 lbs | Toggle bolts or heavy-duty Molly anchors | Use toggles for heavier pieces, follow package weight limits |
| Plaster | 10–75 lbs | Plaster anchors plus find and use studs when possible | Drill slowly to avoid cracking, use toggles for medium weights |
| Concrete or brick | Up to 100+ lbs | Hammer-set anchors, masonry screws, or sleeve anchors | Use carbide masonry bit and mortar-avoiding placement if possible |
Safe hanging techniques and spacing rules
For visual balance and ergonomics, hang art so the center sits roughly 57–60 inches from the floor, which aligns with most sight lines. For pieces over a couch, allow 6–12 inches of vertical space between the top of the sofa and the bottom of the artwork; less feels cramped, more disconnects the duo.
When hanging a gallery or grouping, anchor the composition to the couch width: aim for the art to be 2–6 inches narrower than the sofa on each side for a cohesive look.
Step-by-step practical hanging process
- Mark the center point of the couch and lightly pencil the art center above it.
- Measure hanging hardware on the back of the piece to determine top-to-hardware distance.
- Transfer measurements to the wall, locate the stud or install the appropriate anchor, and pilot drill as needed.
- Install hardware, hang the piece, and use a small level to fine-tune.
Safety checks and finishing touches
Always double-check anchors after hanging by gently applying downward pressure to simulate a bump. For large mirrors or shelf-mounted decor, secure a second lower fastener or safety strap to prevent forward tipping over time.
Finally, protect sofa upholstery during installation with a drop cloth, and keep a small toolkit nearby for future seasonal swaps or repositioning.
Styling Tips for Seasonal Swaps and Long-Term Cohesion
Build a farmhouse foundation that adapts
Start with a consistent base layer that reads farmhouse all year, like a reclaimed-wood framed mirror, a neutral gallery of linen-matted botanical prints, or a simple shiplap panel.
I continually see clients change accessories seasonally but neglect the base; when the foundation is right, swaps feel intentional, not chaotic.
Choose neutrals in warm whites, soft greys, and raw wood tones as anchors, so accent pieces can shift without undermining cohesion.
Seasonal swap strategy, step-by-step
- Store and label seasonal items by type, for example, “spring textiles” or “holiday wreaths,” so swaps are fast and tidy.
- Change one or two focal accents per season, such as pillows, a central wreath, or a single framed print, rather than swapping everything.
- Rotate textures rather than colors alone: add woven grass mats and linen in summer, chunky knit throws in winter, and metal or ceramic accents in fall for warmth.
Mixing pattern, scale, and rustic elements
Keep scale consistent: if your central piece is large, use fewer, larger-scale accents. If you prefer a cluster look, vary frame sizes but maintain a unifying color or material.
Personally, I balance farmhouse charm by pairing one rustic element, like a barn-wood shelf, with two contrasting finishes, such as matte black hardware and soft linen prints.
This prevents the room from feeling dated or overly themed.
Practical decision criteria for swaps and purchases
When choosing seasonal items, evaluate them by three quick criteria: storageability, versatility, and visual weight.
Pieces that fold flat or nest are easier to store, neutrals with a single accent color work across seasons, and low-visual-weight items like wreaths or small signs won’t overwhelm the foundational pieces.
Use this mini-checklist when shopping to avoid accumulating decor that clashes or becomes unused.
Mistakes to avoid and maintenance tips
Do not change everything at once; too many differences break cohesion and look like indecision. Avoid overanchoring with permanent nails for decor you’ll swap seasonally, use picture hanging strips or easily removed anchors for items you rotate yearly.
Finally, refresh dust and patina periodically: farmhouse styling thrives on lived-in texture, so clean frames and re-wax or touch-minor finishes seasonally to keep the look intentional.
FAQ
Aim for the artwork center to be 57–60 inches from the floor, and leave 6–12 inches between the top of the sofa and the bottom of the art for a comfortable visual connection.
Yes, but only with heavy-duty toggles or anchors rated for the combined weight. For anything above 50 pounds, seek a stud or use toggle bolts and follow the manufacturer’s weight limits.
Use removable picture hanging strips for lightweight items and a small set of wall-friendly anchors for medium pieces; label and store seasonal items to minimize re-hanging frequency.
Start with a neutral, textured foundation and introduce contrast through one or two modern finishes, such as matte metal or glass. Maintain consistent color temperature and scale to tie differing elements together.
Final Thoughts
Create a durable, adaptable above-couch arrangement by prioritizing secure installation and a neutral farmhouse foundation.
With purposeful seasonal swaps and careful weight planning, your wall will feel both lived-in and thoughtfully curated for years.